CHAPTER 3: Replacing notebook components
114
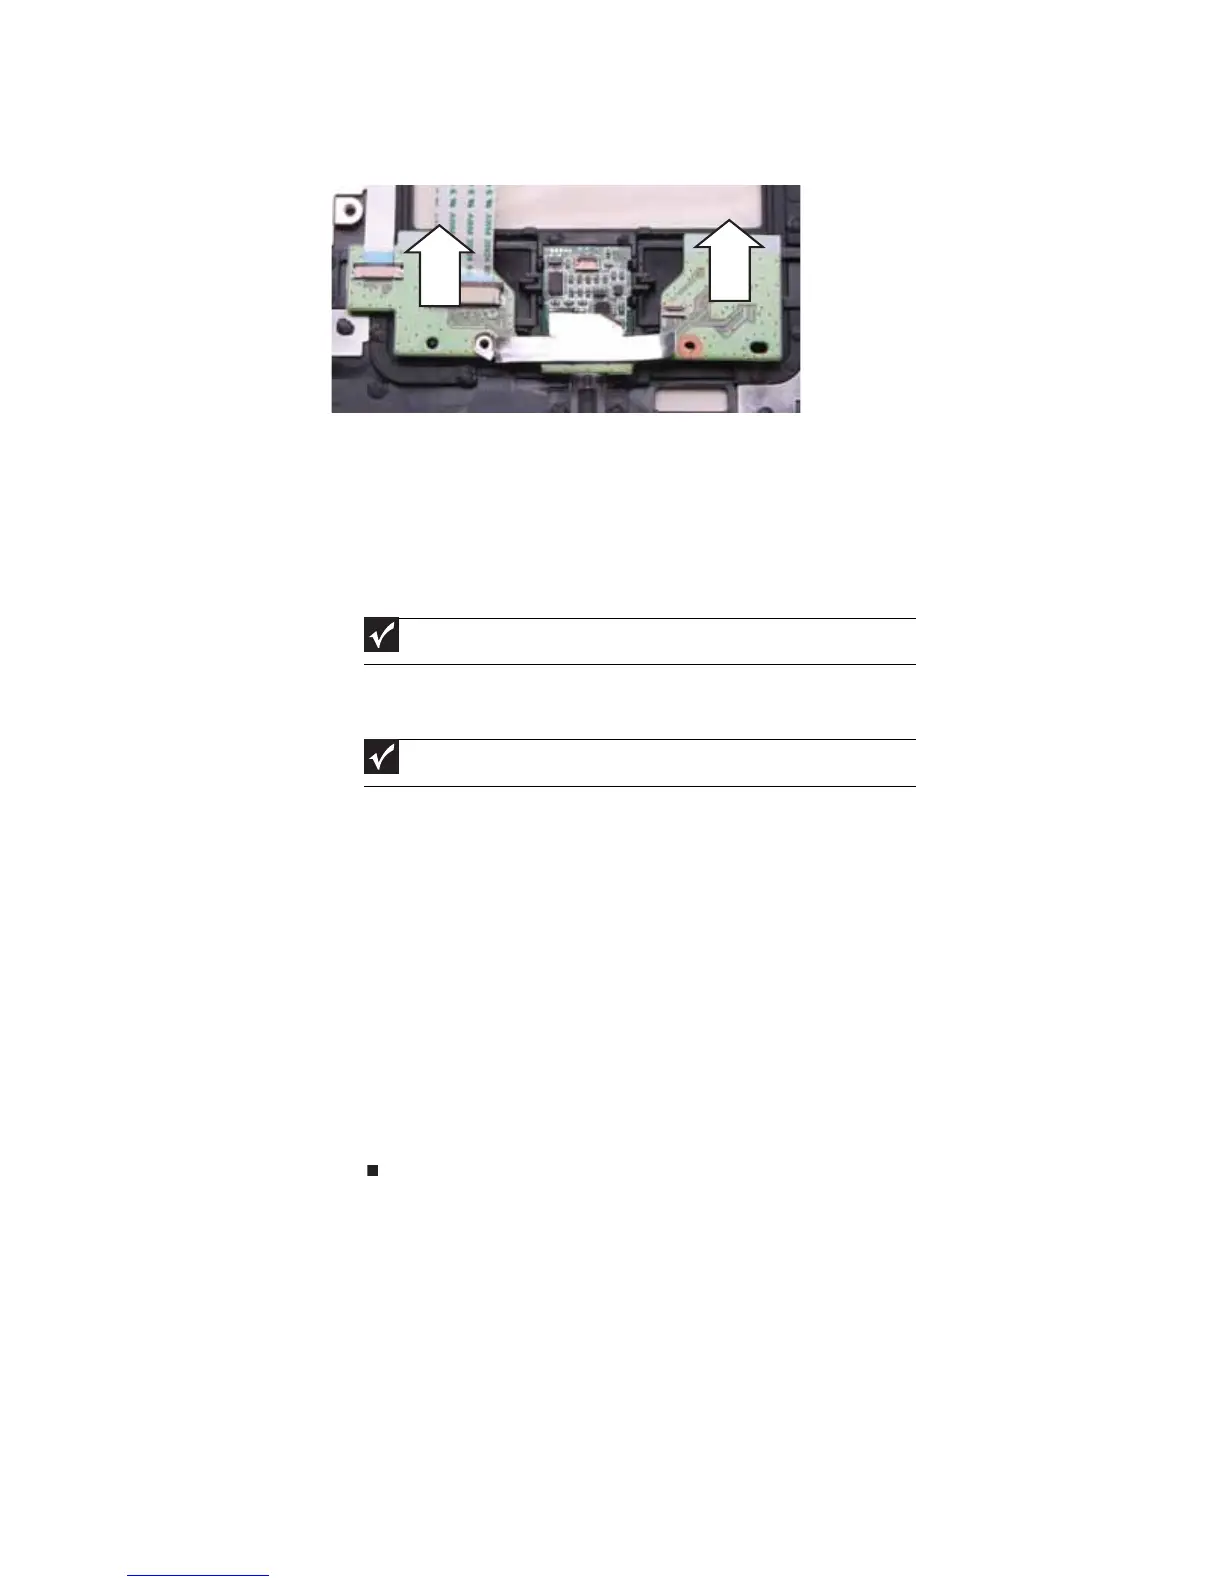
11 Remove the touchpad button board from the notebook.
12 Place the new touchpad button board into the notebook in the same orientation
as the old board.
13 Replace the screws removed in Step 9.
14 Replace the touchpad board by following the steps in “Replacing the touchpad
board” on page 108.
15 Transfer all of the ribbon cables from the old touchpad button board to the new
board.
16 Make sure the black fingerprint reader connector clip is up, insert the cable into
the connector, then swing the clip down to lock the connector in place.
17 Replace the palm rest by following the steps in “Replacing the palm rest” on
page 104.
18 Replace the LCD assembly by following the steps in “Replacing the LCD assembly”
on page 91.
19 Replace the keyboard by following the steps in “Replacing the keyboard” on
page 79.
20 Replace the keyboard cover by following the steps in “Replacing the keyboard
cover” on page 76.
21 Replace the hard drive by following the steps in “Replacing the hard drive” on
page 69.
22 If the notebook has wireless networking built in, reconnect the wireless antennas
by following the steps in “Replacing the IEEE 802.11 wireless card” on page 63.
23 Replace the wireless bay cover by following the steps in “Replacing the IEEE 802.11
wireless card” on page 63.
Important
The cables are correctly oriented if the blue sides are showing.
Important
The touchpad cable is correctly oriented if the blue side is showing.