28
Removal
and
installation
of
Tool
Carriage
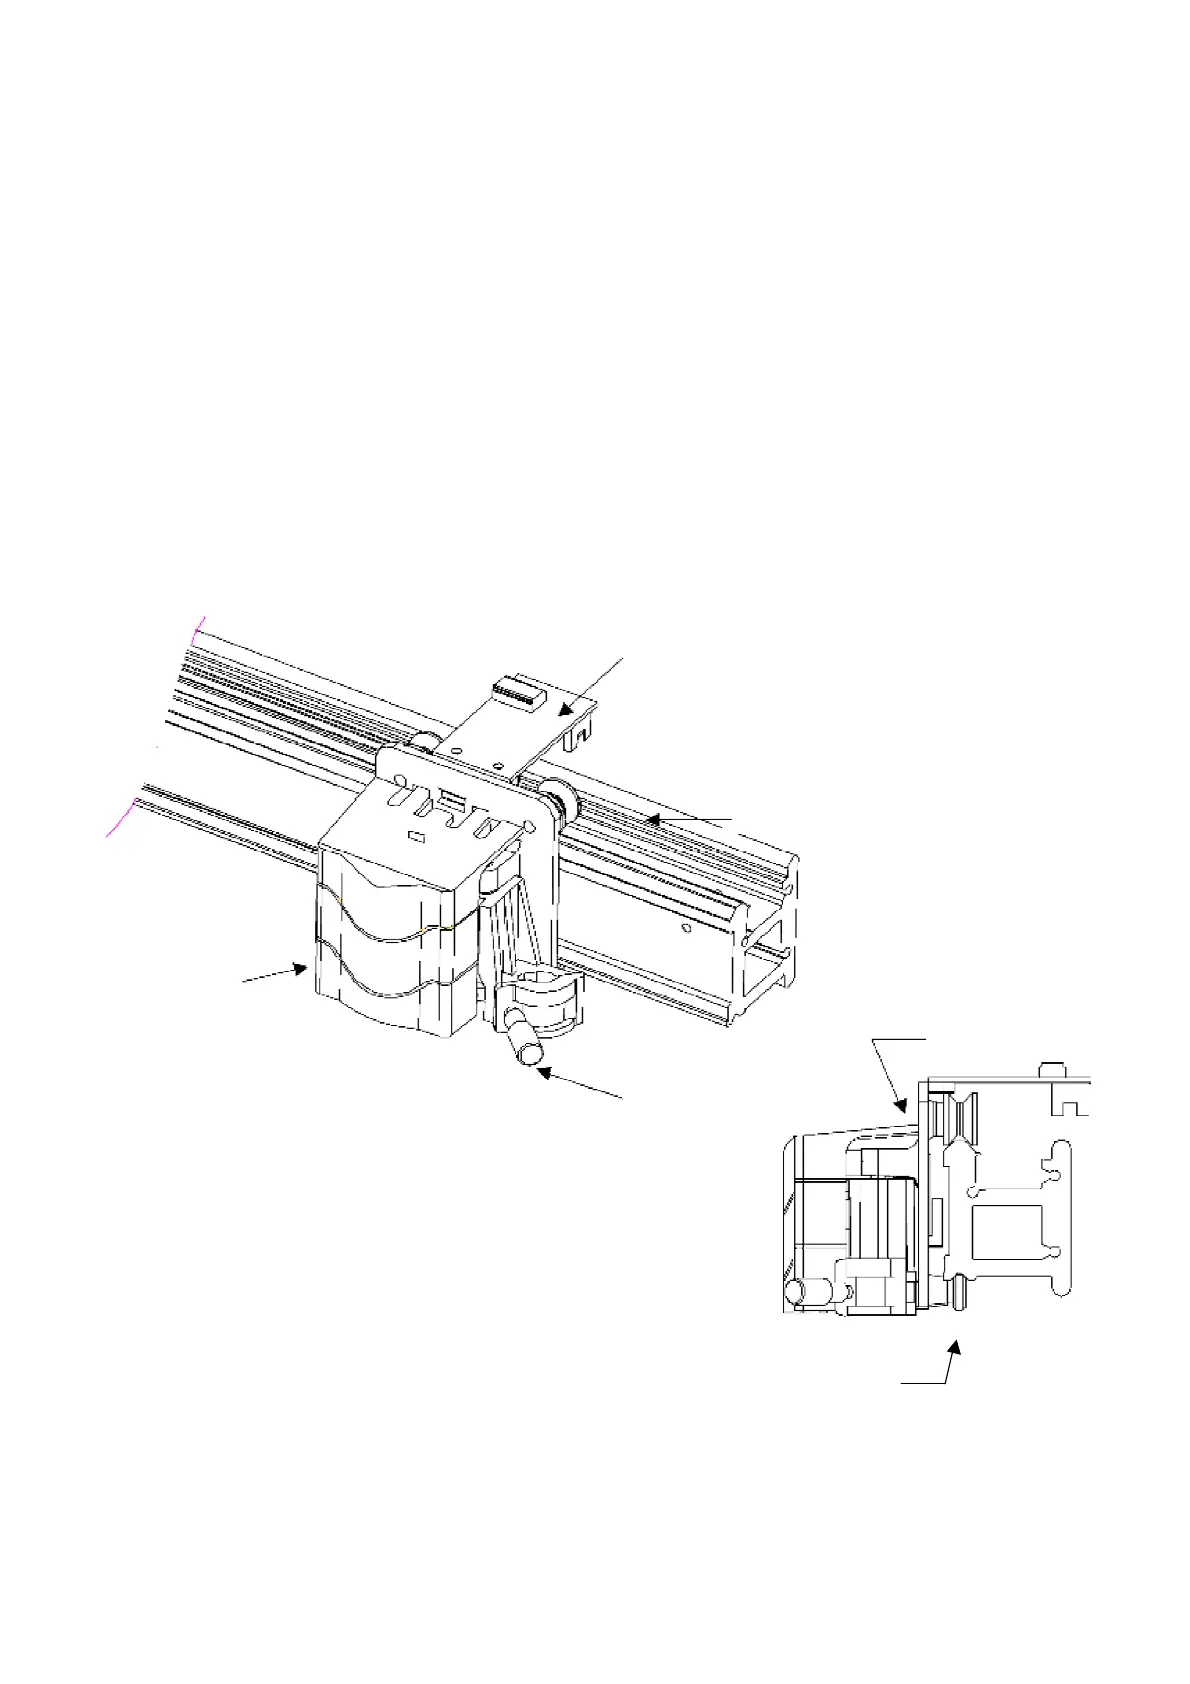
Refer to Fig 1-4 and following steps to remove the Tool Carriage.
Step 1. Remove the Top Cover.
Step 2. Unplug the Flat Cable from Carriage PCB.
Step 3. Remove the Carriage Cover (Push down the
cover’s
top, then pull it downward).
Step 4. Loosen the screws of the Small Roller (lower) about 2~3 revolutions to release the Carriage.
Step 5. Unscrew both DU rollers and remove them.
Step6. To remove the Tool Carriage, tilt and pull down. Be careful not to damage the Carriage PCB.
Carriage PCB
Carriage Guide Beam
Carriage Cover
DU roller
Blade Holder Screw
Fig
1-4
Small Roller



 To Next Page