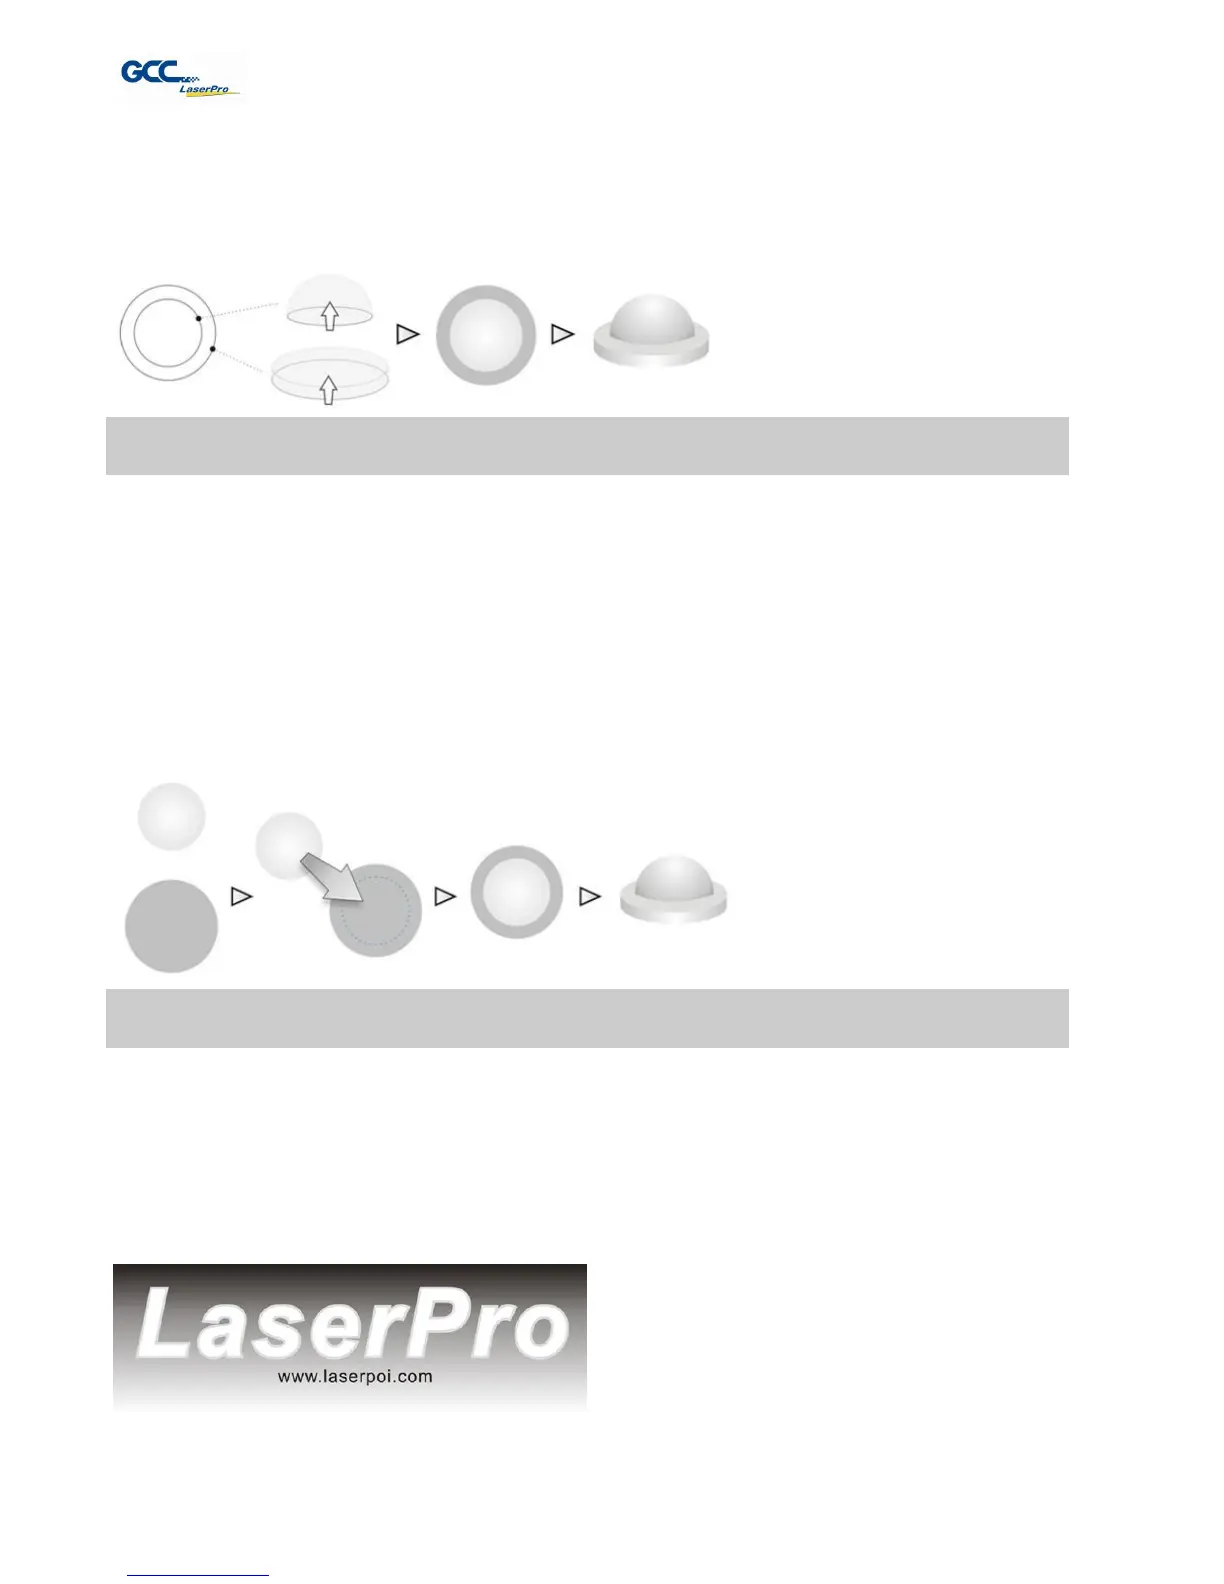
As illustrated in the figure below, all you need to do is to choose the direction of the vector and
then set the length and shape of the convex or concave surface. The software will
automatically generate the 3D graphic for you.
Illustration for the production of 3D graphics with Laser Professional AP
In addition, you may output the completed graphic directly to the Laser Engraver, which is very
handy. You may also export the graphic as JPG or BMP format and then use CorelDRAW or
Illustrator, which you probably use frequently, to output the graphic.
The way to produce 3D graphics with Photoshop and CorelDRAW is very similar. Fill in the
desired gray level colors to each of the drawn figures, and proceed with further arrangement
and combination. Then you may output the 3D graphic to the laser for the production of the 3D
object. Take the figure below as an example. After producing two graphs in gray level, proceed
with the arrangement and combination. Then you may let the laser proceed with 3D mode.
Both Photoshop and CorelDRAW may produce 3D graphics in the manner of combination.
A way to produce 3D graphics
For the production of 3D graphics, in addition to the requirement of having great familiarity with
the software, a significant amount of time is required to design and arrange the layout. Thus,
we use a relatively simple graphic for illustration so that you would understand how to produce
3D graphics better.
Take the graphic above as a production example. CorelDRAW is used for the production of the
3D graphic.
 Loading...


