75 232001250G(06)
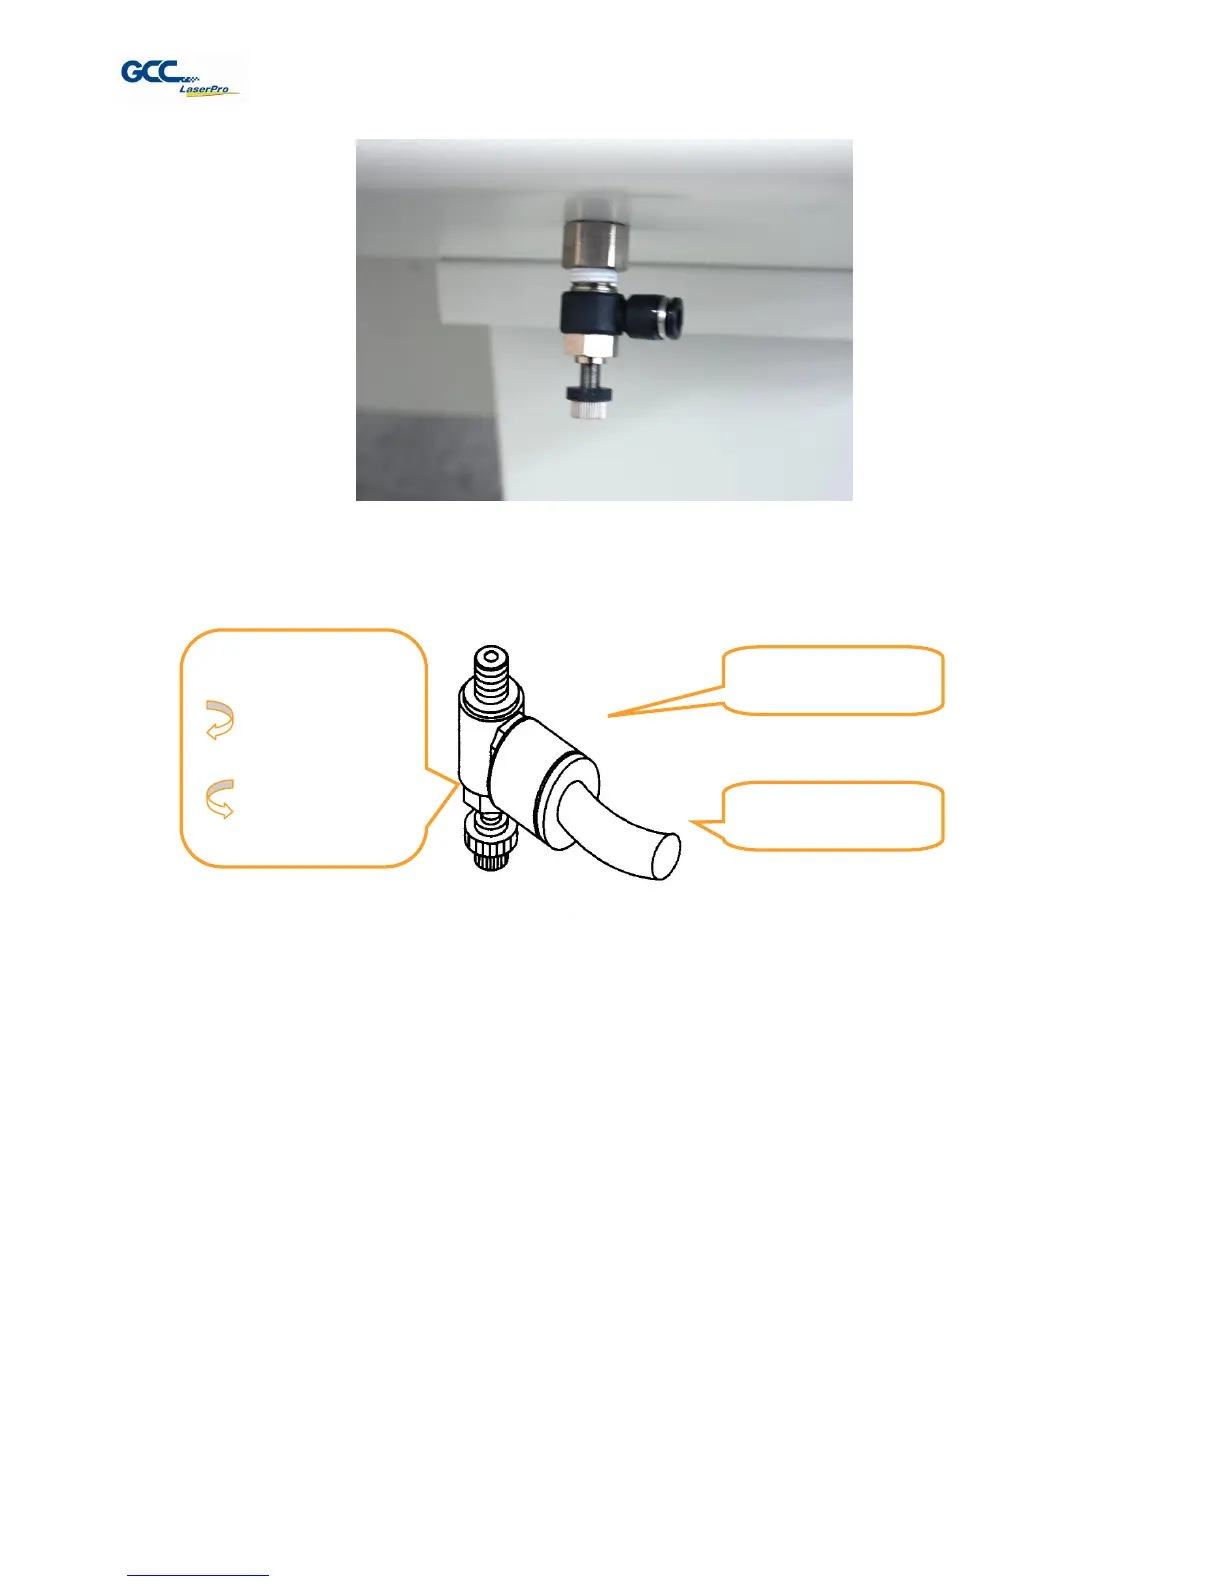
5) Take the unattached end of the ¼” air tubing (other end already connected to air compressor) and
connect it to the air tube connector on the air assist valve. Make sure you press down on the air tube
fastener when inserting the ¼” air tubing, to form a tight, secure attachment as indicated in the diagram
below.
6) Congratulations, you have finished setting up the air compressor. Make sure you have the proper
SmartAIR nozzle installed (depending on your application), before you turn on and utilize the air
compressor.
OPERATION:
1) Switch on the air compressor unit and make sure that the airflow regulator on the air assist valve is
opened (turn clockwise to increase the airflow, counter-clockwise to decrease the airflow). The air
nozzle under the laser head should emit a steady flow of air.
With the SmartAIR nozzle and air compressor properly installed and operating, all configurations and settings
relating to air-assist functions are controlled through the LaserPro X380 print driver and hardware control panel.
Please refer to the LaserPro X380 print driver and graphic control panel sections of this manual for details on
how to enable and configure air-assist functionalities.