EasyManuals Logo

GE LOGIQ E9 Service Manual

GE LOGIQ E9
808 pages
To Next Page IconTo Next Page
To Previous Page IconTo Previous Page
Page #189 background imageLoading...
Page #189 background image
GE
D
IRECTION 5535208-100, REV. 2 LOGIQ E9 SERVICE MANUAL
Chapter 4 Functional Checks 4 - 45
4-3-18 Mechanical Function Checks
4-3-18-1 Alphanumeric Keyboard and Display Platform (Console) Checks
See: 7-5-16-1 "Keyboard" on page 7-125.
4-3-18-2 Brakes and Direction Lock Checks
Check that the brakes and direction locks function as described below.
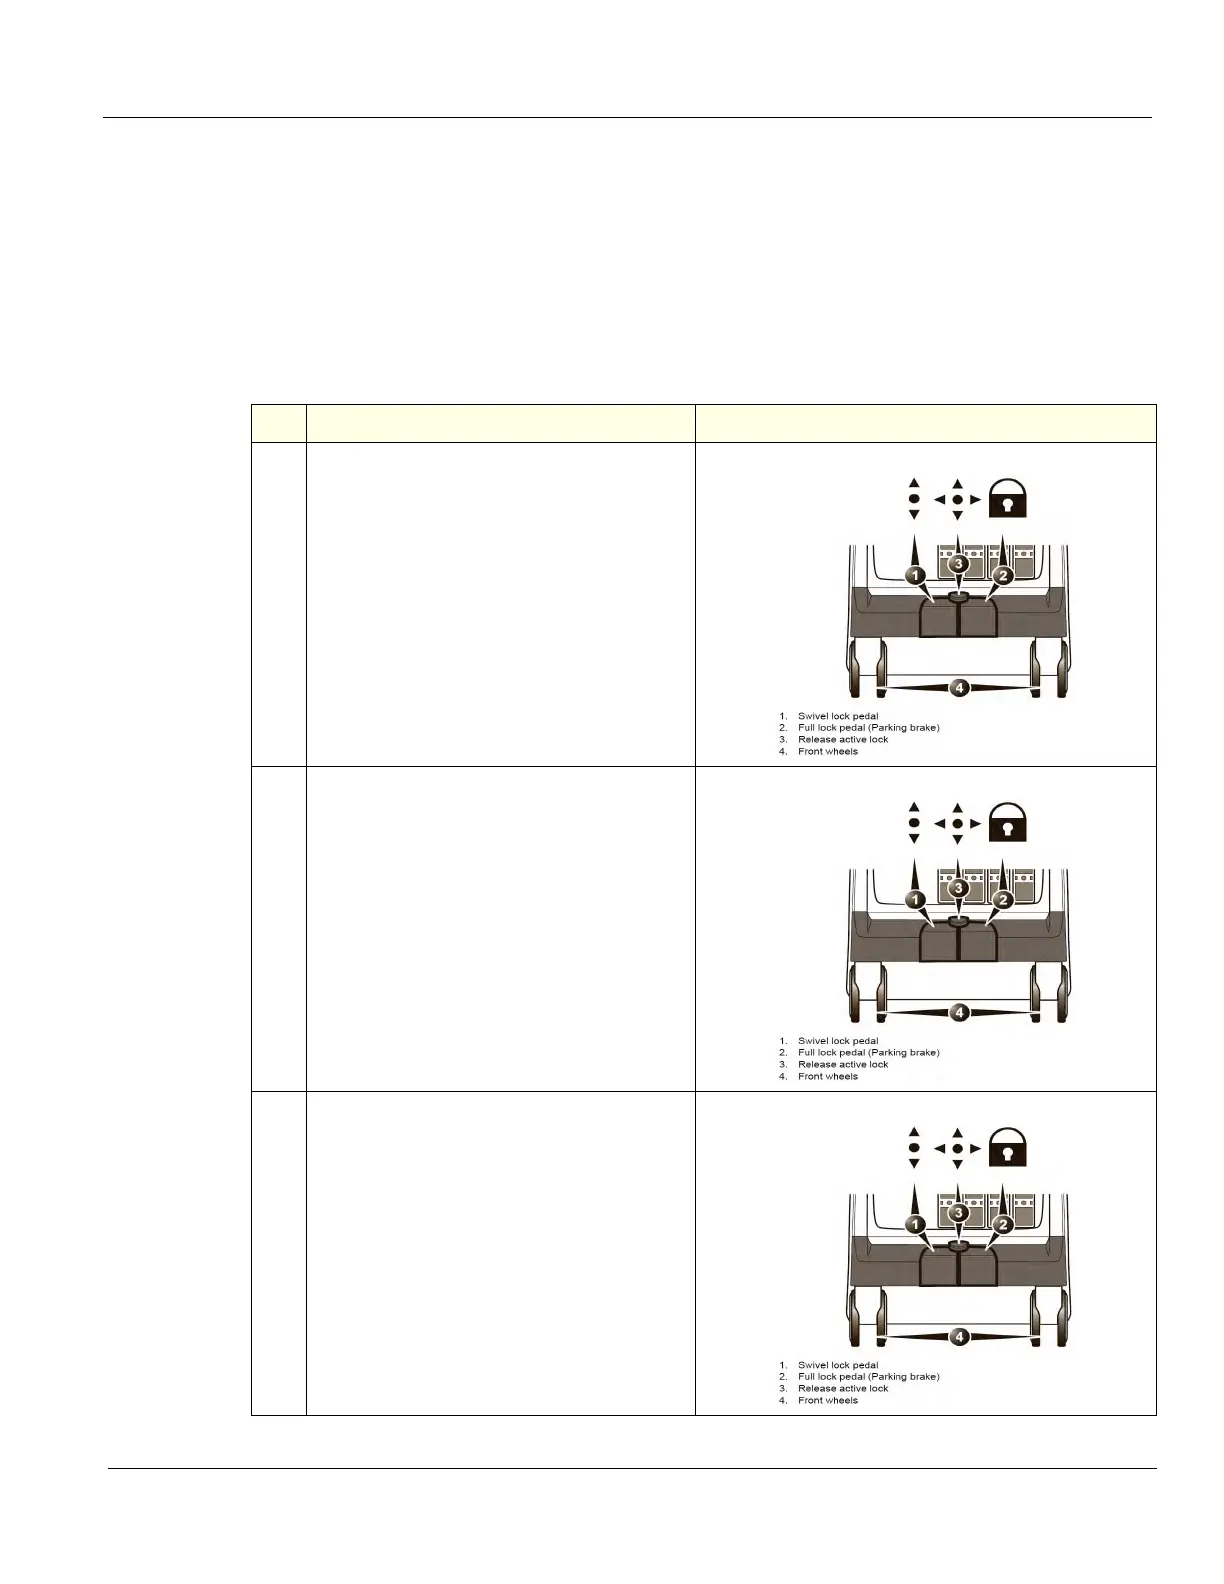
Table 4-18 Brakes and Direction Lock Checks
Steps Corresponding Graphic
1.
Press the left pedal (1), this:
Releases the brake and engages the locked
wheel direction.
You may need to move the system around a little
to get the wheels to lock into the locked direction.
2.
Press the right pedal (2) this:
Engages the brakes in full lock.
3.
Press the middle pedal (3), this:
Engages swivel lock.

Table of Contents

Other manuals for GE LOGIQ E9

Questions and Answers:

Question and Answer IconNeed help?

Do you have a question about the GE LOGIQ E9 and is the answer not in the manual?

GE LOGIQ E9 Specifications

General IconGeneral
TypeUltrasound System
3D/4D ImagingYes
Transducer Ports4 active ports
ConnectivityDICOM, USB, Ethernet
ApplicationsAbdominal, Vascular, Musculoskeletal, Small Parts, Urology, Pediatric, Cardiac, Obstetrics/Gynecology
TransducersLinear, Convex, Phased Array, Volume
Doppler ModesColor Doppler, Power Doppler, Pulsed Wave Doppler, Continuous Wave Doppler
ElastographyYes
Advanced FeaturesB-Flow, Volume Navigation
PortabilityCart-based system
Display19-inch high-resolution LCD monitor

Related product manuals