EasyManuals Logo

GE LOGIQ E9 Service Manual

GE LOGIQ E9
808 pages
To Next Page IconTo Next Page
To Previous Page IconTo Previous Page
Page #235 background imageLoading...
Page #235 background image
GE
D
IRECTION 5535208-100, REV. 2 LOGIQ E9 SERVICE MANUAL
Chapter 6 Service Adjustments 6 - 3
6-2-3 LCD Adjustment Procedure
6-2-3-1 Brightness
• To reduce the brightness, press the left arrow button. A popup box with the current brightness
setting will be displayed on the screen.
• To increase the brightness, press the right button.
• Push the mode button once to remove the popup bow from the screen and save the current values.
6-2-3-2 Contrast
Use the recommended LCD settings. The contrast is adjusted by the LOGIQ E9 software, when
selecting scanning modes and doing scanning adjustments. Changing the monitor’s contrast settings in
one mode will influence the picture quality in other modes.
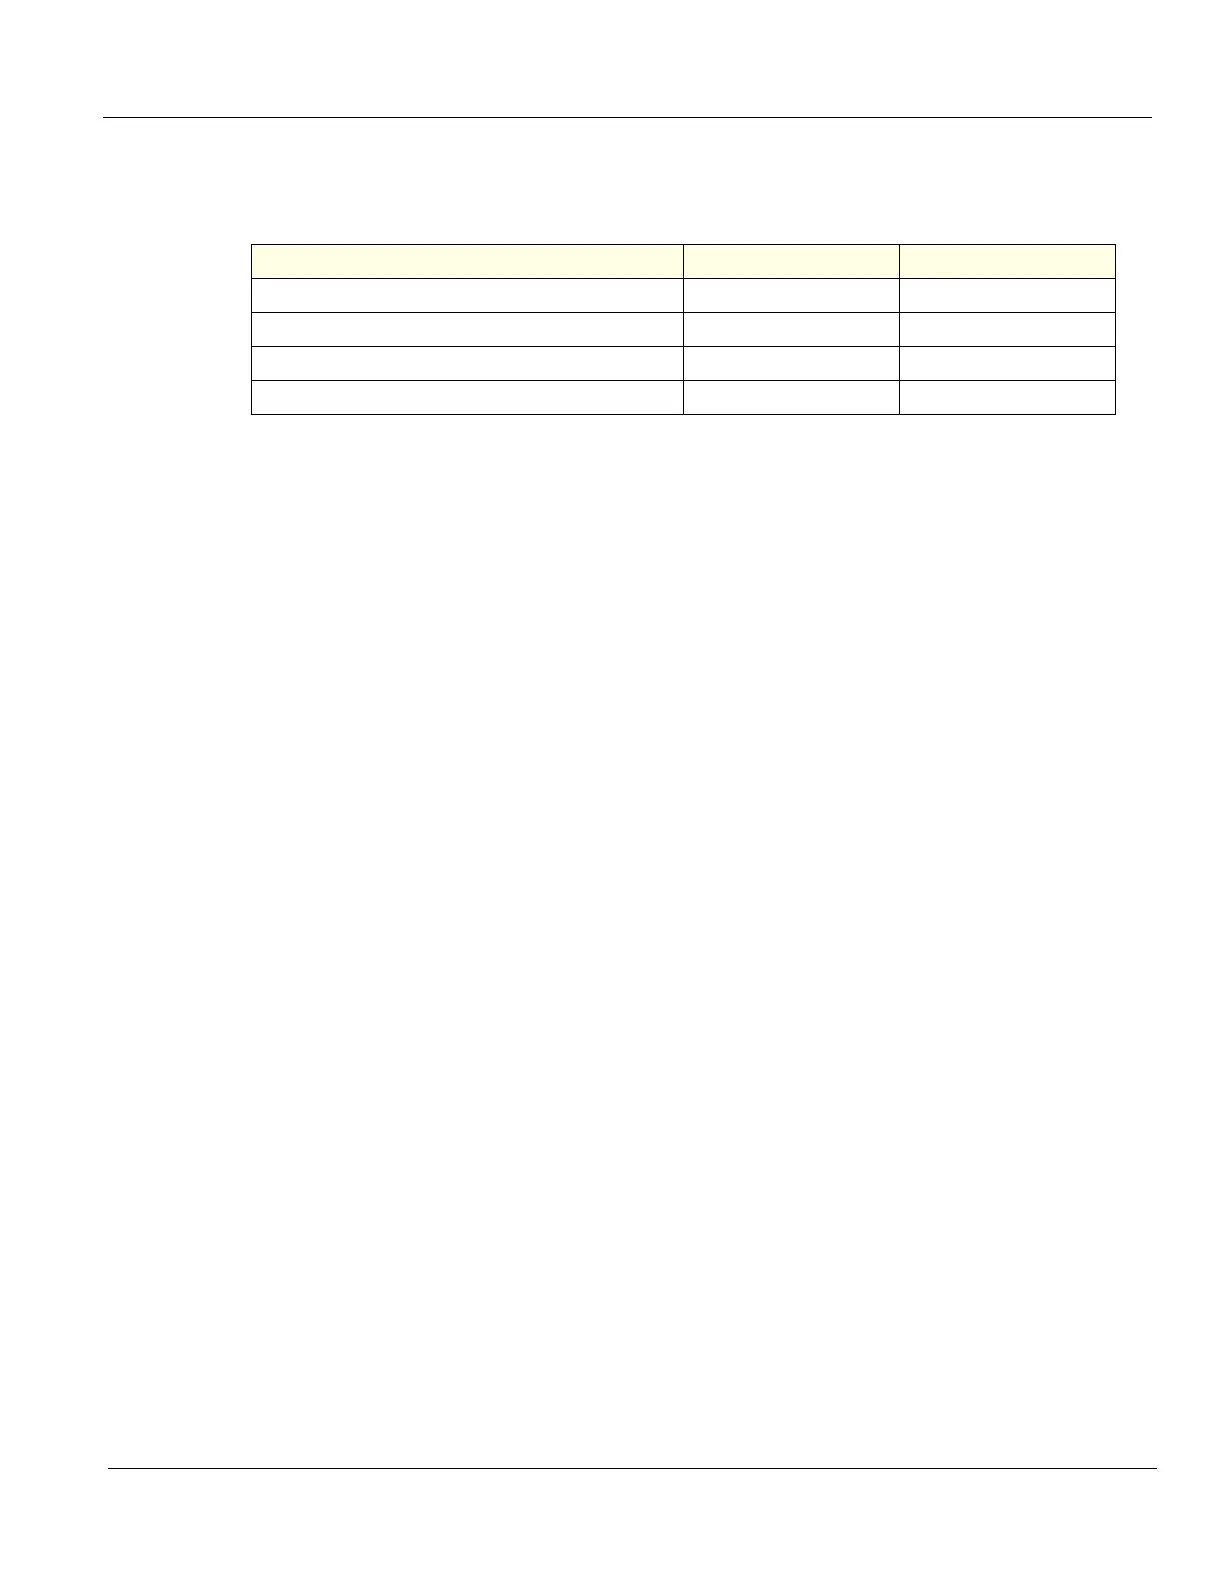
Table 6-1 Recommended LCD Settings
Room Condition Contrast Brightness
Dark Room for Radiology/Cardiology 85 35
Dim Room for Radiology/Cardiology 90 55
Bright Room 100 100
Factory Settings 100 60

Table of Contents

Other manuals for GE LOGIQ E9

Questions and Answers:

Question and Answer IconNeed help?

Do you have a question about the GE LOGIQ E9 and is the answer not in the manual?

GE LOGIQ E9 Specifications

General IconGeneral
TypeUltrasound System
3D/4D ImagingYes
Transducer Ports4 active ports
ConnectivityDICOM, USB, Ethernet
ApplicationsAbdominal, Vascular, Musculoskeletal, Small Parts, Urology, Pediatric, Cardiac, Obstetrics/Gynecology
TransducersLinear, Convex, Phased Array, Volume
Doppler ModesColor Doppler, Power Doppler, Pulsed Wave Doppler, Continuous Wave Doppler
ElastographyYes
Advanced FeaturesB-Flow, Volume Navigation
PortabilityCart-based system
Display19-inch high-resolution LCD monitor

Related product manuals