GE
D
IRECTION 5535208-100, REV. 2 LOGIQ E9 SERVICE MANUAL
8 - 66 Section 8-5 - Replacing Covers and Bumpers
8-5-15 LCD Monitor V2 Arm Assembly Covers replacement
Two types of V2 Arm Assembly Covers are described in this Section. For R4, see: Table 8-44 "LCD
Monitor V2 Arm Assembly Covers removal and installation - R4" on page 8-66 or Table 8-45 "LCD
Monitor V2 Arm Assembly Covers removal and installation - R5.x and later" on page 8-67.
Table 8-42 Manpower / Time and Tools
Manpower /
Time
Tools
One person /
15 minutes
Refer to: 8-2-5 "Tools needed for servicing the LOGIQ E9" on page 8-5.
Table 8-43 Preparations and Preparation Link
Preparations - you must perform the following steps
1. Power down the system.
2. Move the User Interface (Top Console) to its lower position.
3. Disconnect the mains power cable from the wall outlet and all Probes and External I/O Cabling.
Preparation Link (if you need more information):
4-2-3 "Power shut down" on page 4-7.
Table 8-44 LCD Monitor V2 Arm Assembly Covers removal and installation - R4
Steps Corresponding Graphic
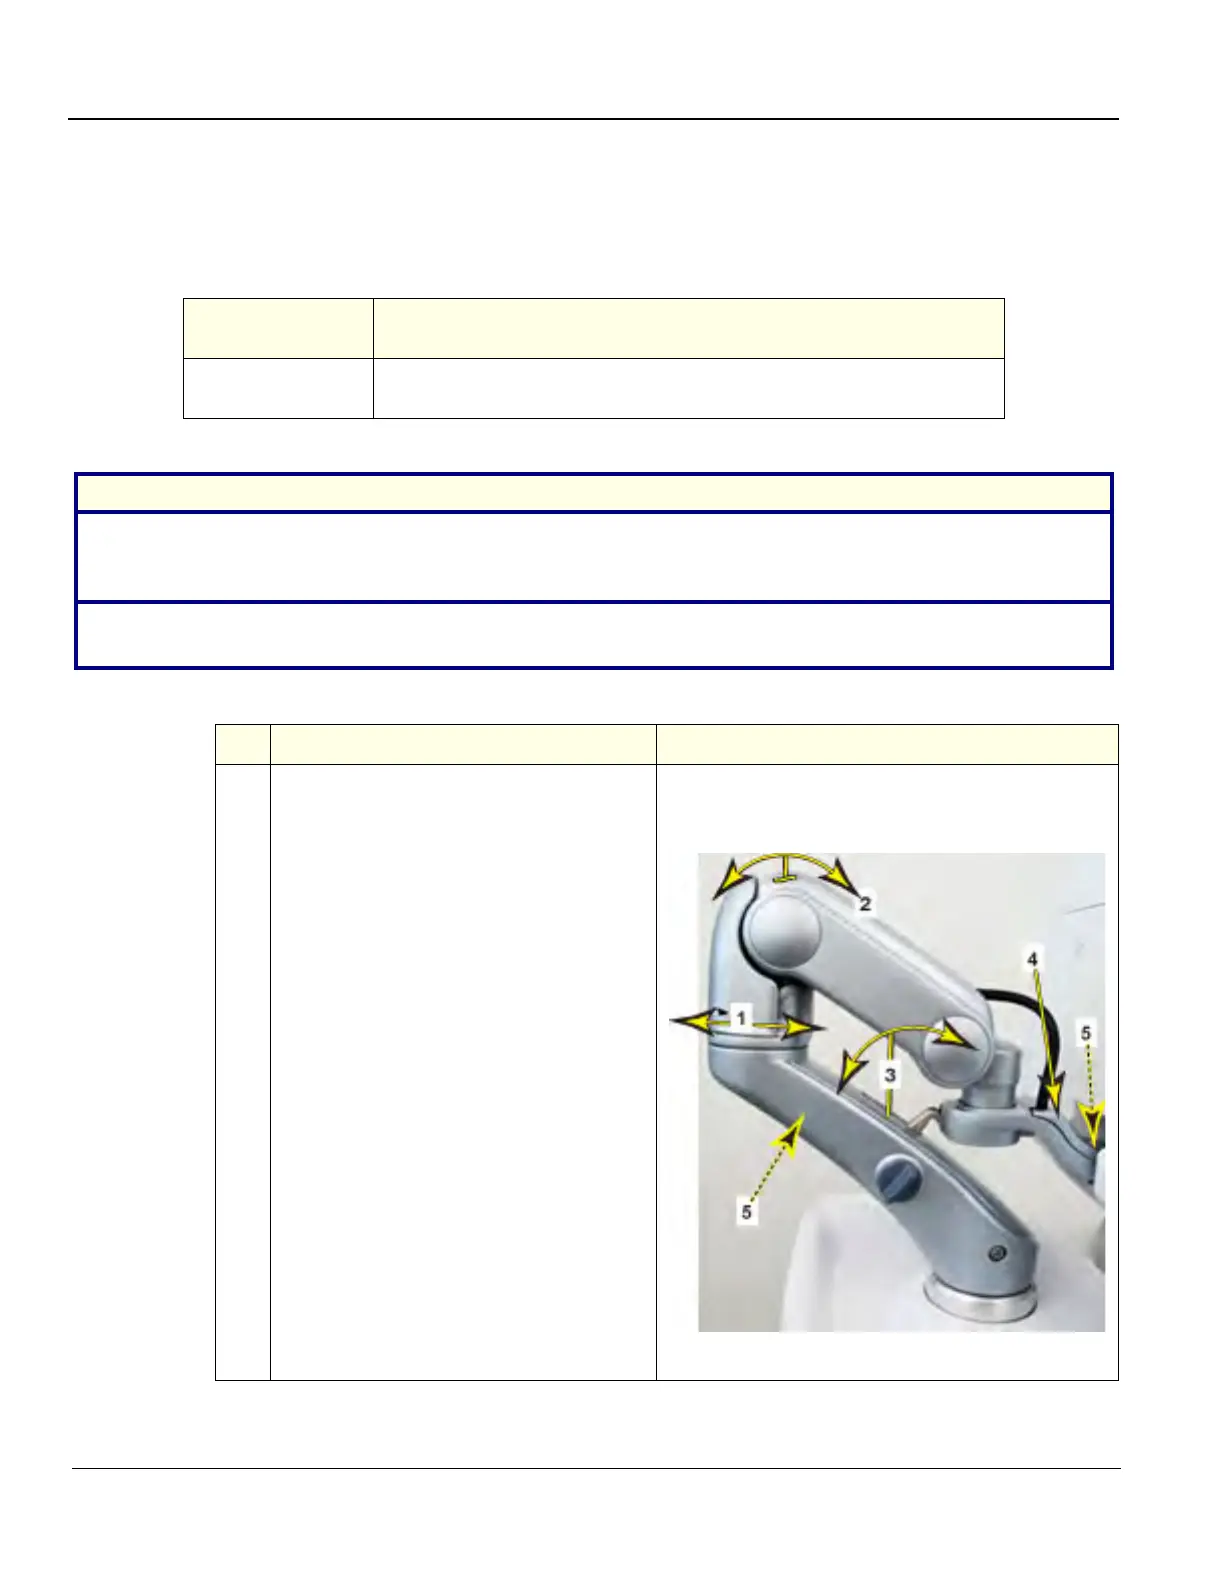
1.
Remove Arm Assembly Covers.
The Rear (1) and Upper (2) LCD Arm
Covers snap into place and removed, in the
direction shown. The Upper Cover must be
installed before the Rear Cover.
The Rear (1) snaps into place pushing
forward and removed pulling back.
The Upper (2) snaps into place at the rear,
after the front guides are inserted into
place. The Upper can be removed, by tilting
forward.
The Lower Cover (3) and LCD Bracket
Cover (4) are secured with screws (5). After
the front guide of the Lower Cover is
inserted into place, the cover can be
secured. To remove, remove the screw and
tilt forward. The arm must be released and
the upper arm clear.
The LCD Bracket Cover (4) seats in
position.
Illustration shows direction and
sequence covers should be removed