GE
D
IRECTION 5535208-100, REV. 2 LOGIQ E9 SERVICE MANUAL
8 - 146 Section 8-6 - Replacing Top Console Parts
8-6-10-1 Lower Operator Panel (OP) removal
Table 8-97 Lower Operator Panel (OP) removal
Steps Corresponding Graphic
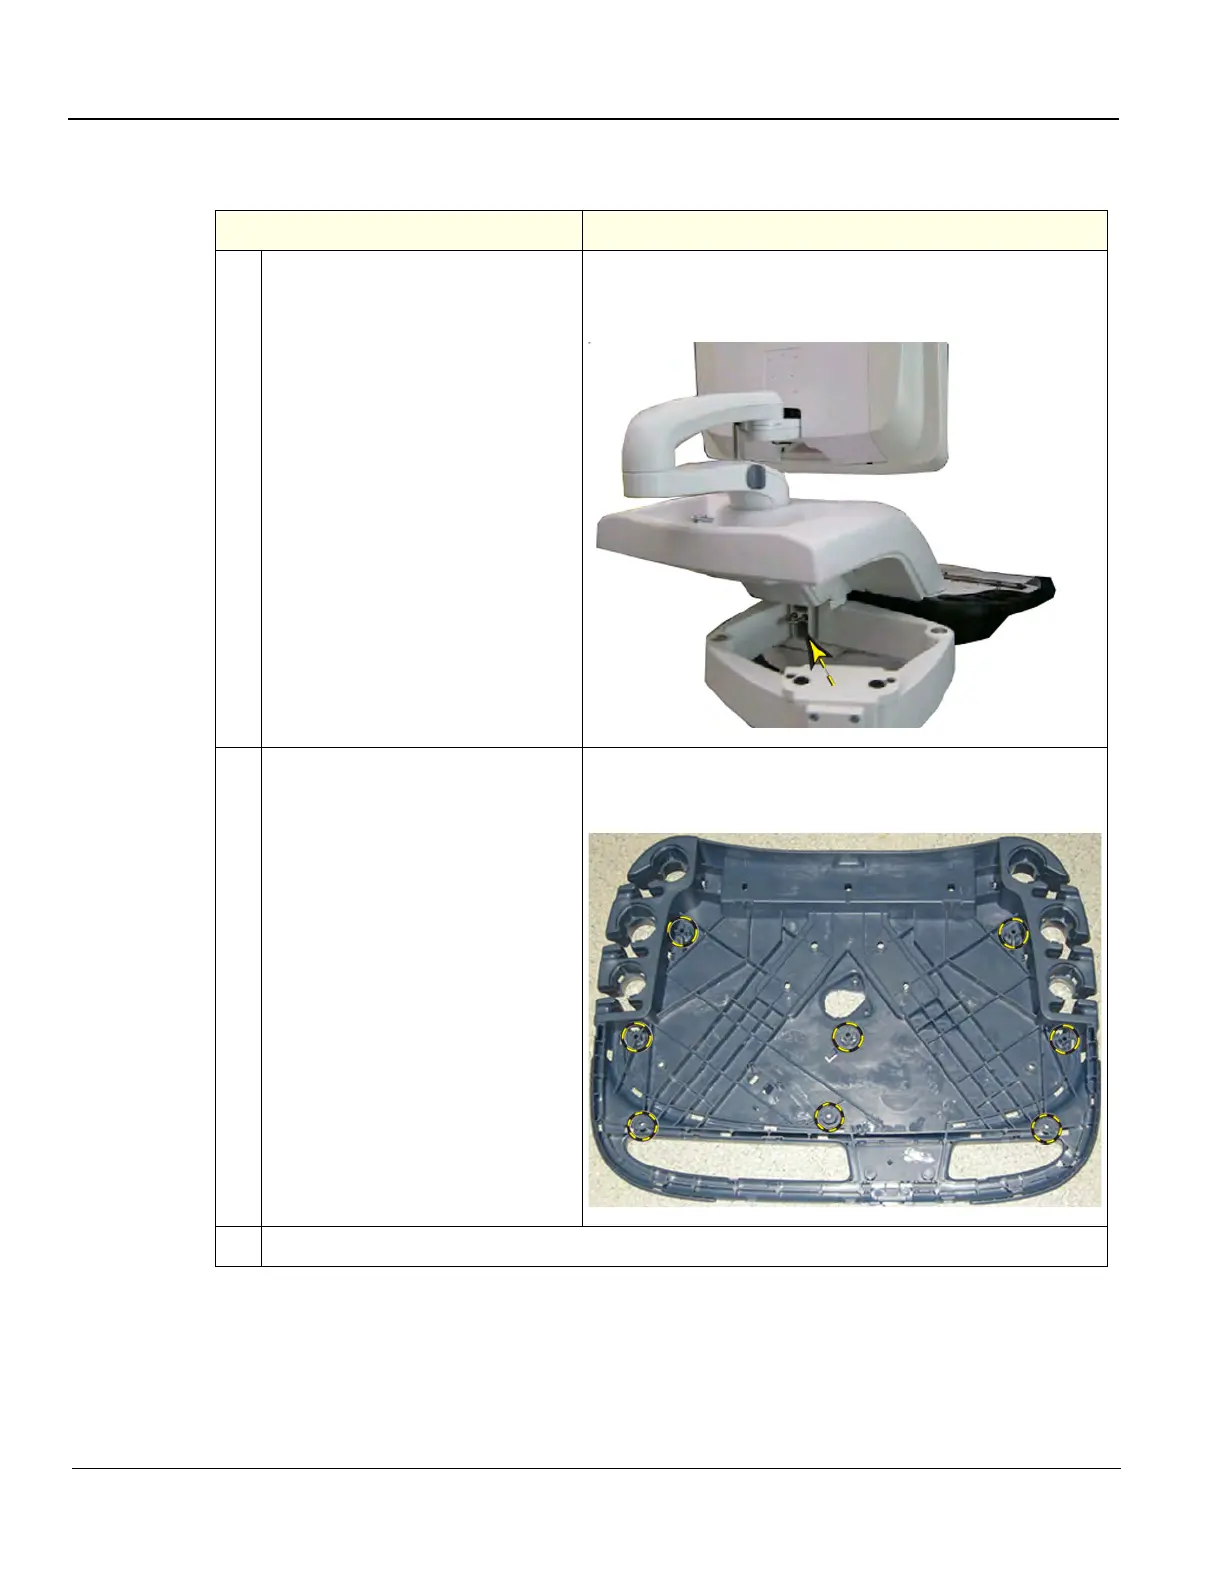
1. Keep XY / Frogleg mechanism in a
released state and the console
extended to gain access to the
screws in the next step. The screws
are available from the underside of
the OP Panel Lower Frame.
Frogleg mechanism released and
console extended
2. Remove the five longer, and the
three shorter screws (closest to
front) that secure the Lower
Operator Panel to the Lower
Operator Panel Frame Assembly.
Access the screws from beneath
the Lower OP Panel Frame
Assembly.
Screw placement, Lower OP Panel Frame
Assembly (shown) to Lower OP Panel
3. Remove the Alphanumeric Keyboard screws (M3 x 8).