EasyManuals Logo

GE LOGIQ E9 Service Manual

GE LOGIQ E9
808 pages
To Next Page IconTo Next Page
To Previous Page IconTo Previous Page
Page #524 background imageLoading...
Page #524 background image
GE
D
IRECTION 5535208-100, REV. 2 LOGIQ E9 SERVICE MANUAL
8 - 178 Section 8-7 - Main Console parts replacement
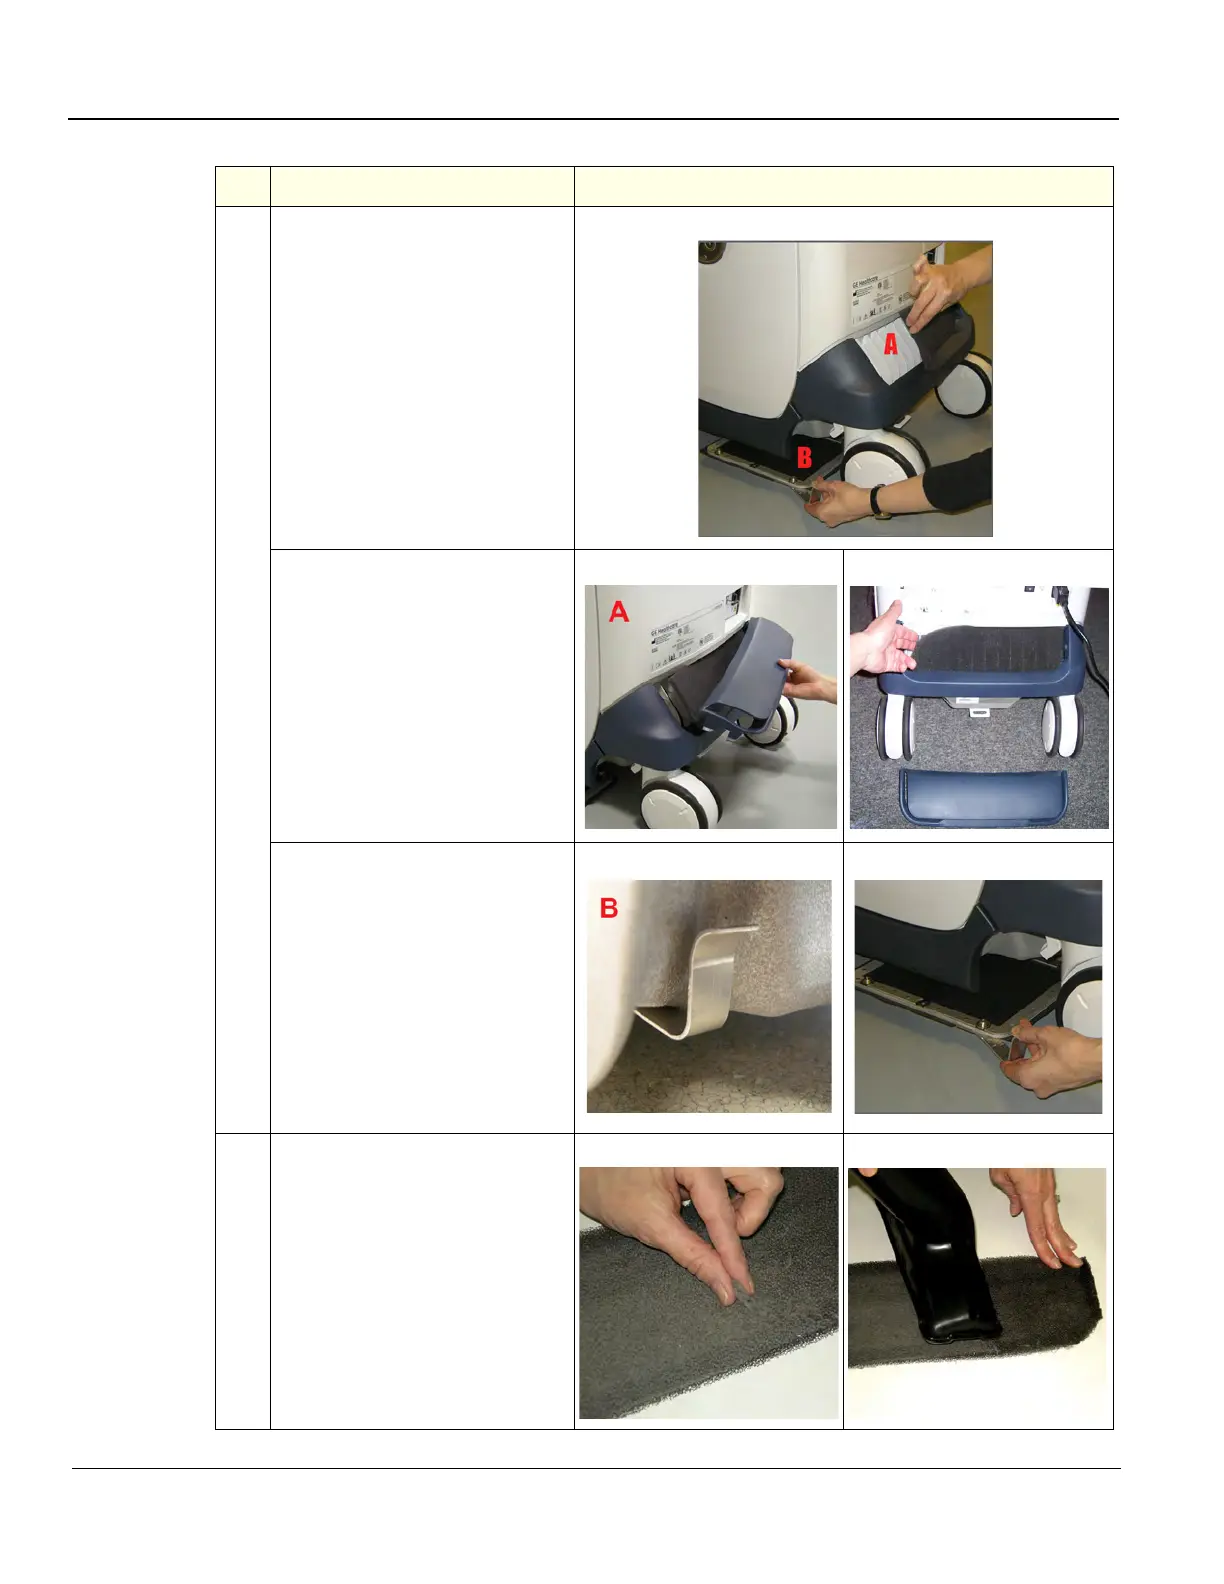
3.
Filter Locations
A. Rear Filter - Remove the
Cover and then remove the filter.
B. Bottom Filter - Remove the
Filter Assembly by lowering the
handle.
NOTE: The handle for the bottom
filter is located in the same
location for both Filter
Assemblies.
4.
Clean the Rear Filter after it is
removed by removing excess lint
or dust from the soiled side; or
vacuum if necessary.
Table 8-109 Removing and Cleaning Filters
Steps
Corresponding Graphic

Table of Contents

Other manuals for GE LOGIQ E9

Questions and Answers:

Question and Answer IconNeed help?

Do you have a question about the GE LOGIQ E9 and is the answer not in the manual?

GE LOGIQ E9 Specifications

General IconGeneral
TypeUltrasound System
3D/4D ImagingYes
Transducer Ports4 active ports
ConnectivityDICOM, USB, Ethernet
ApplicationsAbdominal, Vascular, Musculoskeletal, Small Parts, Urology, Pediatric, Cardiac, Obstetrics/Gynecology
TransducersLinear, Convex, Phased Array, Volume
Doppler ModesColor Doppler, Power Doppler, Pulsed Wave Doppler, Continuous Wave Doppler
ElastographyYes
Advanced FeaturesB-Flow, Volume Navigation
PortabilityCart-based system
Display19-inch high-resolution LCD monitor

Related product manuals