EasyManuals Logo

GE LOGIQ E9 Service Manual

GE LOGIQ E9
808 pages
To Next Page IconTo Next Page
To Previous Page IconTo Previous Page
Page #593 background imageLoading...
Page #593 background image
GE
D
IRECTION 5535208-100, REV. 2 LOGIQ E9 SERVICE MANUAL
Chapter 8 Replacement procedures 8 - 247
8-10-2-2 Main PS installation
NOTE: If the 4D MC option was installed, make sure to reinstall the option into the new replacement
PS.
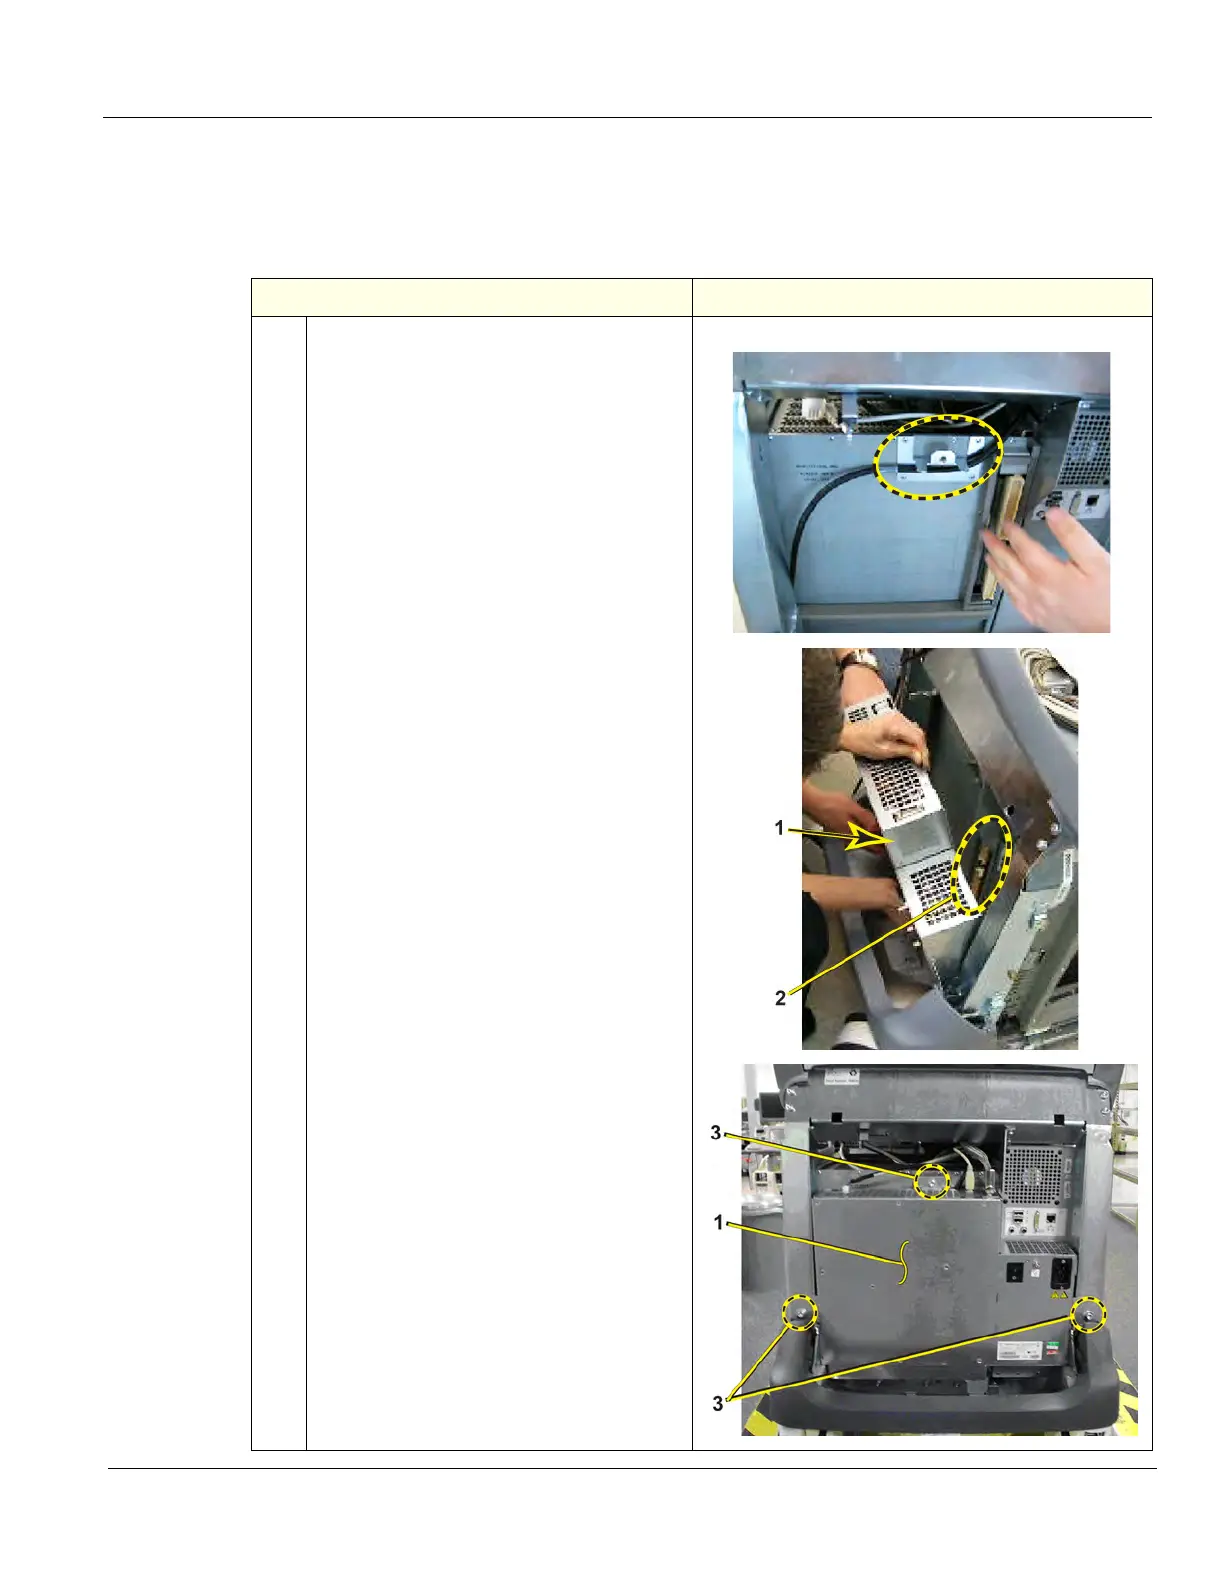
Table 8-159 Main PS installation
Steps Corresponding Graphic
1.
Make sure the GFI PCIe cable is routed
behind the Main PS fang. GFI
Configuration only. MRX does not use this
cable.
Slide the Main PS (1) forward to seat the
connectors (2) on the Card Cage.
Engage the tab onto the Fang, from where
it was removed.
Install the three screws (3) that secure the
Main PS using a 5 mm Allen wrench
(Torque: 10 Nm {7.4 lbf-ft}).

Table of Contents

Other manuals for GE LOGIQ E9

Questions and Answers:

Question and Answer IconNeed help?

Do you have a question about the GE LOGIQ E9 and is the answer not in the manual?

GE LOGIQ E9 Specifications

General IconGeneral
TypeUltrasound System
3D/4D ImagingYes
Transducer Ports4 active ports
ConnectivityDICOM, USB, Ethernet
ApplicationsAbdominal, Vascular, Musculoskeletal, Small Parts, Urology, Pediatric, Cardiac, Obstetrics/Gynecology
TransducersLinear, Convex, Phased Array, Volume
Doppler ModesColor Doppler, Power Doppler, Pulsed Wave Doppler, Continuous Wave Doppler
ElastographyYes
Advanced FeaturesB-Flow, Volume Navigation
PortabilityCart-based system
Display19-inch high-resolution LCD monitor

Related product manuals