GE
D
IRECTION 5535208-100, REV. 2 LOGIQ E9 SERVICE MANUAL
Chapter 8 Replacement procedures 8 - 285
8-11-8-1 Printer Bracket removal
Table 8-179 Printer Bracket removal
Steps Corresponding Graphic
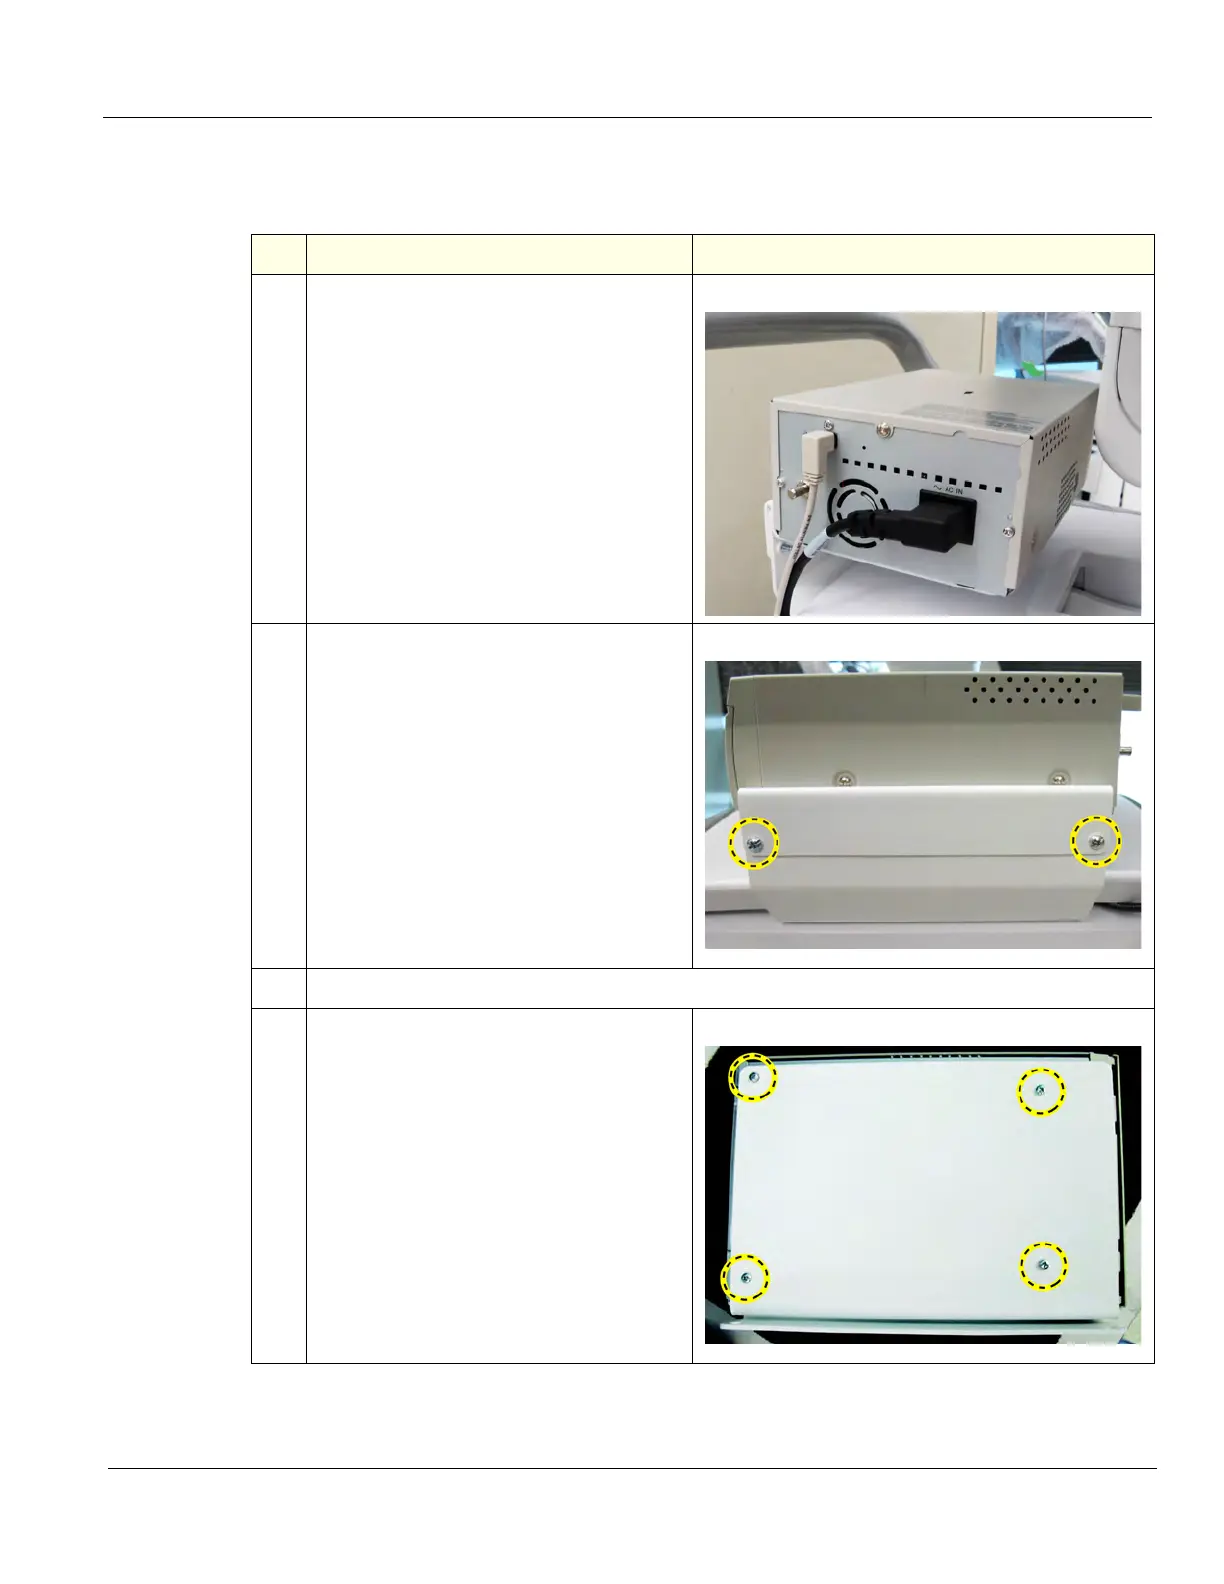
1.
Disconnect the Power and USB Cables
from the Printer.
2.
Remove the two screws that secure the
Bracket and Printer to the Printer Mount.
3.
Remove the Top Cover.
4.
Remove the four screws that secure the
Printer to the Printer Bracket.