GE
D
IRECTION 5535208-100, REV. 2 LOGIQ E9 SERVICE MANUAL
Chapter 8 Replacement procedures 8 - 295
8-11-9-2 Capacitor Pack installation
4.
Unlatch the two latches (1) that clamp the
Capacitor Pack to the top of the BEP (2).
Tilt the Main Console Front Cover forward
just until the lower Column Cover stop tabs
(3) clear and slide the Shear Wave Console
Cover Assembly (4) out.
Lift the Column Cover Assembly.
Push the Capacitor Pack toward the Card
Cage approximately 1/2 inch to free the
Pack the BEP.
Remove the Capacitor Pack.
Table 8-185 Capacitor Pack Installation
Steps Corresponding Graphic
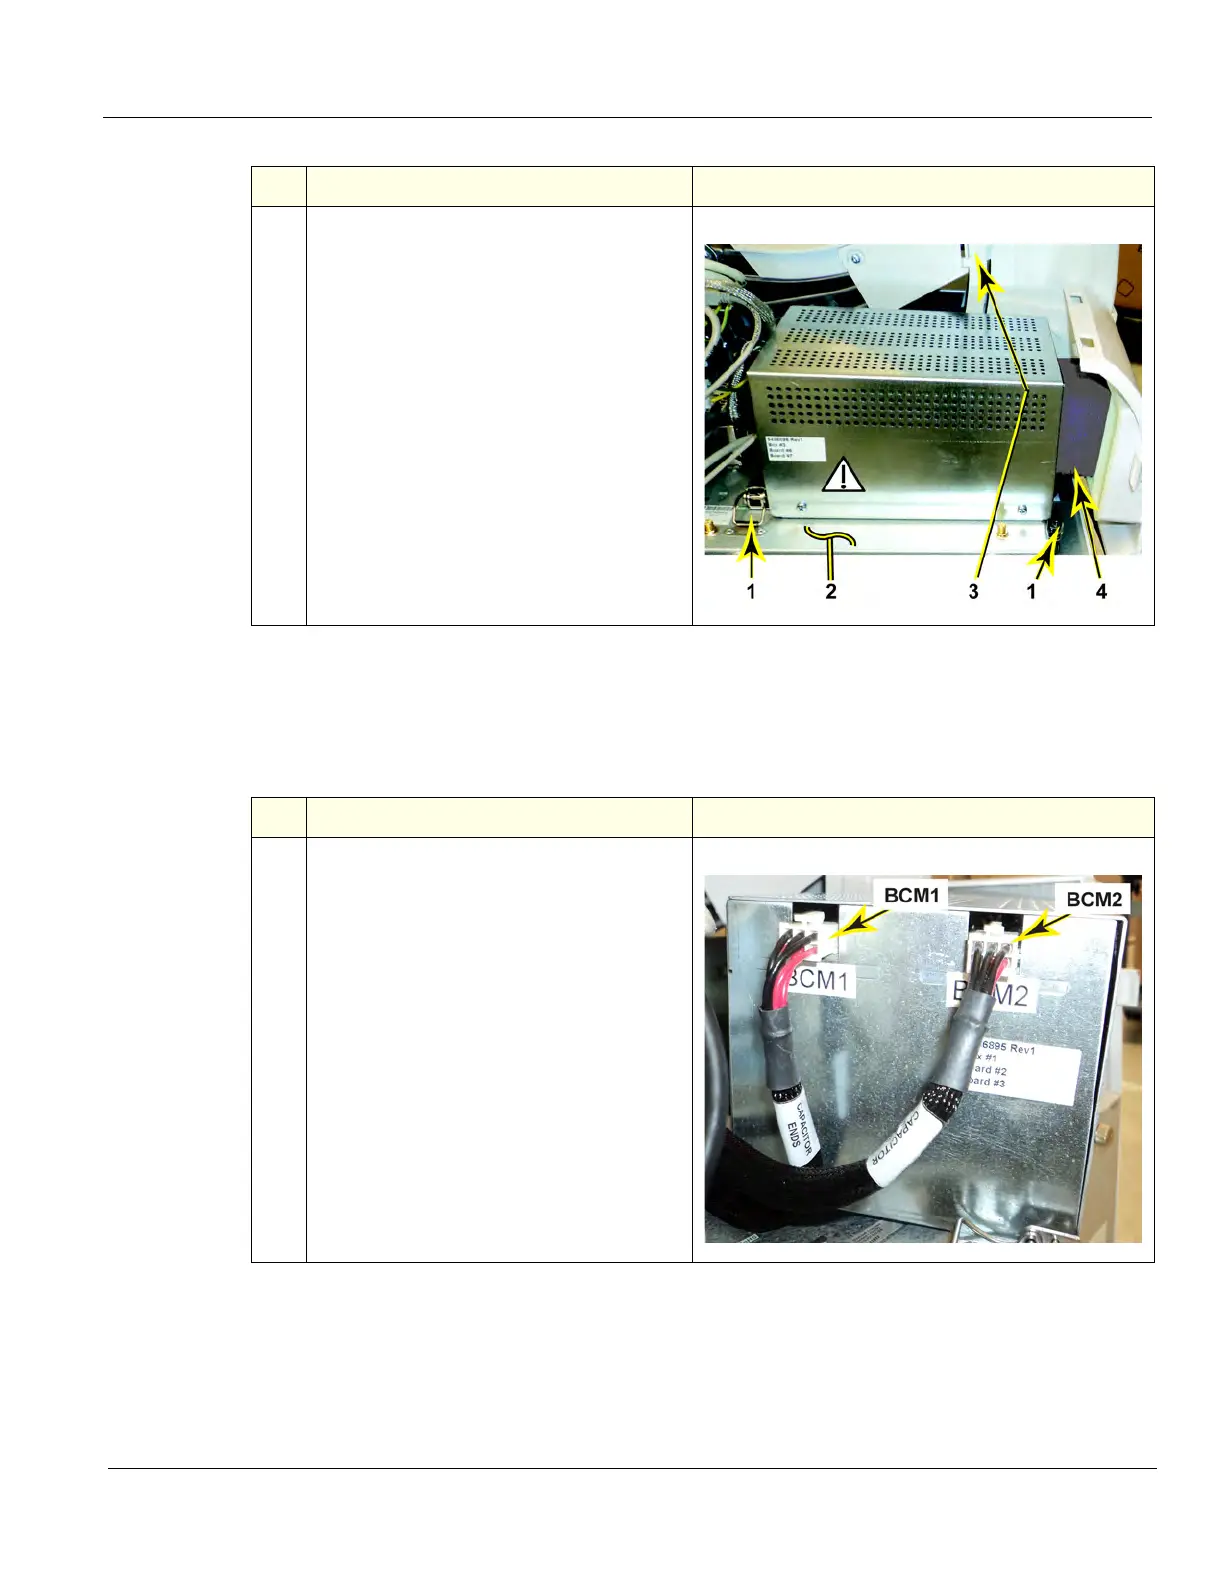
1.
Place the Capacitor Pack on top of the
BEP.
Reconnect the power cable from the Main
Power Supply to the Pack BCM1 and
BCM2. Power Cable is labeled.
Table 8-184 Capacitor Pack removal
Steps Corresponding Graphic