EasyManuals Logo

GE LOGIQ E9 Service Manual

GE LOGIQ E9
808 pages
To Next Page IconTo Next Page
To Previous Page IconTo Previous Page
Page #642 background imageLoading...
Page #642 background image
GE
D
IRECTION 5535208-100, REV. 2 LOGIQ E9 SERVICE MANUAL
8 - 296 Section 8-11 - Peripherals replacement
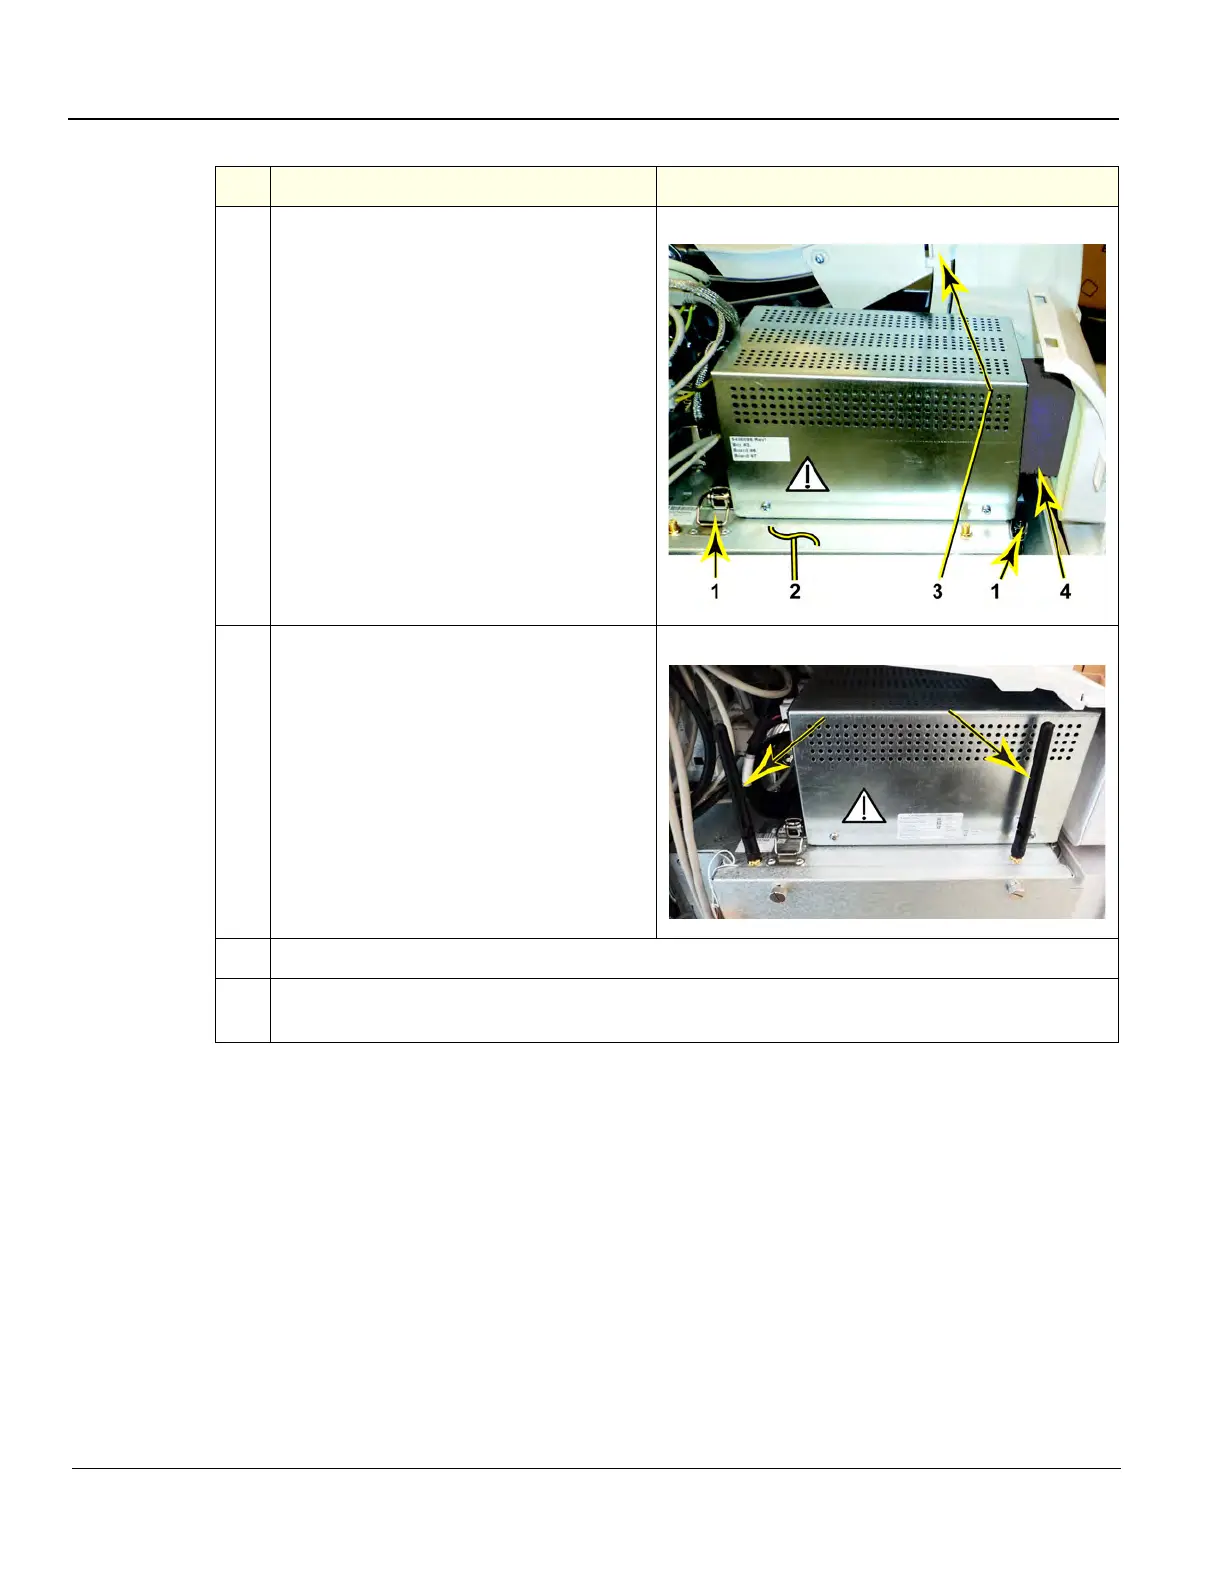
2.
Position the Pack at the top of the BEP.
Be sure the lip, on the underside of the
Pack, hooks on the edge of the Card Rack,
and the three tabs insert into the slots on
the top of the BEP frame. The lip “clamps”
the Card Rack and BEP (2) together. This
is a tight fit.
Lower the lower Column Cover.
Slide the Shear Wave Console Cover
Assembly (4) into the console.
Position the Main Console Front Cover to
engage the lower Column Cover stop tabs
(3).
Latch the two latches (1) that clamp the
Pack to the top of the BEP.
3.
Reinstall the Antennas on the top of the
BEP, if the Attunes were removed.
4.
Replace the covers.
5.
Perform Functional Checks. See: 8-11-9-3 - Calibration and adjustments,
8-11-9-4 - Verification and 8-11-9-5 "Functional Checks" on page 8-297.
Table 8-185 Capacitor Pack Installation
Steps Corresponding Graphic

Table of Contents

Other manuals for GE LOGIQ E9

Questions and Answers:

Question and Answer IconNeed help?

Do you have a question about the GE LOGIQ E9 and is the answer not in the manual?

GE LOGIQ E9 Specifications

General IconGeneral
TypeUltrasound System
3D/4D ImagingYes
Transducer Ports4 active ports
ConnectivityDICOM, USB, Ethernet
ApplicationsAbdominal, Vascular, Musculoskeletal, Small Parts, Urology, Pediatric, Cardiac, Obstetrics/Gynecology
TransducersLinear, Convex, Phased Array, Volume
Doppler ModesColor Doppler, Power Doppler, Pulsed Wave Doppler, Continuous Wave Doppler
ElastographyYes
Advanced FeaturesB-Flow, Volume Navigation
PortabilityCart-based system
Display19-inch high-resolution LCD monitor

Related product manuals