Operating Your Computer 2-17
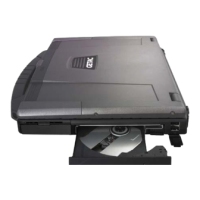
Inserting and Removing a Disc
Follow this procedure to insert or remove a disc:
1. Turn on the computer.
2. Press the optical drive quick button (
) and the drive tray will slide
out partially. Gently pull on it until it is fully extended.
3. To insert a disc, place down the disc in the tray with its label facing
up. Slightly press the center of the disc until it clicks into place.
To remove a disc, hold the disc by its outer edge and lift it up from the
tray.
4. Gently push the tray back into the drive.
NOTE: In the unlikely event that you are unable to release the drive tray by pressing the
optical drive quick button (
), you can manually release the disc. (See “Optical
Drive Problems” in Chapter 8.)