Installation
2
2-14 Gilson GX-271 Liquid Handler User’s Guide
Syringe Installation—402 Syringe Pump
Syringe Installation—402 Syringe Pump
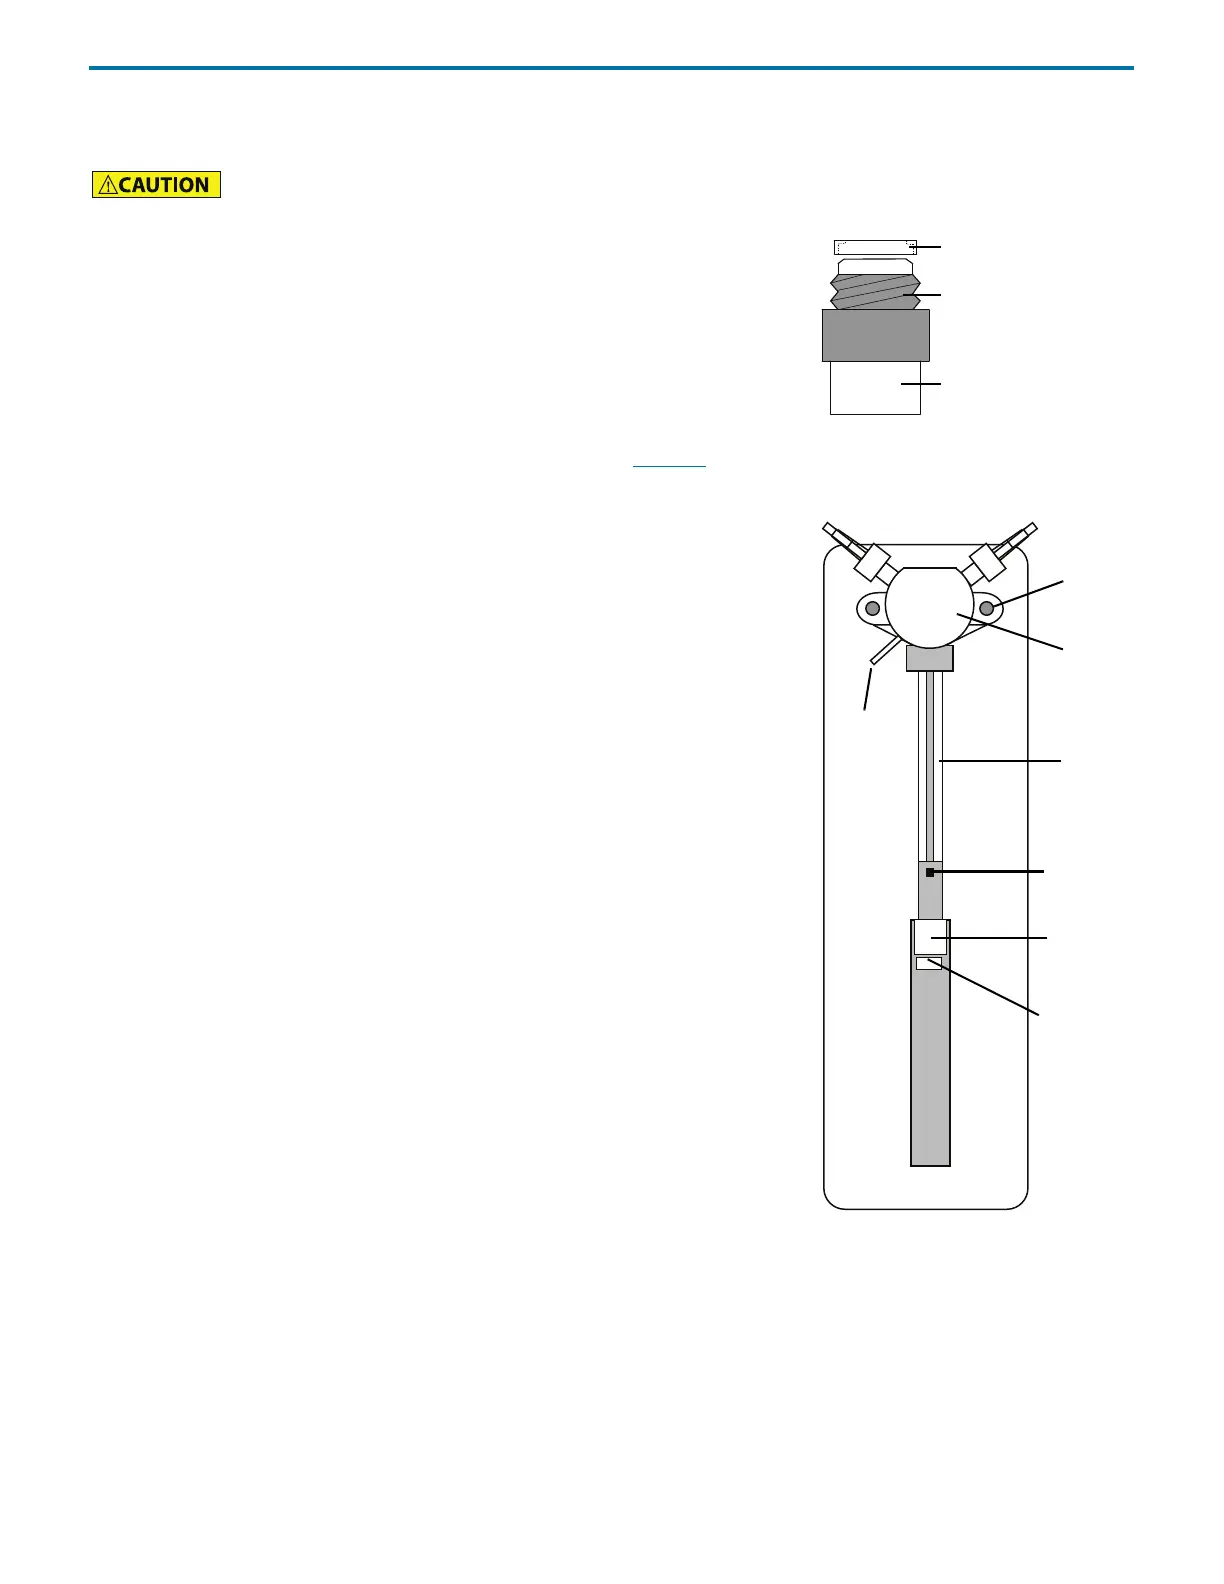
The 100 μL, 250 μL, and 500 μL syringes are supplied with a cover seal to ensure an
airtight fit between the syringe and the valve.
Before mounting one of the smaller syringes (100 μL, 250 μL, 500 μL and 1 mL),
manually prime it. Place its open end in the pump reservoir and use the piston to
aspirate the liquid. This manual prime is not necessary for the 5 mL, 10 mL and 25 mL
syringes.
The piston operating rod will be shipped in the down position. If the rod is not in the
down position, refer to the instructions for replacing a syringe on page 4-9
. Those
instructions include how to lower the rod.
The following procedure is important for correct syringe piston alignment. Improper
alignment may cause premature piston failure.
1 Remove the valve from the front panel by removing the two securing valve screws.
2 Lubricate the piston with solvent to reduce piston seal friction during syringe
installation.
3 Loosely screw the syringe into the valve. Do not fully tighten.
4 Loosely attach the valve to the syringe pump with the supplied screws.
5 Pull down the piston so it comes into contact with the piston operating rod and
firmly tighten the piston holding screw.
6 Fully tighten the valve screws to secure the valve.
7 Fully tighten the syringe to the valve.
Remember or note the size of the syringe you are installing for later software
configuration.
To prevent injury, when operating the syringe pump, keep hands clear of syringe to avoid risk of personal
injury by pinching.
cover seal
valve screw
syringe body
Figure 2-28: Cover Seal on Syringe
valve
valve
to
syringe
piston
piston
piston
vent
tubing
operating
rod
holding
screw
screw
Figure 2-29: Syringe Installation



 To Next Page