Maintenance
4
4-6 Gilson GX-271 Liquid Handler User’s Guide
Cleaning
Cleaning the Valve—402 Syringe Pump
Clean the syringe pump valve with a nonabrasive cloth after any of the following situations have occurred:
• Corrosive or hazardous liquids have been pumped
• Possible back flow of liquids into the waste tubing
•Leakage
• System has not been used for a while
Remove the Valve
To clean the valve, first remove it from the syringe pump:
1 Disconnect the inlet, transfer and vent tubing from the valve.
2 Disconnect the syringe from the valve and remove the valve from the syringe pump as described on page 4-3
.
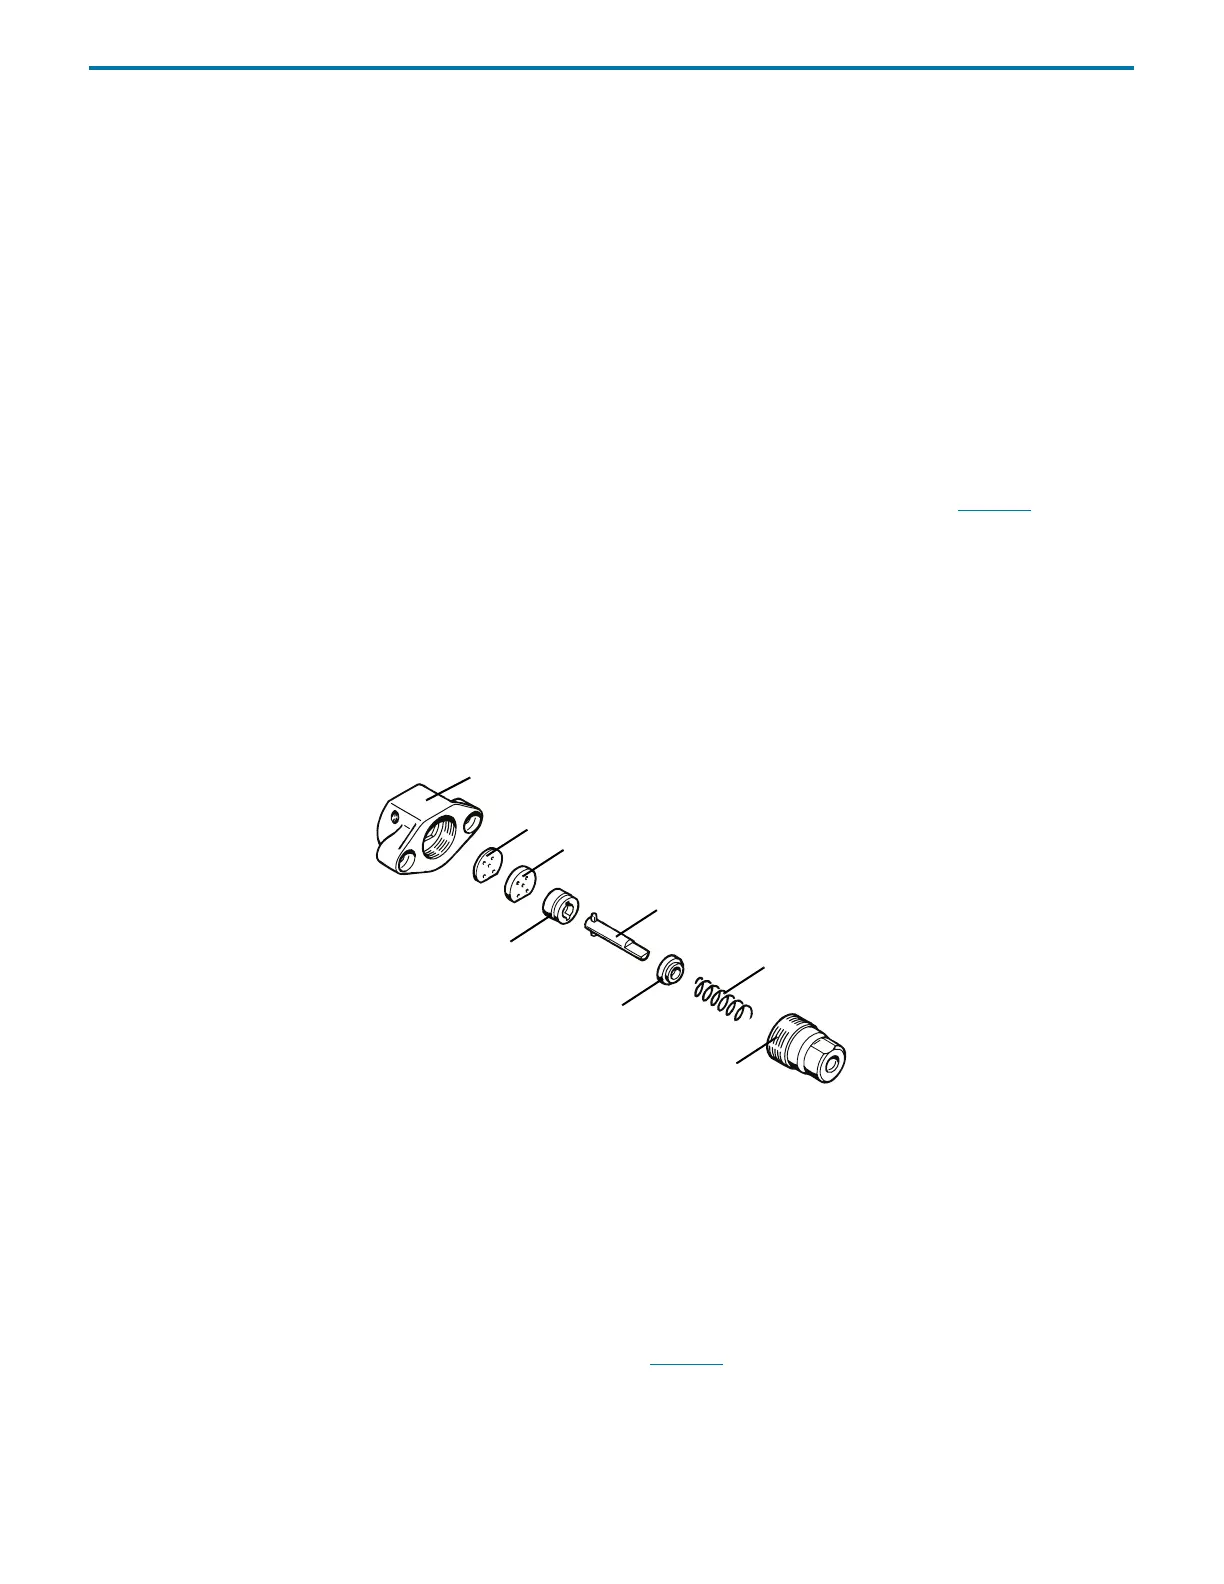
Disassemble the Valve
1 Hold the valve body firmly in one hand. Using a 17 mm open-ended wrench, turn the valve axle guide counterclockwise and
separate the two halves.
2 Pull the valve axle away from the valve main body.
3 Separate the ceramic stator from the ceramic rotor.
4 Tap the valve axle guide against a solid level surface to remove the spring and PTFE end piece.
Figure 4-2: 402 Valve
Note: Do not remove the ceramic stator from the valve main body.
Clean and Reinstall the Valve
The disassembled parts of the valve can be cleaned using a non-abrasive cloth dampened with alcohol or by autoclaving.
1 Dry the components using a clean, lint-free cloth.
2 Reassemble the valve parts by reversing the above procedure.
3 Reinstall the syringe and valve by following the instructions on page 4-4
.
4 Reconnect the inlet, transfer, and vent tubing to the newly installed valve.
main body
PTFE seal
ceramic stator
ceramic and
valve axle
PTFE end piece
spring
valve axle guide
PEEK rotor



 To Next Page