Gilson GX-271 Liquid Handler User’s Guide 4-13
Maintenance
4
Replacing Parts
Piston Seal for 25 mL Syringe
1 Remove the syringe from the pump as described on page 4-3.
2 Slide the piston out of the syringe barrel.
3 Hold the piston seal firmly in one hand and unscrew the seal from the piston shaft.
4 Screw a new piston seal on the shaft.
5 Dip the piston seal in distilled water and slide the piston up and down in the syringe barrel five or six times to ensure a
smooth movement between the piston and syringe.
6 Slide the piston into the syringe barrel and complete the piston seal fitting by screwing the shaft until the piston seal turns
with the piston shaft.
7 Remount the syringe on the pump as described on page 4-4
.
Replacing the Valve
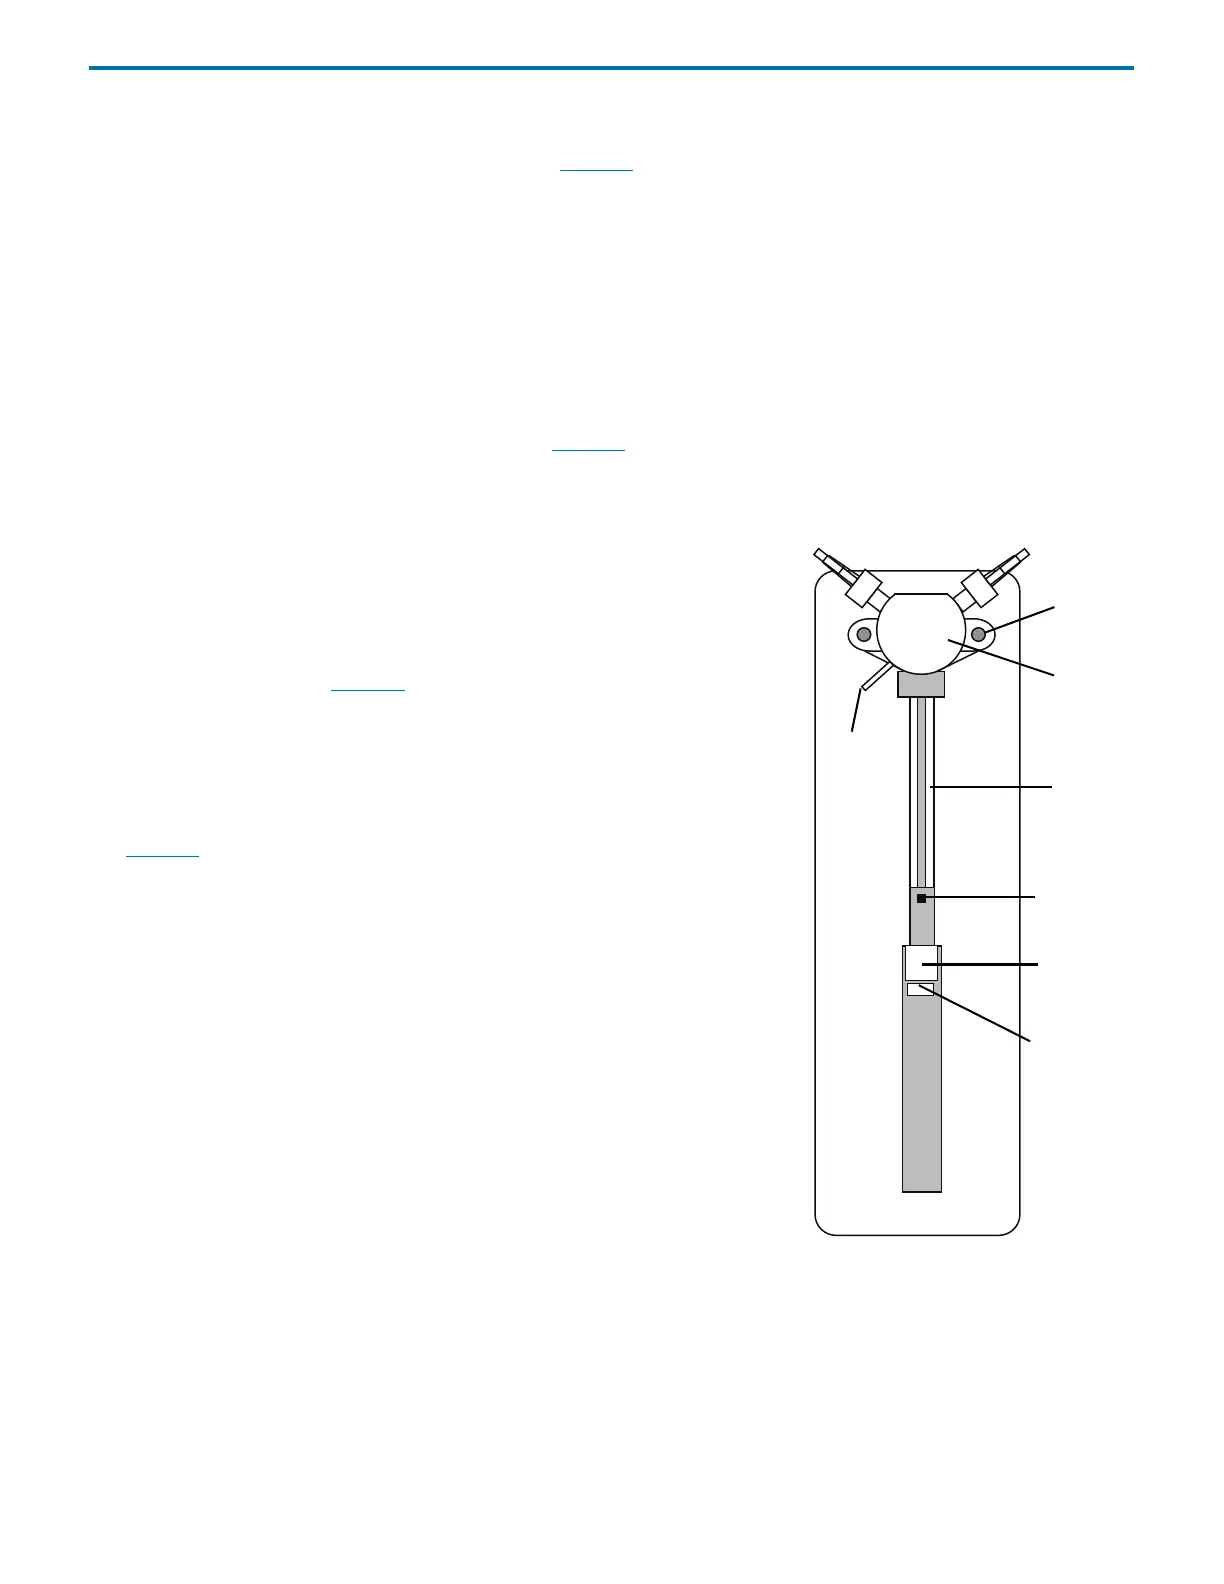
To replace a valve on the syringe pump, follow the instructions below. If necessary, refer
to the syringe pump diagram.
1 Disconnect the inlet, transfer, and vent tubing from the valve.
2 Disconnect the syringe from the syringe pump. Refer to the procedure for
replacing the syringe on page 4-9
.
3 Remove the two screws securing the valve to the syringe pump and then remove
the valve.
4 Fully tighten the valve screws to secure the replacement valve.
5 Re-install the syringe. Refer to the procedure for mounting new syringe on
page 4-9
.
6 Reconnect the inlet, transfer, and vent tubing to the newly installed valve.
valve
valve
to
syringe
piston
piston
piston
vent
tubing
operating
rod
holding
screw
screw
Figure 4-12: 402 Syringe



 To Next Page