2-2
USER HANDBOOK
• Switch instrument ON in fresh air and check that the
battery is fully charged.
• Verify there are no faults.
• Attach optional accessories, as required.
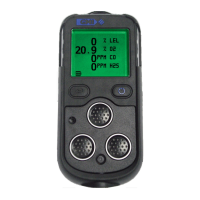
• If oxygen sensor is fitted, check oxygen readings to
ensure correct operation. The oxygen sensor
responds to the user breathing on the instrument
front face (sensor area) by displaying a decreased
value, i.e. below 20.9%.
• Perform regular leak check on pumped instruments, by
placing thumb over sample inlet nozzle and making sure
that instrument displays ‘SAMPLE FAULT’.
• Perform regular bump tests using either the Auto Bump
/ Calibration Station or by performing manual bump tests.
• Switch the instrument OFF, in fresh air, after use.
2.2 SWITCH THE INSTRUMENT ON
Press and hold the Right Hand (RH) button
for one
second to switch the instrument ON. Refer to Fig. 2-1.
The instrument begins its warm-up routine, which lasts
approximately 30 seconds. During the warm-up, a countdown
timer appears in the top (RH) corner of the display.
Note: The display backlight illuminates green and remains
ON during warm-up. When warm-up is complete, the screen
light automatically switches off.

 Loading...