48
860-7200-18 DTU DTB Service & Maintenance Manual
REPLACING THE FRONT CONVEYOR
MODULAR BELT
IMPORTANT: Only persons who are appropriately trained and
qualied with the safe operation and service of this machine
should be allowed to carry out operation, installation, service or
maintenance� Trained personnel must follow all applicable codes,
laws and standards, both national and local, when conducting
any servicing or maintaining of the machine and associated
equipment� Trained personnel should know and follow all national
and local regulations regarding occupational health and safety
acts or regulations� These persons must also have received
safety training to recognize, identify and avoid any hazards
involved in servicing and maintaining the equipment�
Items required before starting:
• Modular Conveyor Belt - Part # M1220GX24X131-POM
(Belt 23�6 x 131 x 0�5 GRIPTOP PP; Blue Edges; Nylon
Rods)
Verify that there are 262 pitches/links of belting on a new
belt.
• Belt Rod Removal Tool - Part # H010702262 (Puller, Rod
5MM)
1� Position the front conveyor at or level while the Destu-it is
still connected to AC power�
2. Complete the Destu-it Safety Lockout Procedures –
Document 860-6000 – Skip past the “Install the Safety
Block” steps for installing the safety block on the front
conveyor hydraulic cylinder� In order to change the belt, the
conveyor must be in a level position� Perform all the lockouts
required to ensure the machine is electrically locked out�
At NO time should any service work be performed on
the hydraulic system during this repair, so as to prevent
injuries while changing the front conveyor belt.
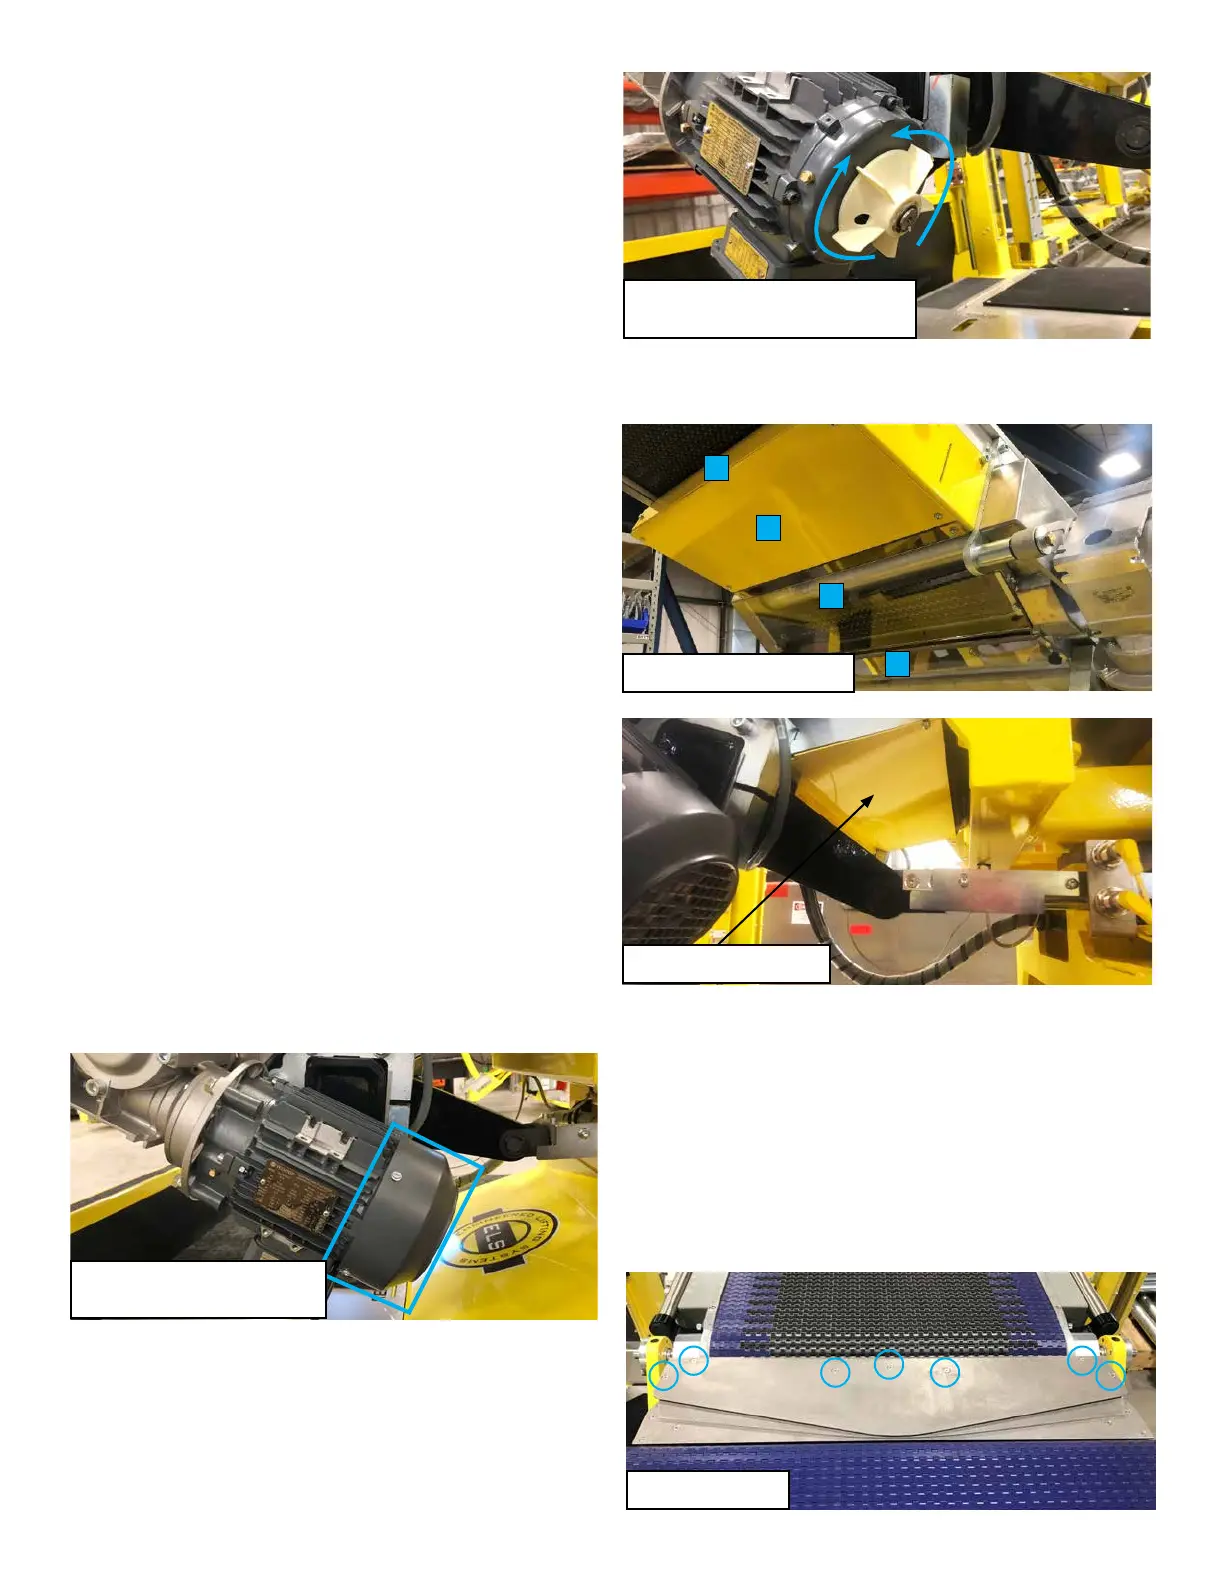
3� Remove the fan cover/guard on the front conveyor drive
motor� There are four screws which secure the cover�
Remove the screws and pull the fan cover/guard o.
4� Remove the six screws holding the two lower conveyor metal
covers and set the covers aside� Remove the four screws
and two knobs which hold the two lower clear Lexan covers
in place and set the covers aside� Remove the four screws
holding the metal guard under the rear of the front conveyor�
Remove the guard and set it aside�
5� Remove the seven screws which secure the top transition
plate. Lift o the top and middle transition plate. Set them
aside� Be careful not to bend the plates� It is not necessary
to remove the bottom transition plate� Removing the top and
middle plates will allow enough clearance for the belt to pass
through and around the tailshaft�
Step 3 - Remove four screws
securing the fan guard.
Turning the fan blade will move the
conveyor belt forward or reverse.
Remove the four guards.
1
2
3
4
Remove rear guard.
Transition Plates