50
860-7200-18 DTU DTB Service & Maintenance Manual
10� Re-install all the lower conveyor guards, covers and the
front conveyor motor fan guard cover� Use a small amount of
lubricant (White Lithium grease) on the bearing in the center
of the middle transition plate. Re-install the transition plates
and use a small dab of Blue 242 Loctite on each of the 7
screws that secure it� The front cover/belt guard should not
rub on the sagging portion of the belt� Adjust it to have about
3/16” clearance to the center of the belt where it sags the
most�
11� Check the machine is clear of all tools and items used
during the repair� Remove the Lockouts for the AC and
DC disconnect switches and all the connectors� Restart
the machine� Test run the conveyor to verify that the belt is
running correctly� Make sure that the belt is tracking correctly/
evenly side to side, so as to prevent wear on the belt edge�
Once the Destu-it machine has been run and checked that
the front belt is running smoothly, the machine can now be
returned back into service�
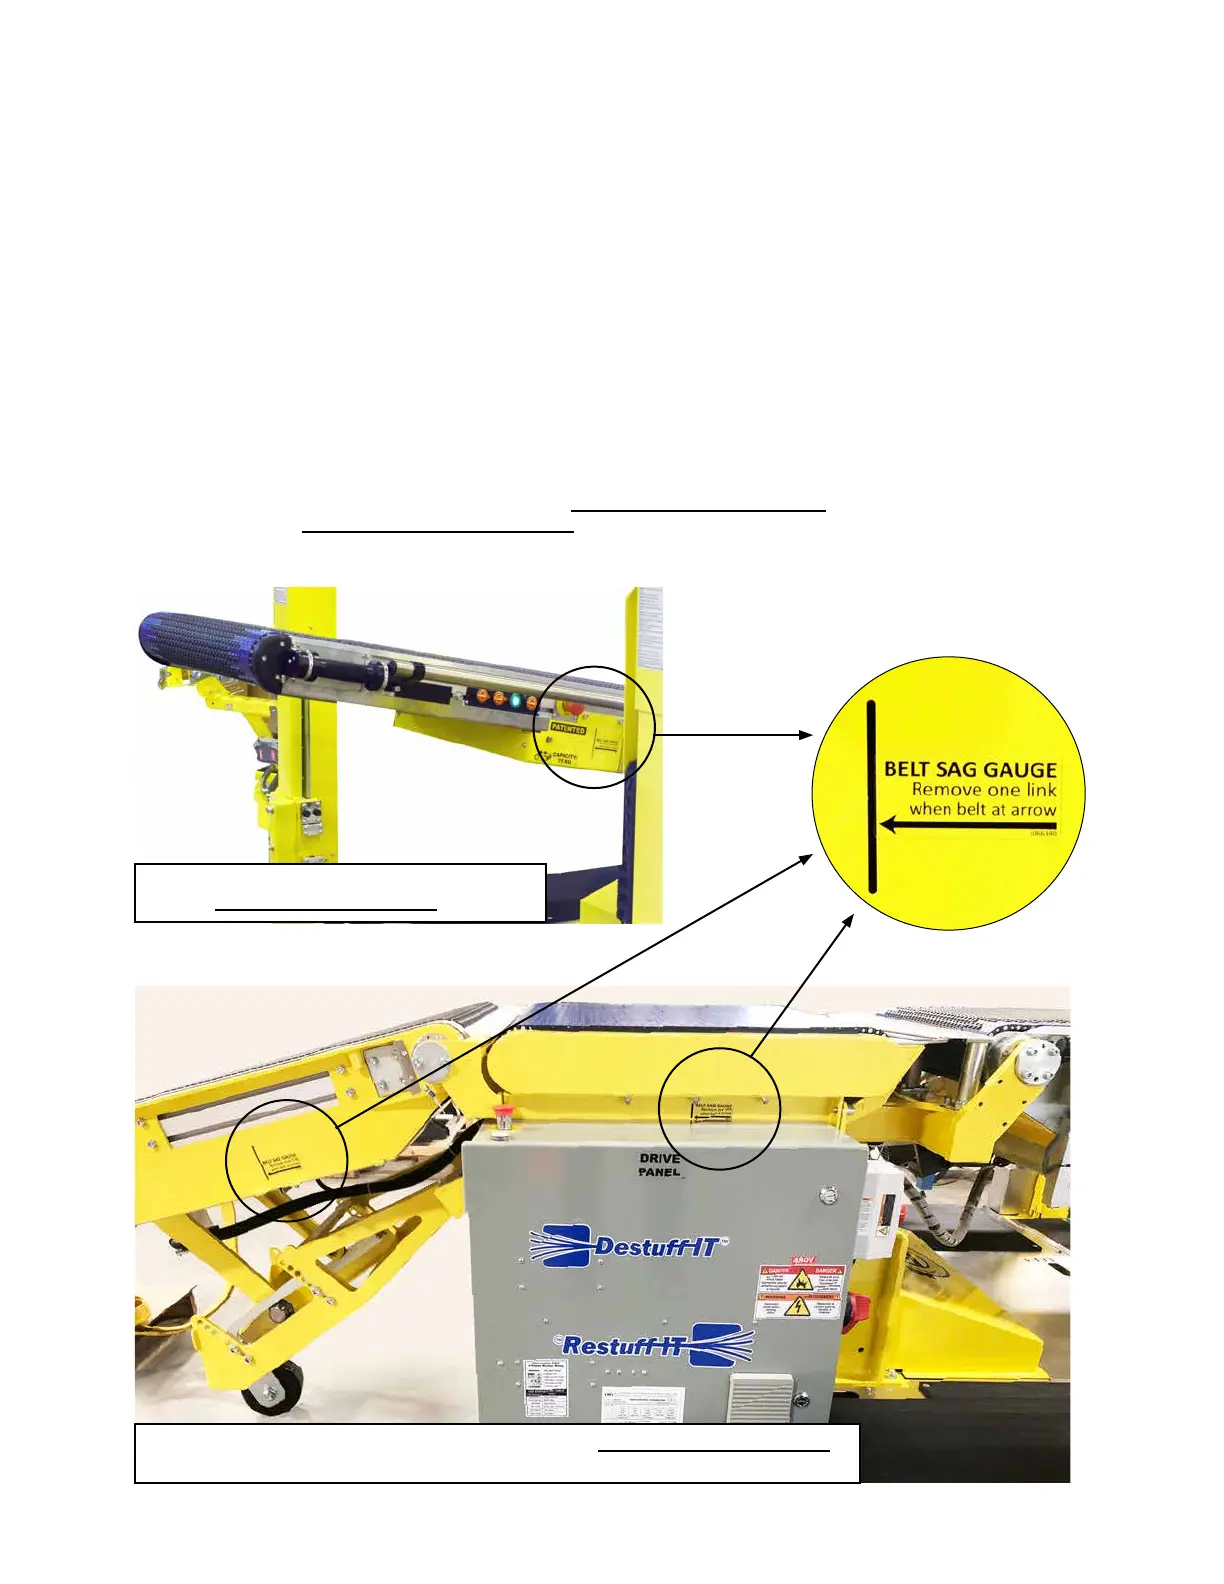
The Belt Sag Gauge label for the front conveyor
is on the left-hand side of the machine.
The Belt Sag Gauge label for the middle conveyor is on the right-hand side of the machine
as well as models with a powered rear conveyor (as shown above).
BELT TENSION
CHECKING BELT ELONGATION:
Use a light to see the belt through the slot in the side of the conveyor� If the belt is at the tip of the arrow of the Belt Sag Gauge label,
remove one section of links across the width of the belt�
The Belt Sag Gauge label for the front conveyor is on the left-hand side of the machine. The Belt Sag Gauge label for the
middle conveyor is on the right-hand side of the machine, as well as models with a powered rear conveyor.