Operation
333587B 41
NOTE: The depressurization process does not
automatically stop. You need to manually stop
depressurization as described below.
3. Press the soft key to start the depressurization
process and to stop it.
4. Press the soft key for the platen or the
soft key for the valve to exit the depressurization
mode.
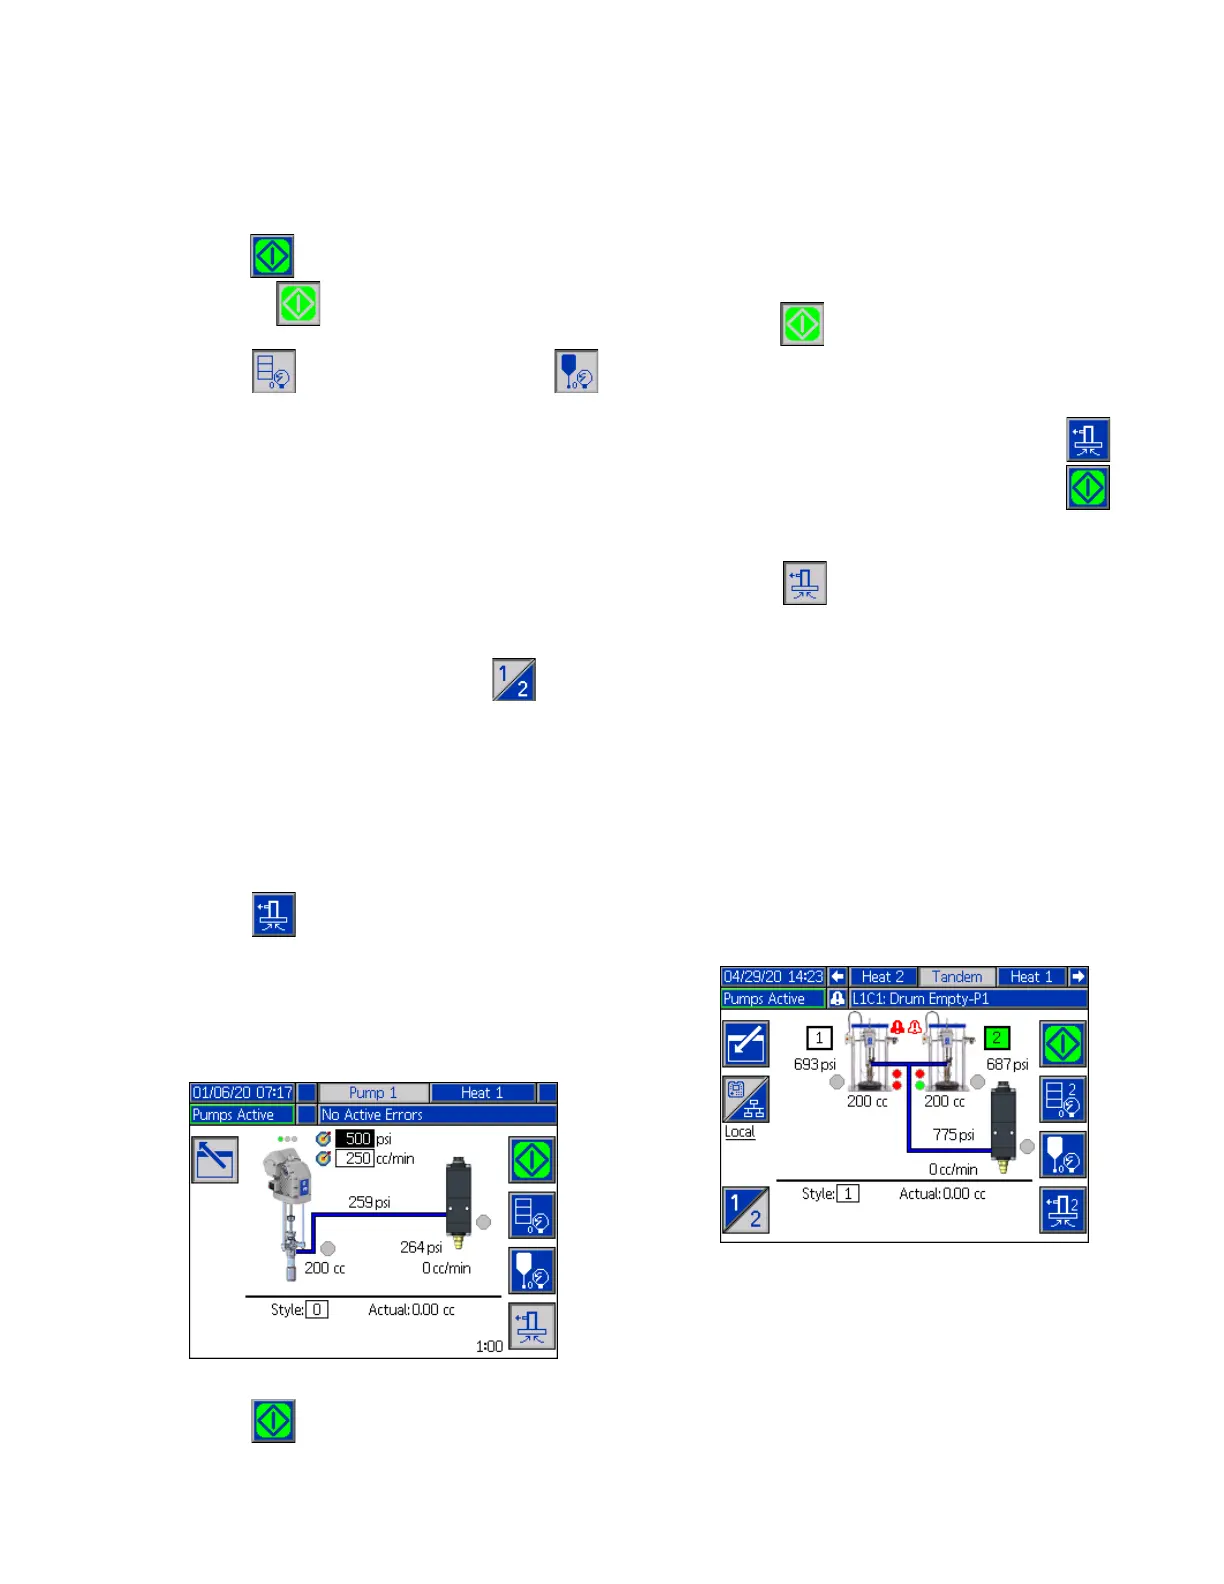
Priming Mode
The pump can be primed from the Run screen in Local
control mode during operation. If the pump is being
controlled by PLC Lockout, priming must be done
through CGM. See the Prime Diagram on page 87.
The steps are the same for the Ram and Tandem
systems. On Tandem systems, press the soft key,
if needed, to switch between Pump 1 and Pump 2.
NOTE: You are able to depressurize the platen and
valve on a pump while in priming mode.
1. On a Tandem system, open the Ball Valves (S) on
the Tandem Block (R).
1. Press the soft key to enter the pump priming
mode.
2. To control the flow of material, set your target
pressure and target flow in the fields that are
displayed above and to the right of the pump.
3. Press the soft key to start the priming process.
4. A timer is shown to the left of the priming mode icon
and counts down when the priming starts. The
default is 5 minutes but you can adjust the timer
setting to between 1 and 9 minutes. See Pump
Screen 2 - Pump Settings on page 27.
5. To manually stop the priming process at any time,
press the soft key. If you do not manually stop
the process, it will automatically stop when the timer
counts down to 0:00.
NOTE: If time has expired, you must press the soft
key again to resume priming. Do not press the soft
key until you have restarted the priming process.
6. Press the soft key to exit the priming mode.
NOTE: Refer to Load Material on page 35 for
information about priming and loading material into the
pump the first time after installation.
NOTE: Priming does not appear in the Job Log.
Low Level and Empty Level Indicators
The Tandem Run screen has low material level and
empty material level indicators. You can enable or
disable the sensors for these on Pump Screen 2 -
Drum Settings on page 27. These monitor the material
level in the drums.
The indicators normally show as green. When a low
level sensor on the ram is activated because material in
the drum is low, the top indicator for the pump turns red
and an error symbol appears next to the pump.
When an empty level sensor is activated on the ram, the
bottom indicator for the pump turns red and the error
symbol changes to the one selected for the empty level
sensor.