Model 672/675 Technical Reference Manual
2-3
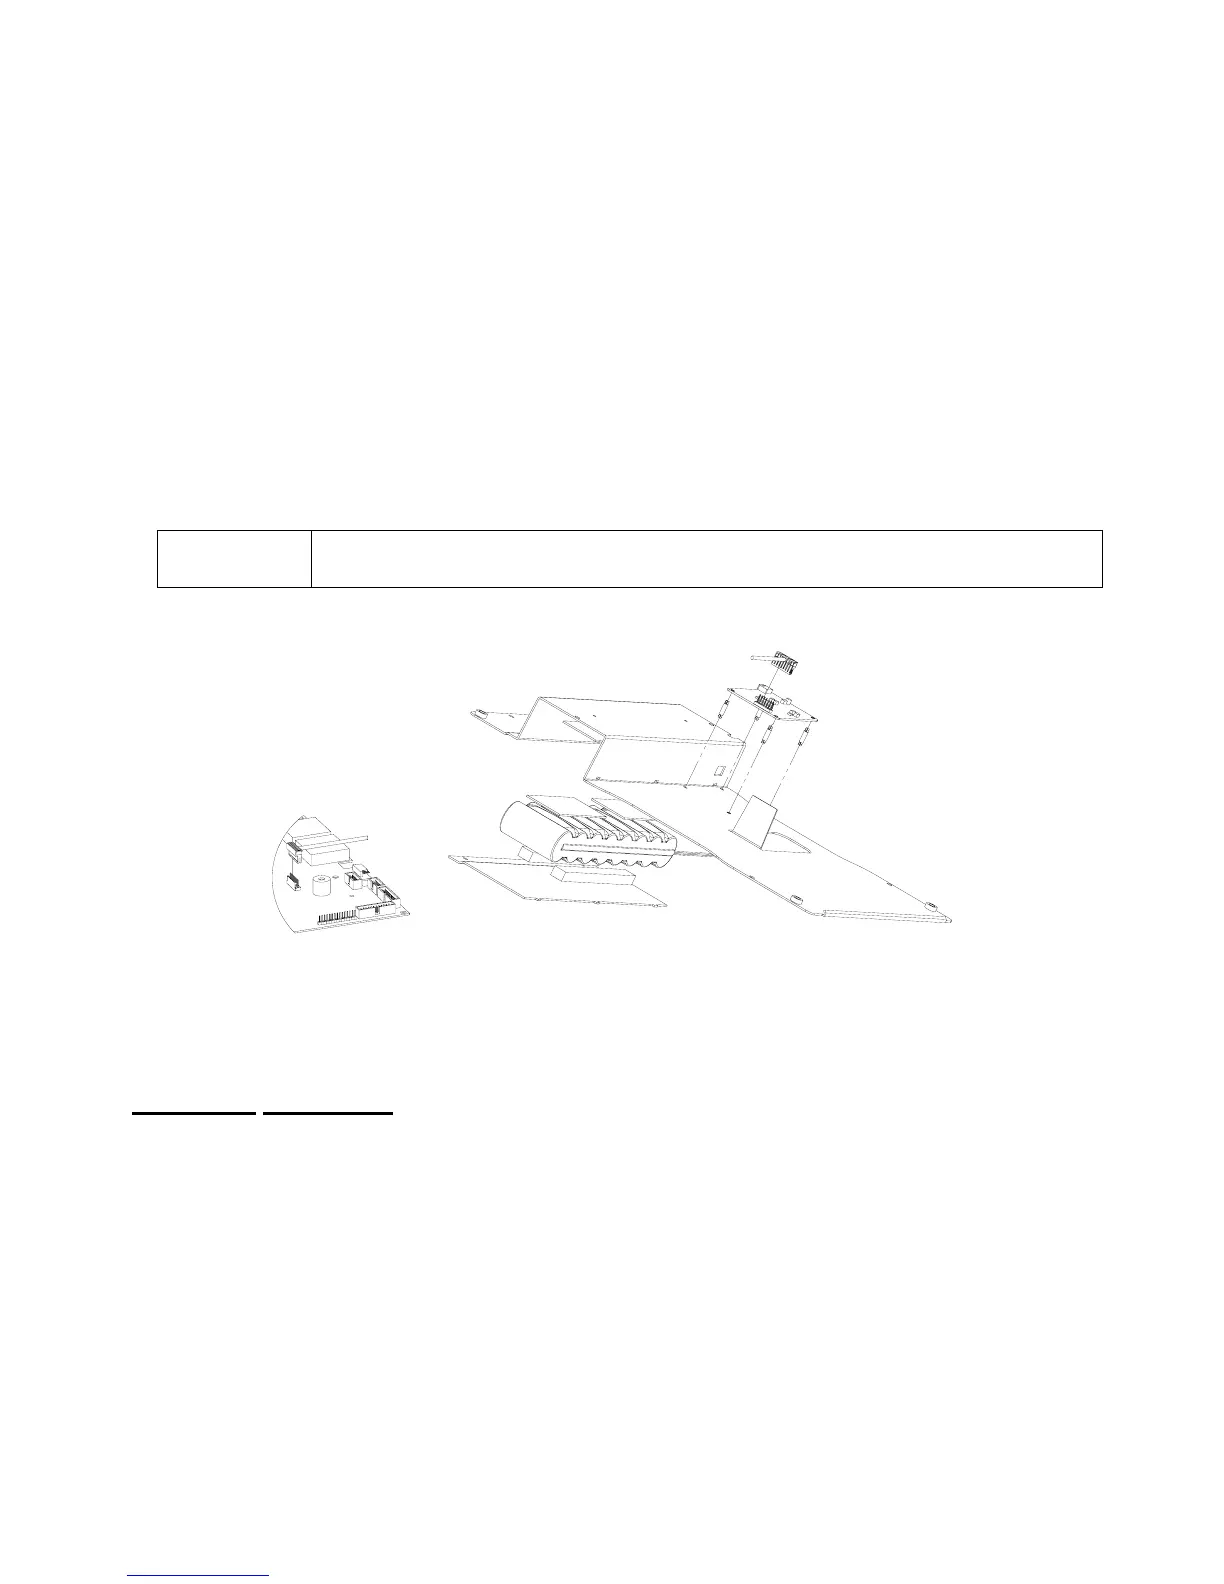
8. Install the hook sided Velcro to the battery cavity.
9. Install the soft-sided Velcro to the battery making sure it is lined up with the Velcro that was placed in the
battery cavity.
10. Connect the battery cable to the J2 connector of the battery charging board.
11. Place the battery in the battery cavity.
12. Install the (2) strips of foam on the battery door.
13. Reinstall the enclosure bottom plate to the enclosure.
14. Install the battery door by aligning the (3) tabs of the battery door with the (3) slots of the enclosure
bottom plate and push the tabs into the slots. The battery door is raised on the end with the screw holes.
Make sure the raised portion of the door is up insuring the battery door is flush.
15. Install (2) 38-26-8112 screws to the battery door and fasten the battery door to the bottom plate.
16. Some older models will not have threaded holes in the bottom cover plate. Use 38-26-8112 self-tapping
screw to create thread. Remove and install thumbscrews.
The 24 hour and 12 hour batteries are not interchangeable. The connectors on both
options are different to avoid damaging the battery pack and/or battery charging board.
Figure 2-1: Rechargeable Battery Installation
E
XTERNAL
B
ATTERY
C
HARGER
Installation Instructions
1. Connect the supplied power cord to IEC connector in the back panel of the charger.
2. Connect the power cord to an AC outlet.
3. Front indicator green light labeled "POWER ON" will turn on.
4. Connect the Model 675 battery pack to the battery connector on the battery charger, which is visible
from the front panel.
5. For the first few seconds after the battery pack is connected, the front indicator light labeled "FAST
CHARGE" will blink.
6. The battery charger performs diagnostics on the battery to determine the state of the battery.
a. If the battery has the required characteristics the charger will start charge cycle. During the
charge period the "FAST CHARGE" red LED will be on continuously.


 To Next Page