2
2. Local Mode Screen 2-13
Local Mode Screen
Setting using the V-SFT Editor
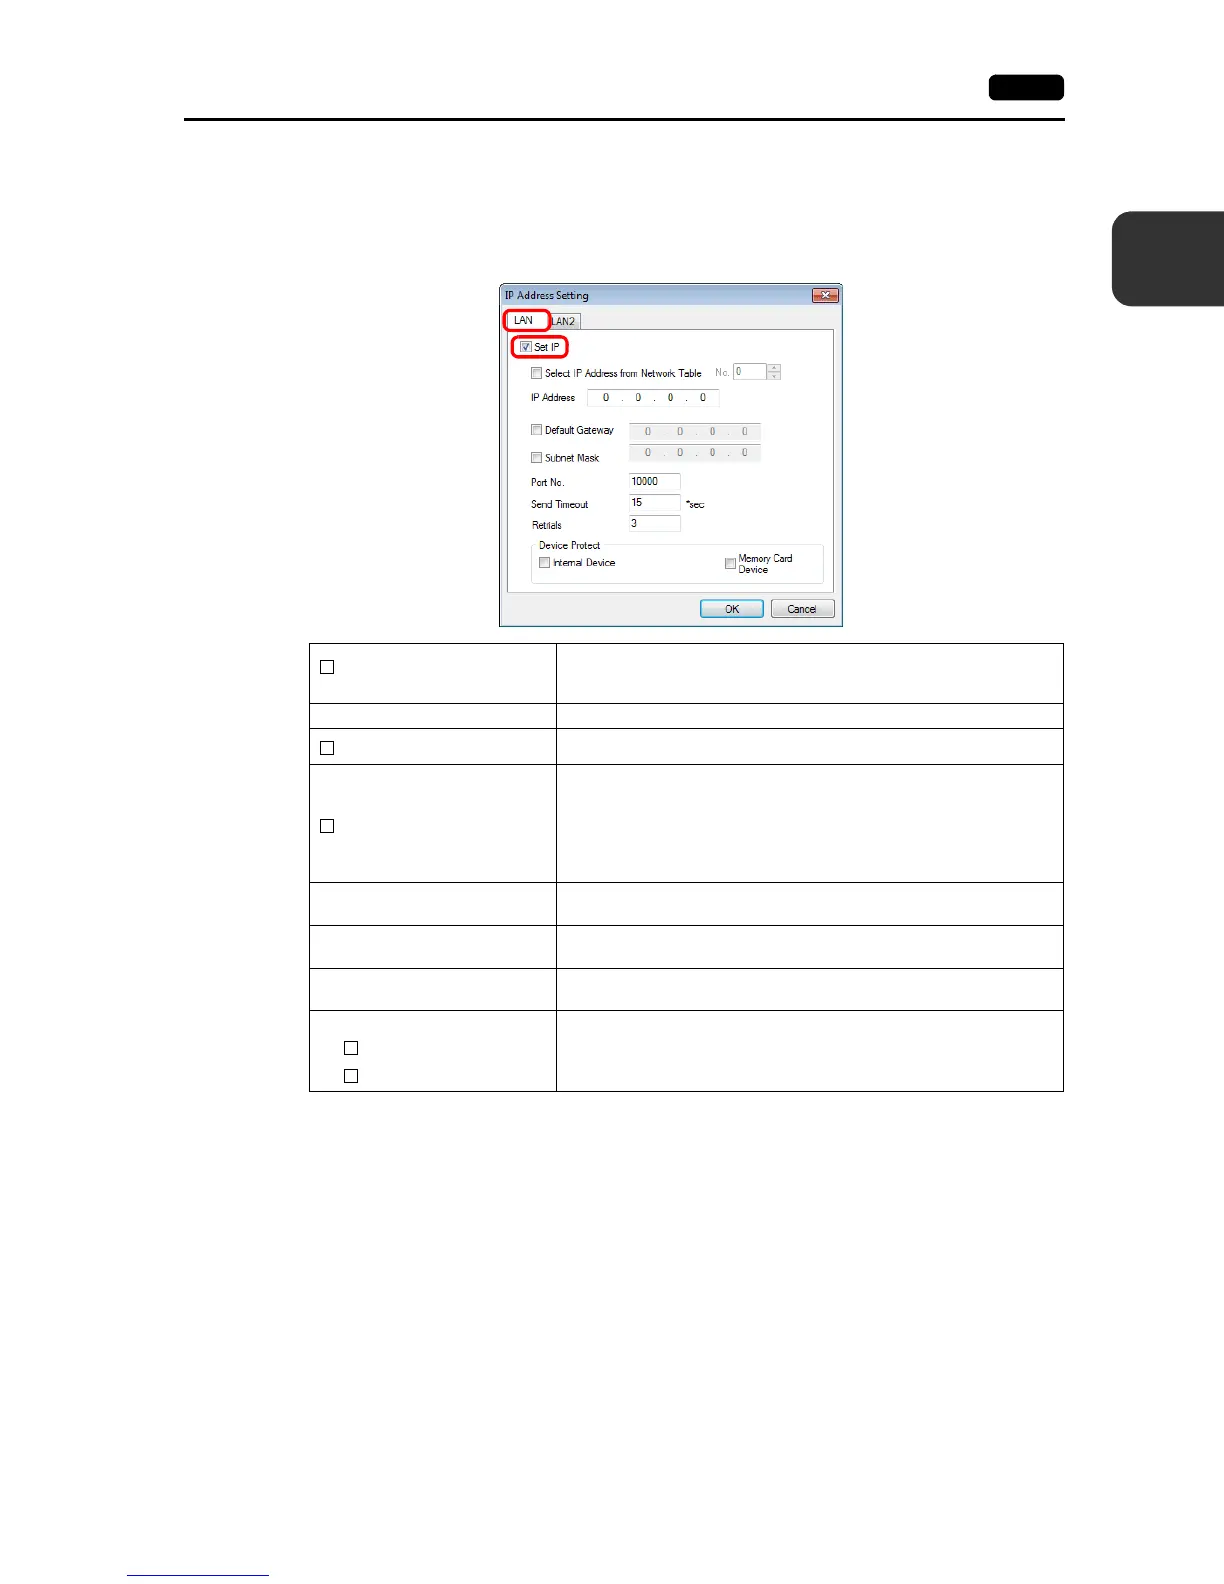
1. Select [System Setting] [Ethernet Communication] [Local Port Address] on V-SFT.
The [IP Address Setting] window is displayed.
2. Select the [Set IP] checkbox in the [LAN] tab window, and set each item.
* For details on the setting items, refer to page 2-14.
3. Click [OK].
4. Transfer the screen program to the V9 series unit.
5. Select the [Restore Screen Data Settings] switch in the [LAN Setting] [IP Setting] tab window in
Local mode, and press the [Apply] switch.
6. Select [System Information] [MONITOUCH Information], and check the contents in the
[Ethernet Information] field.
Select IP Address from
Network Table
This is valid when the IP address of the V9 series unit has been
registered in the network table. Select a network table number from 0 to
255 to set the IP address.
IP Address * Set the IP address for the V9 series unit.
Default Gateway *
Set the default gateway.
Subnet Mask *
Set the subnet mask.
When this box is not checked, the subnet mask is automatically assigned
based on the byte at the extreme left of the IP address.
Example:
IP address 172.16.200.185: “255.255.0.0” is set.
IP address 192.168.1.185: “255.255.255.0” is set.
Port No. *
Set a port number from 1024 to 65535.
(“8001” is not available.)
Send Timeout
Set a timeout period for transmitting macro commands EREAD,
EWRITE, SEND, MES or EWRITE, or Ethernet DLL functions.
Retrials
0 to 255
Set the number of retrials to be performed when a time-out occurs.
Device Protect
Internal Device
Memory Card Device
Select either checkbox to write-protect the device memory from PCs or
other stations.
 Loading...