24
Subject to change without notice
Item Instrument Behavior What to do Remark
5.1 Analog and digital mode:
HAMEG logo has a bright
spot in the top right posi-
tion of the letter G, incre-
asingly unfocused and a
Zoom effect.
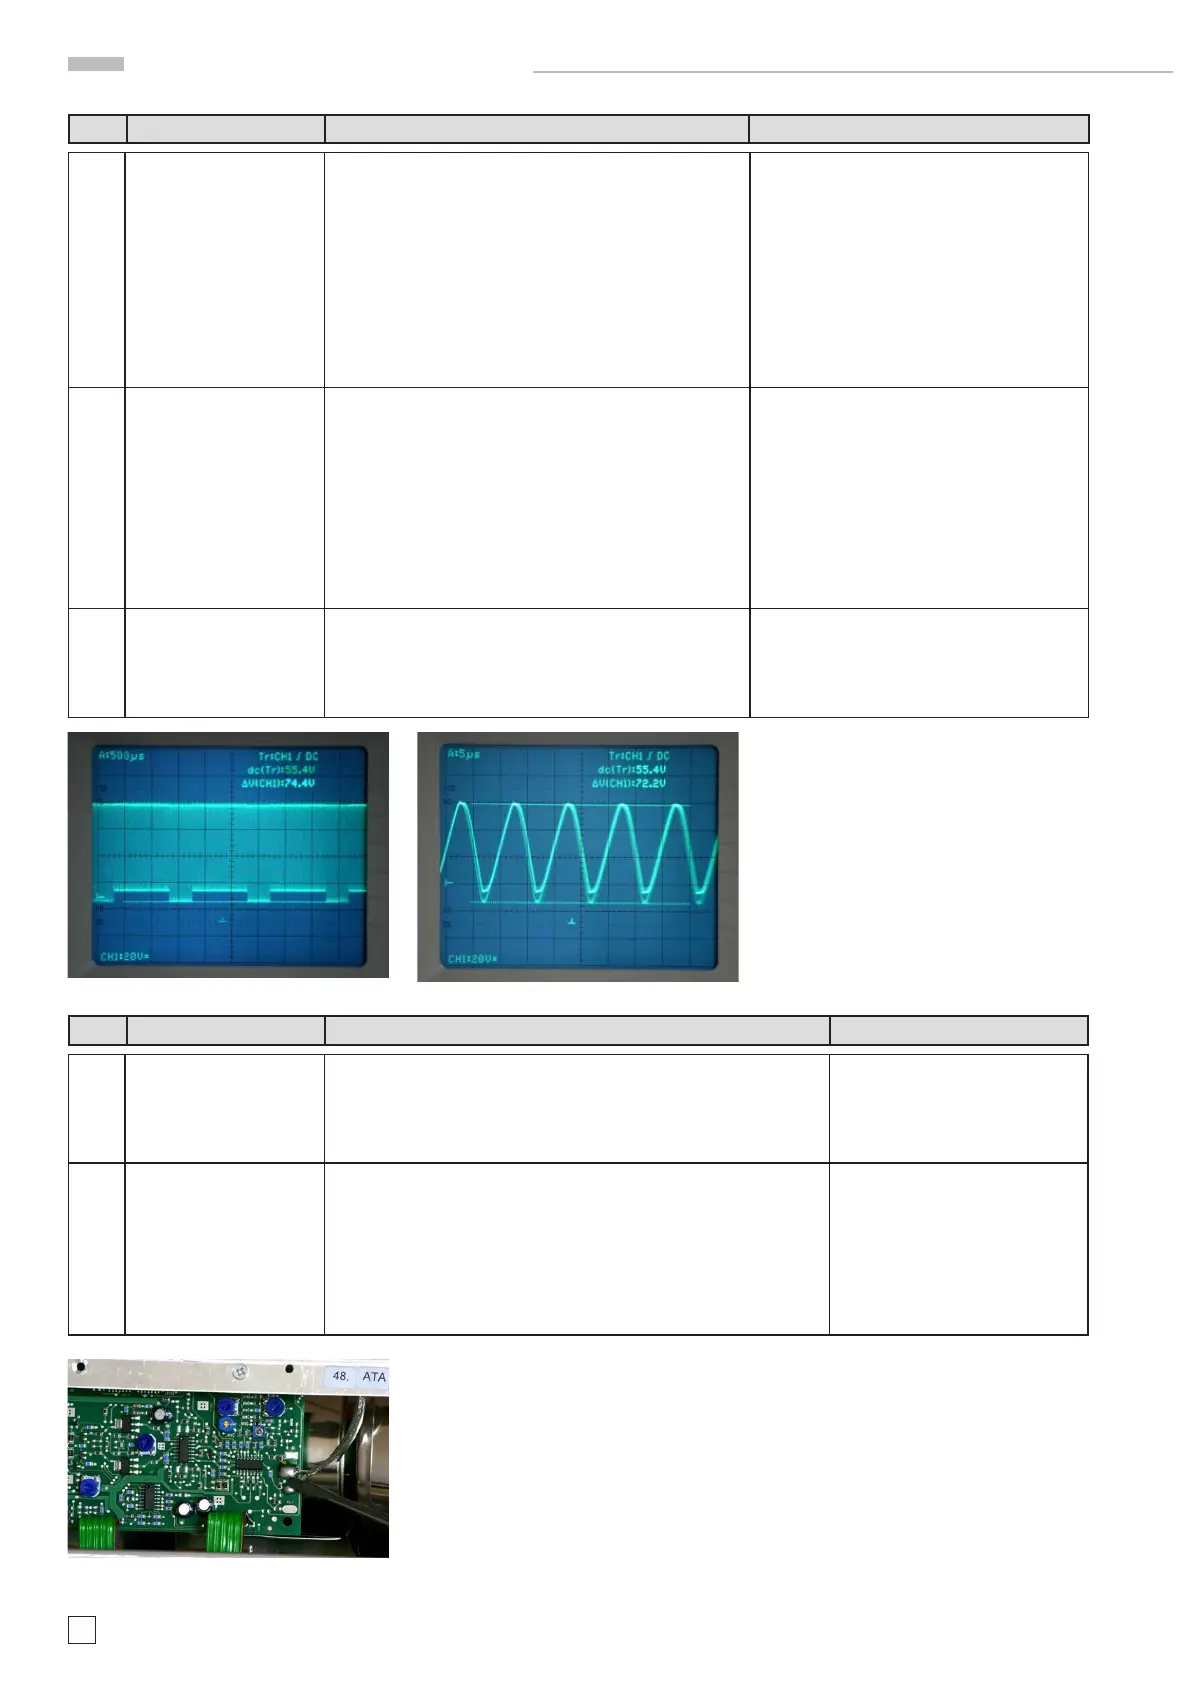
Use an oscilloscope and measure the PUMP_VOL(tage)
via a 10:1 probe at pin 2 of Molex connector J1008 after
the wire to CR board has been disconnected.
The voltage should be similar to a sine wave and should
have a height of approx. 106 Vpp, symmetrical to refe-
rence potential (chassis).
If the voltage is too low, continue with item 5.2 or item
5.3
See photos C5.1.1 and C5.1.2.
Without disconnecting the wire and if gene-
rator (PS board) and load (CR board) have
no error, there should be approx. 74 Vpp
superimposed on approx. 50 V dc.
5.2 Replace the PS (power supply) board after disconnecting
the instrument from mains/line.
After successful replacement:
1. Check and adjust +65 V= and +12V= as described
under item 1 and 2 in the Adjustment Procedu-
re.
2. Press SETTINGS pushbutton, select “Self Cal”
and “Start” the self calibration.
3. Check time base and Y accuracy.
5.3 Replace the CR board and readjust the following items
as described in the Adjustment Procedure:
1. Item 5 (CRT minimum intensity)
2. Item 6 (Focus symmetry)
3. Item 7 (Astigmatism correction)
Item Instrument Behavior What to do Remark
6.1 Analog mode:
No trace visible in dual
and single channel mode;
readout displayed.
Press AUTOSET pushbutton.
If no trace is displayed continue with item 6.2.
6.2 Connect the inner lead and the shielding of the delay line by a wire
(short) or tool.
If the trace is displayed near the vertical screen center position,
change the YP board and as described in the Adjustment Procedure
and make a complete new adjustment of the instrument.
If not, continue with item 6.3.
See photo C6.2.
photo C5.1.1
photo C5.1.2
photo C6.2
HM1508-2 Troubleshooting

 Loading...


