50
H4D
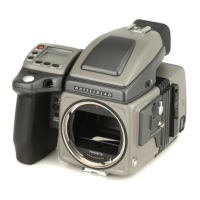
The menu is structured in a manner similar to mobile/cell phones and similar small electronic
devices. Various branches within the tree system are accessed by pressing the navigation
button until you reach the point where a choice has to be made.
The
OK
(Approve) button or
SELECTION
(
ZOOM IN /
ZOOM OUT
) buttons are then used to
con rm choice.
Both the front and rear control wheels can also be used to navigate the menu. The rear con-
trol wheel navigates up and down the menu list and the front control wheel navigates side-
ways in the direction of the menu arrows. The front control wheel also functions in the same
as way as the plus and minus button functions for settings choice.
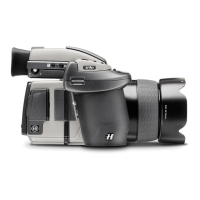
The need to continue further into the menu is indicated by the arrow symbol beside
the menu item.
Press the ‘right’ arrow symbol on the navigation button to access the next part of
the menu.
Introductory overview of menu access, navigation and settings choice.
After pressing the
MENU
button, the main menu list appears. The blue frame high-
lights where you are on the menu. Press on the ‘up’ and ‘down’ symbols on the
navigation button to move up and down the list.
You can return to the standard image view by pressing either on the ‘left’ symbol on
the navigation button or on the
EXIT/MENU
button again.
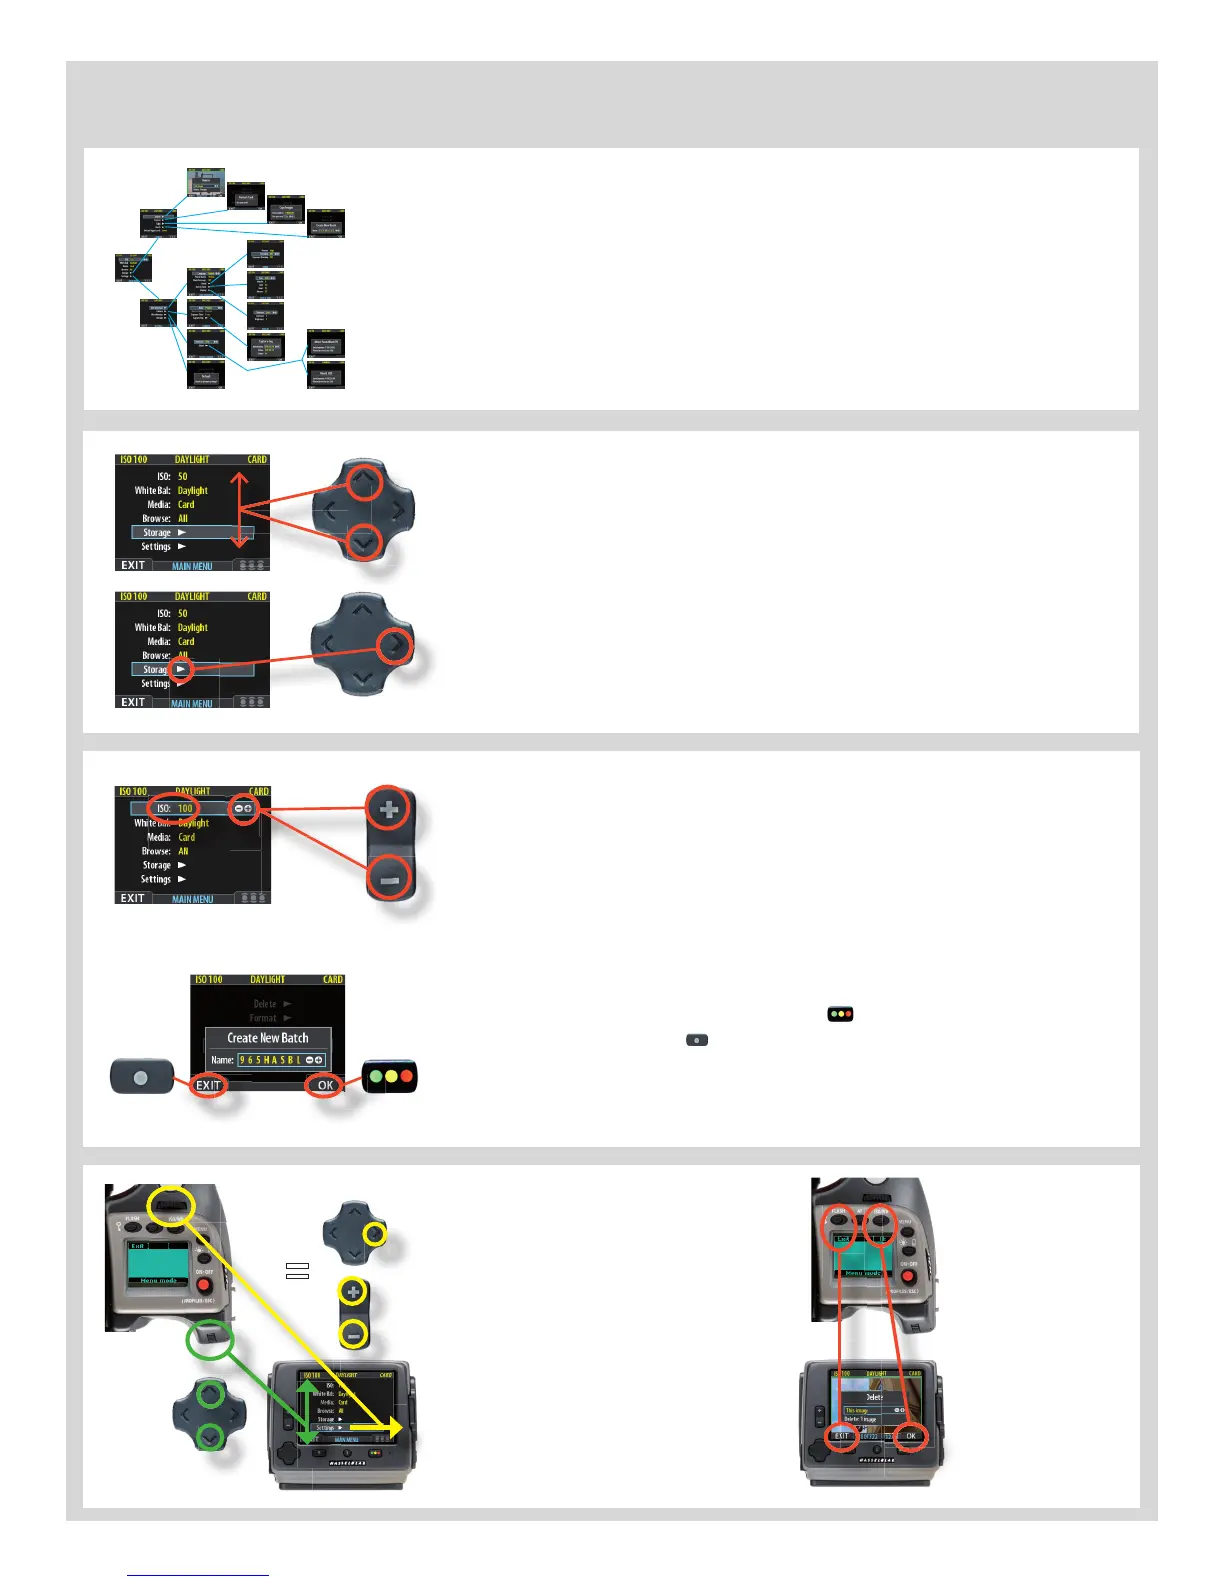
When you reach the nal destination of your choice (this might take several moves),
PLUS
and
MINUS
symbols appear to the right in the frame round the item. You then
press the
ZOOM IN /
ZOOM OUT
buttons to access a loop list of choices.
In the example on the left, 100 is the ISO value shown. By pressing either button
the alternatives appear – 200, 400, etc and then back to 100 again. Pressing the
EXIT/MENU
button will then confirm the new setting.
In the next example on the left, the name of a new batch is changed by pressing a
combination of the
ZOOM IN /
ZOOM OUT
buttons as well as the navigation button.
You can then con rm your choice with the
OK
( ) button or revert to the previous
status by pressing the
EXIT
( ) button. Note that how the
MENU
button is now
described as
EXIT
on the display, and the Approval button is described as the
OK
button. See later sections for more comprehensive information.
The
FLASH
button
on the grip also
acts as a men
u EXIT
button and the
ISO
/WB
button acts as
an
OK
button.
The rear control wheel navigates up
and down the menu list and the front
control wheel navigates sideways in
the direction of the menu arrows.
The front control wheel also func-
tions in the same as way as the
ZOOM
IN
and
ZOOM OUT
button functions
for settings choice.
(The wheel can be set in Custom Op-
tions #17).
=
=