Wheel Alignment AXIS500
AXIS500 Manual Instructions
5 Front Wheel Alignment
5.1 Preparations
• Carry out alignment on level ground.
• Remove protective caps of wheel nuts or caps
respectively.
• Clean rim between wheel nuts.
• Check tire pressure and, if necessary, adjust as
specified.
Drive vehicle onto turning plates
• Place turning plates centrally in front of the wheels.
• Fasten turning plates with bolt to avoid torsion.
• Drive vehicle on turning plates. The wheel centre
shall be positioned in the turning plate centre.
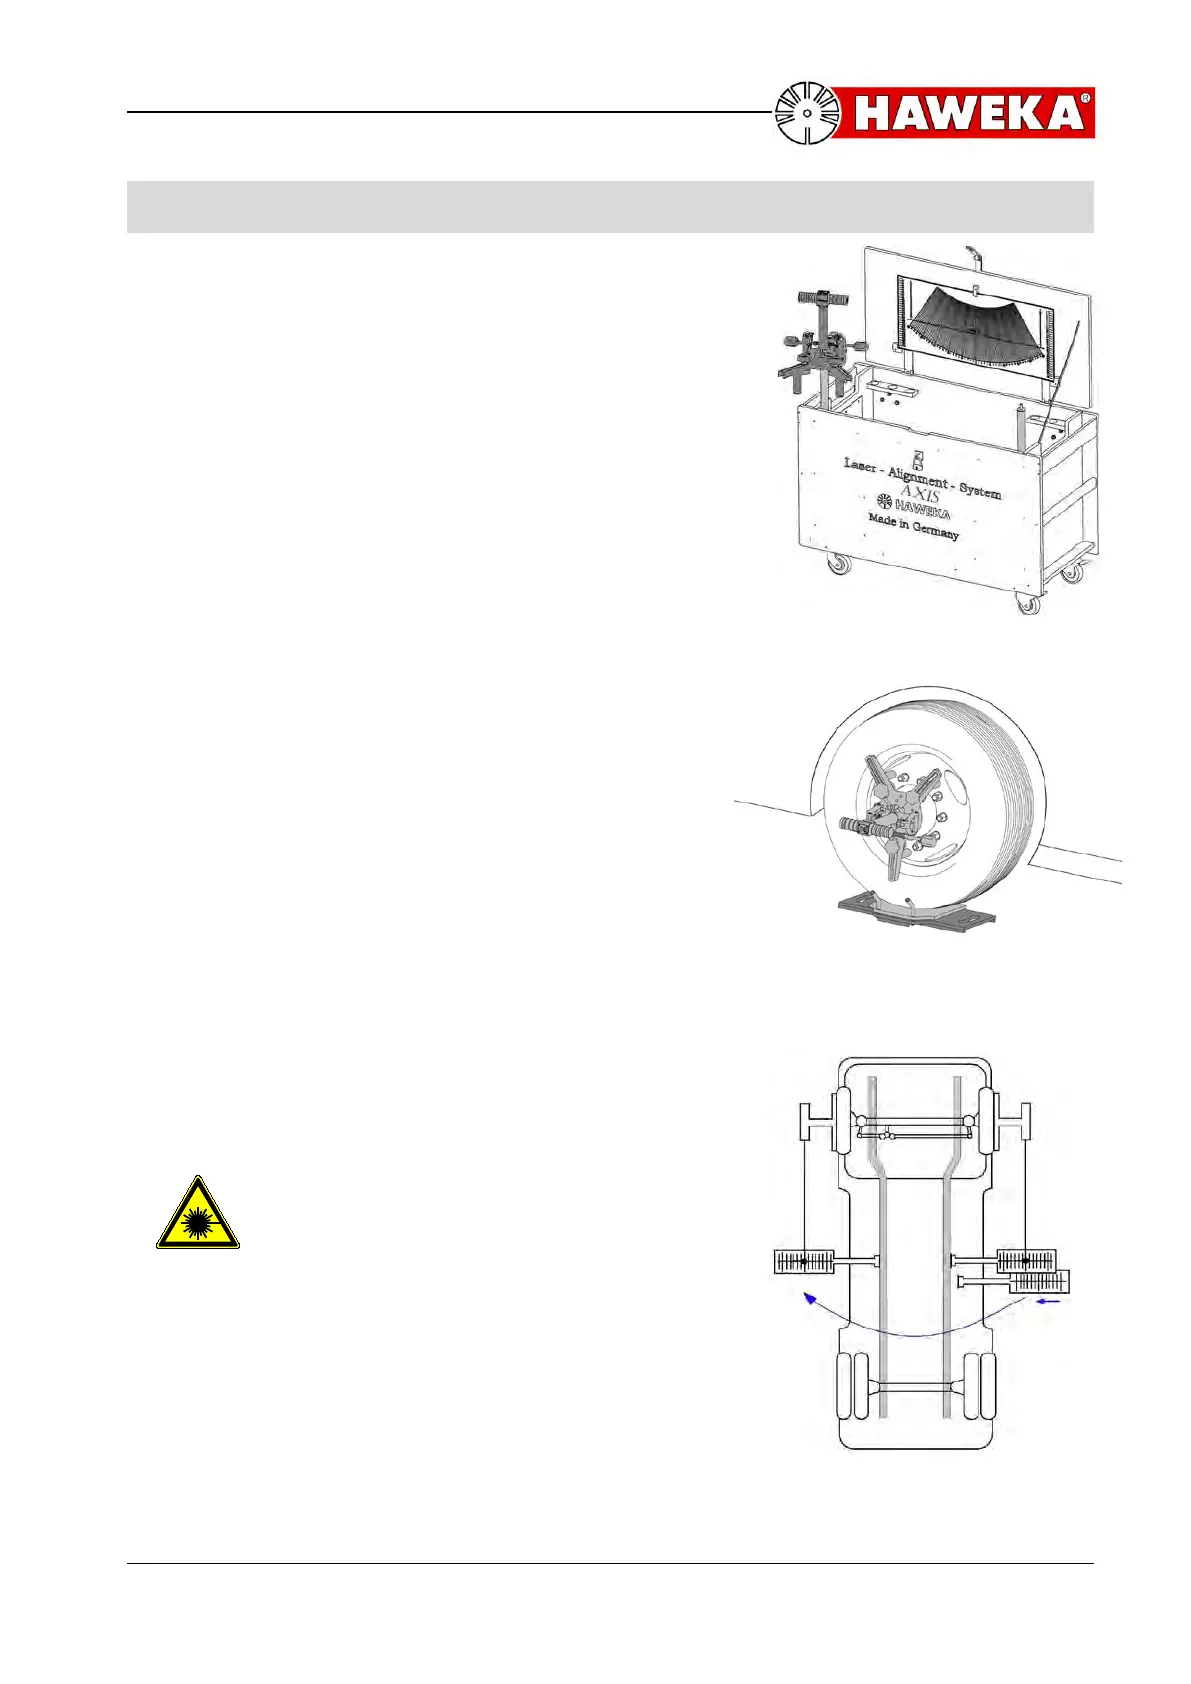
Mounting of laser measuring heads (Illustration 1)
• The magnetic feet of the 3-arm-star have to be
adjusted to the proper rim diameter. It is
recommended to fix the laser measuring head onto
a mounting stand of instrument cabinet (Illustration
1).
• Adjust magnetic cams by turning and shifting to
achieve all-over attachment of rim flange diameter
between wheel nuts.
• Put the measuring heads with the magnets onto the
rim flange. Two magnets shall be placed above the
wheel centre and one below. (Illustration 2).
Fitting of magnetic scales
• Put the front wheels in the straight ahead position by
turning the steering wheel. (Illustration 2)
• Fix the first scale on the right-hand side of the
frame, if possible in the middle (regarding
lengthwise direction).
• Switch on laser on the right-hand side.
(left hand drive vehicles, vice versa for RTA)
Pay attention to laser beam output
opening before switch on!
• Turn right-hand laser until the laser point gets visible
on the magnetic scale.
• Adjust scale with wing nut until the laser point
indicates »0«.
• Repeat the same procedure with the second scale
on the right-hand side. Now the magnetic scales
have the same length and must not be changed
again!
• Attach one of the two scales on the left-hand
side, if possible in the same place (Illustration 3). (Illustration 3)