Wheel Alignment AXIS500
AXIS500 Manual Instructions
10 Checking the Wheel Alignment Clamp
The wheel alignment clamp is installed on the rim and a scale (e.g. the magnetic scale or
the floor gauge) is positioned so that the laser points onto the scale at a distance of a
minimum of 3 metres.
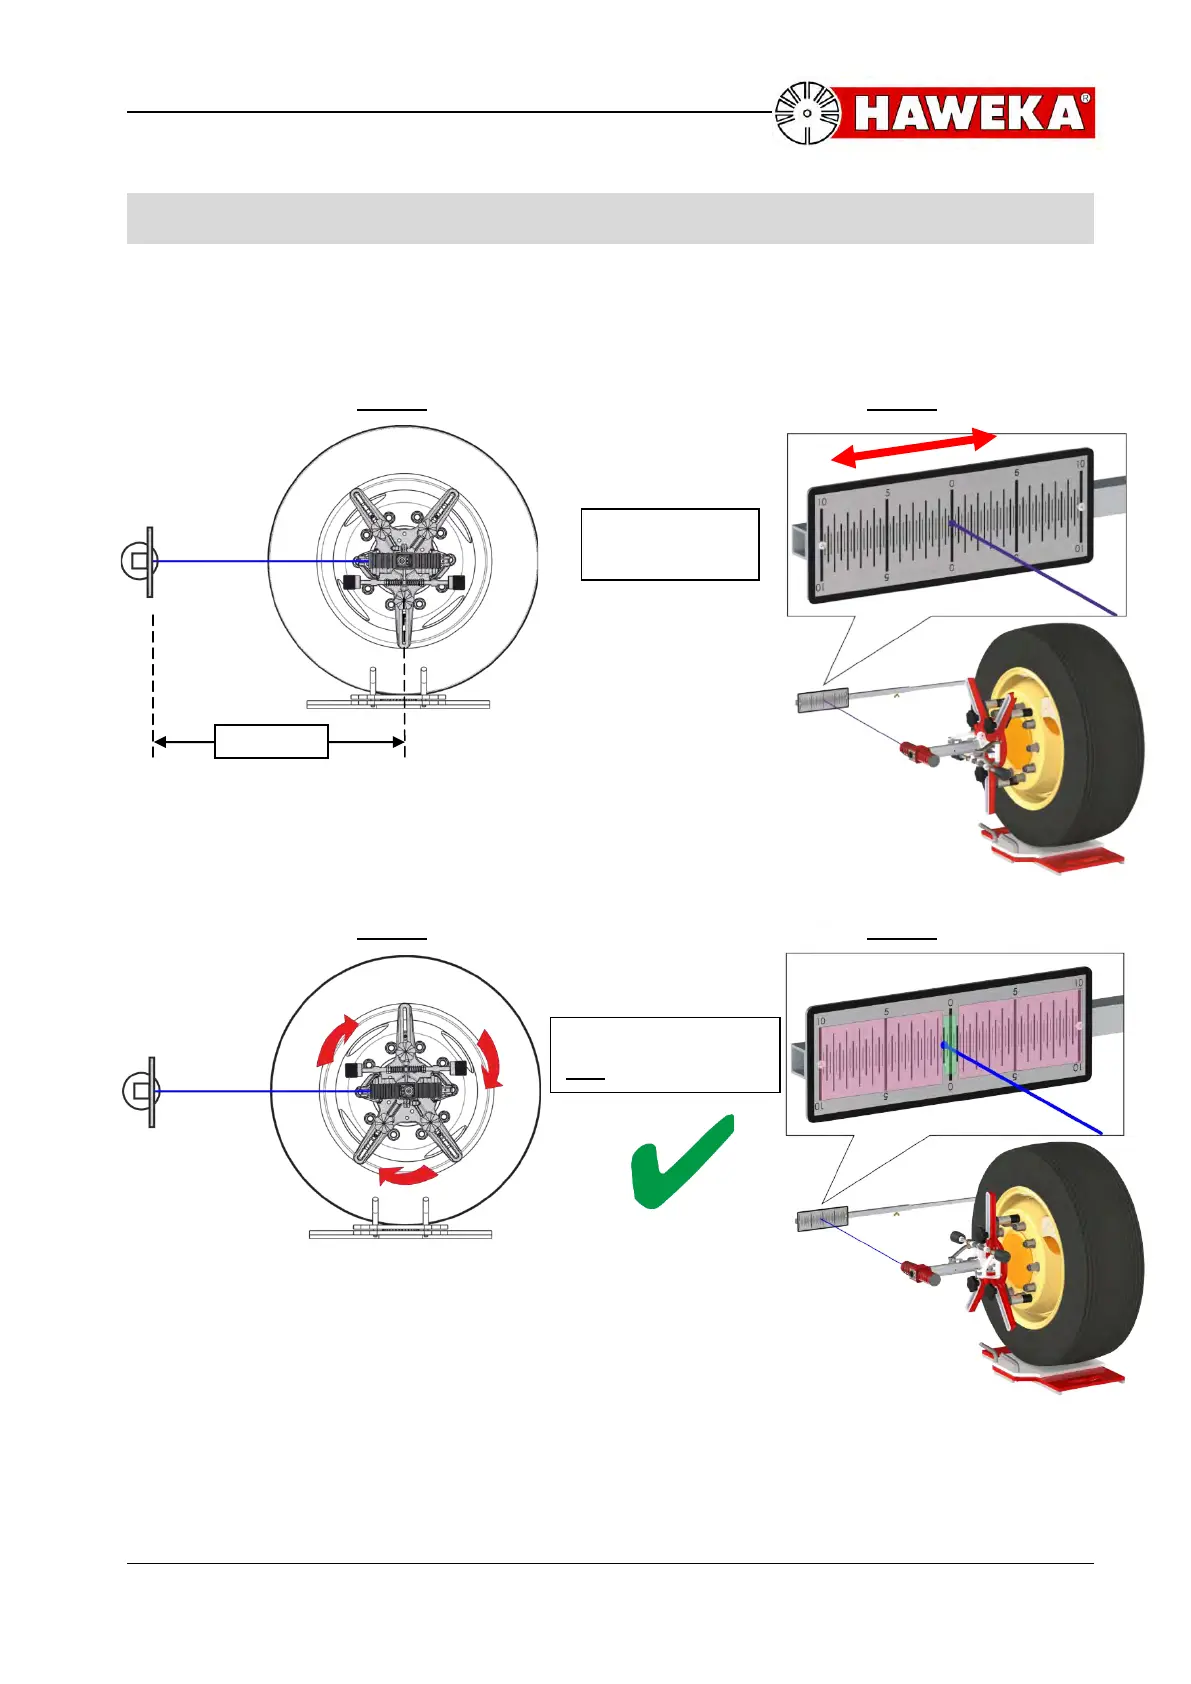
Step 1 Step 2
The laser is switched on and the scale is now displaced sidewards
until the laser beam points to the value “0”.
Step 3 Step 4
Subsequently, remove the wheel alignment clamp and, at 180
degrees, again install on the rim and align the laser to the same
scale. Now read the value on the scale.
If there is a deviation of more than 0.5 mm (here, 1 half of a division at a distance of 3 m)
present between the measurements, the wheel alignment clamp must be readjusted.
For this, please contact your sales partner for the wheel alignment clamp.
Repeat the process for all wheel alignment clamps on your system.
half of a division