7
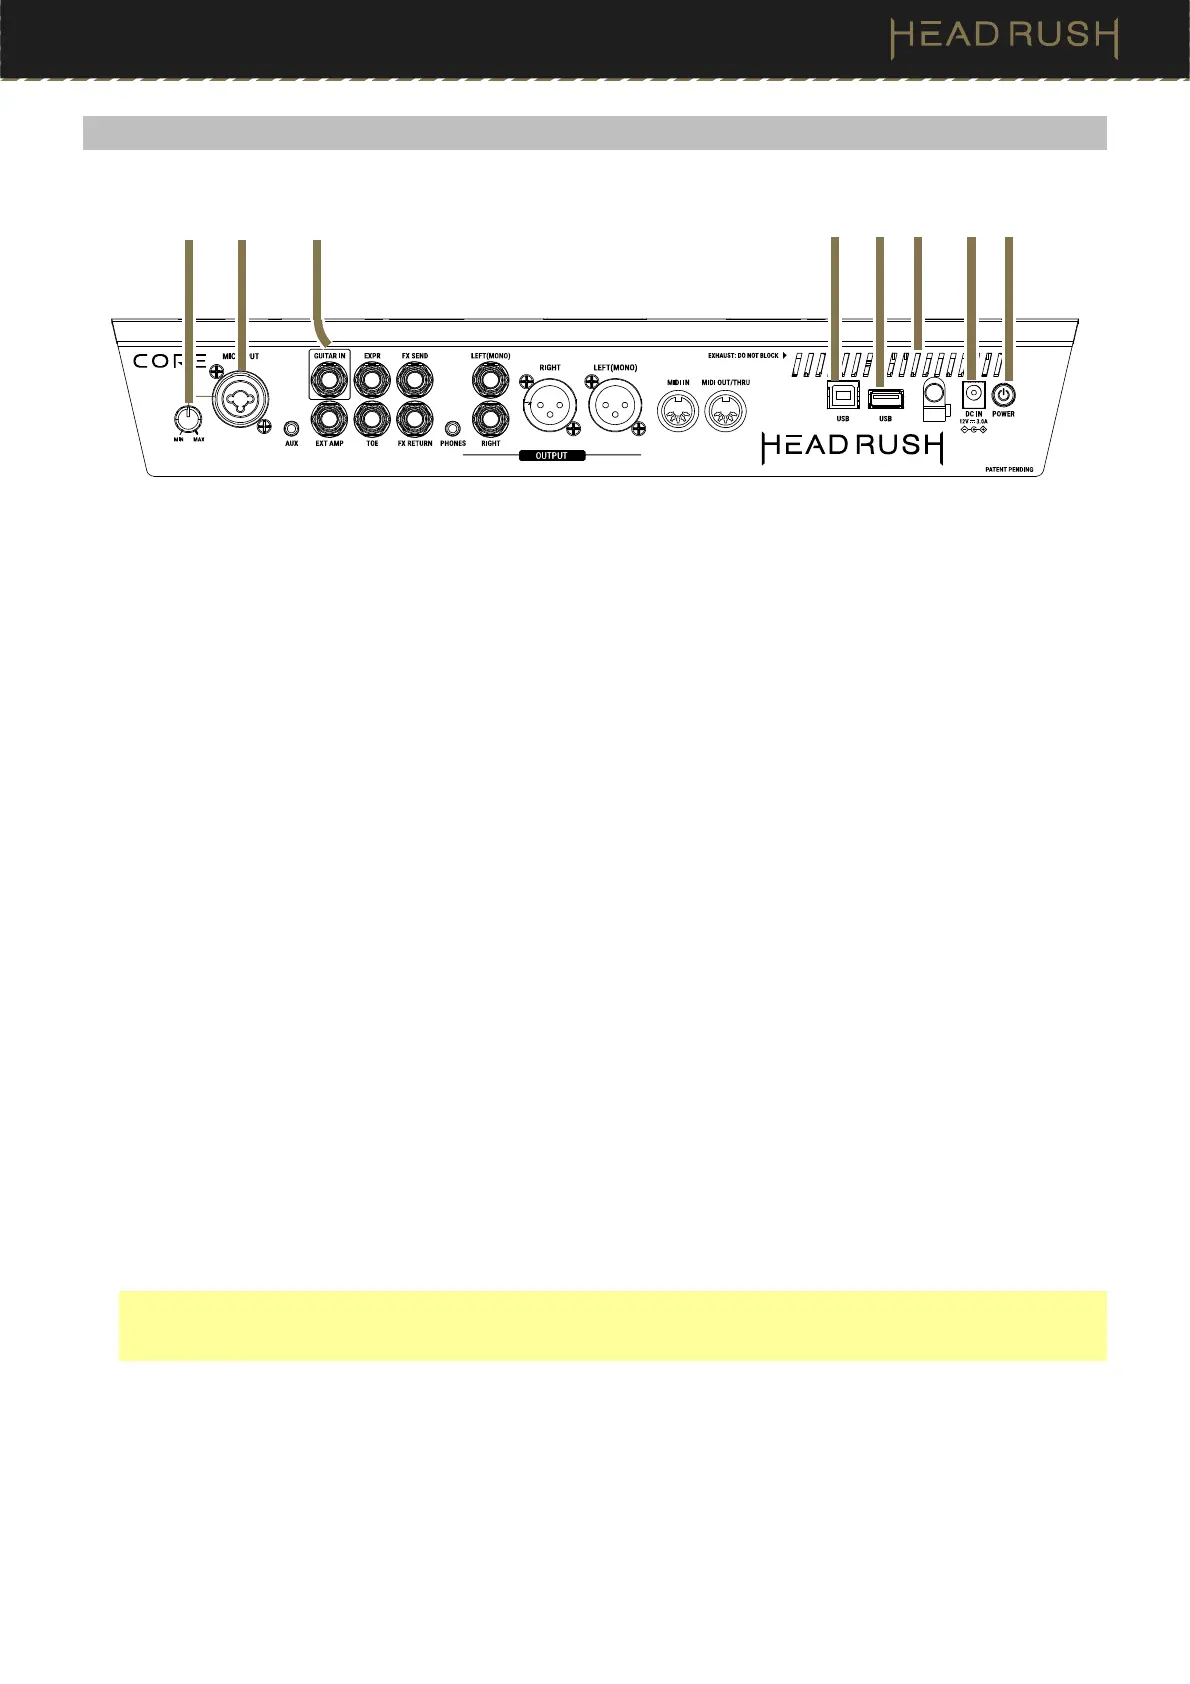
(3.2) Rear Panel
1. Power Input
Connect this input to a power outlet using the included power cable.
2. Power Switch
Press this button to turn HeadRush Core’s power on.
3. Vent
Make sure this vent is unobstructed while using HeadRush Core.
4. USB-B Port
Connect this USB port to a computer using a standard USB cable. This connection allows HeadRush Core to send
and receive the digital audio signal to and from your computer. You can also use this connection to import or export
rigs, block presets, setlists, loops, clones, and tracks for the practice tool. See (4.15) USB for more information.
5. USB Type-A Port
Connect a USB flash drive to this USB port for additional storage. A class-compliant USB device can also be
connected to this USB port for external MIDI control.
6. Guitar Input (1/4”/6.35 mm, TS)
Connect your guitar to this input using a standard instrument cable.
7. Mic Input (XLR or 1/4”/6.35 mm, balanced)
Connect a microphone to this input using a standard XLR or 1/4” (6.35 mm) microphone cable. You can enable
or disable +48V phantom power for these inputs in the (4.20.2) Global Settings > Audio menu.
Important: Only enable phantom power if your microphone requires it. Most dynamic microphones and ribbon
microphones do not require phantom power, while most condenser microphones do. Consult your microphone's
documentation to find out whether it needs phantom power.
8. Mic Input Gain
Use this knob to adjust the level of the Mic Input. View the current level of the microphone by double tapping
the input block to make sure the level is not low or clipping.
1
2
3
4 5
6
78