5. Install tube and cassette
CAUTION: use only those combinations of multi-channel pump heads, cassettes, and hoses
specified in reference table (chapter 15). Deviation will increase wear or cause malfunction.
5.1. Cassette "small"
Disconnect pump drive before installing or uninstalling cassettes, to avoid
contusion hazard.
- The tube cassette system installs and
uninstalls at ease (snap-on); no extra
tooling required for this work. Since tube
cassettes may work in both directions, no
particular orientation of the cassette is
required. Despite this fact, we recommend
to arrange cassettes alternatingly, for ease
of access to the setting knobs of every
single cassette in a stack.
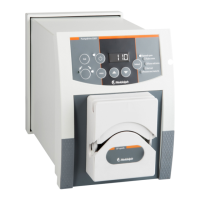
- Turn contact pressure setting knob (59) (fig.
32) to max. clearance (counter-clockwise);
You do not need to do this work if you
haven't touched the factory setting before,
or contact pressure had been set for actual
pumping work before.
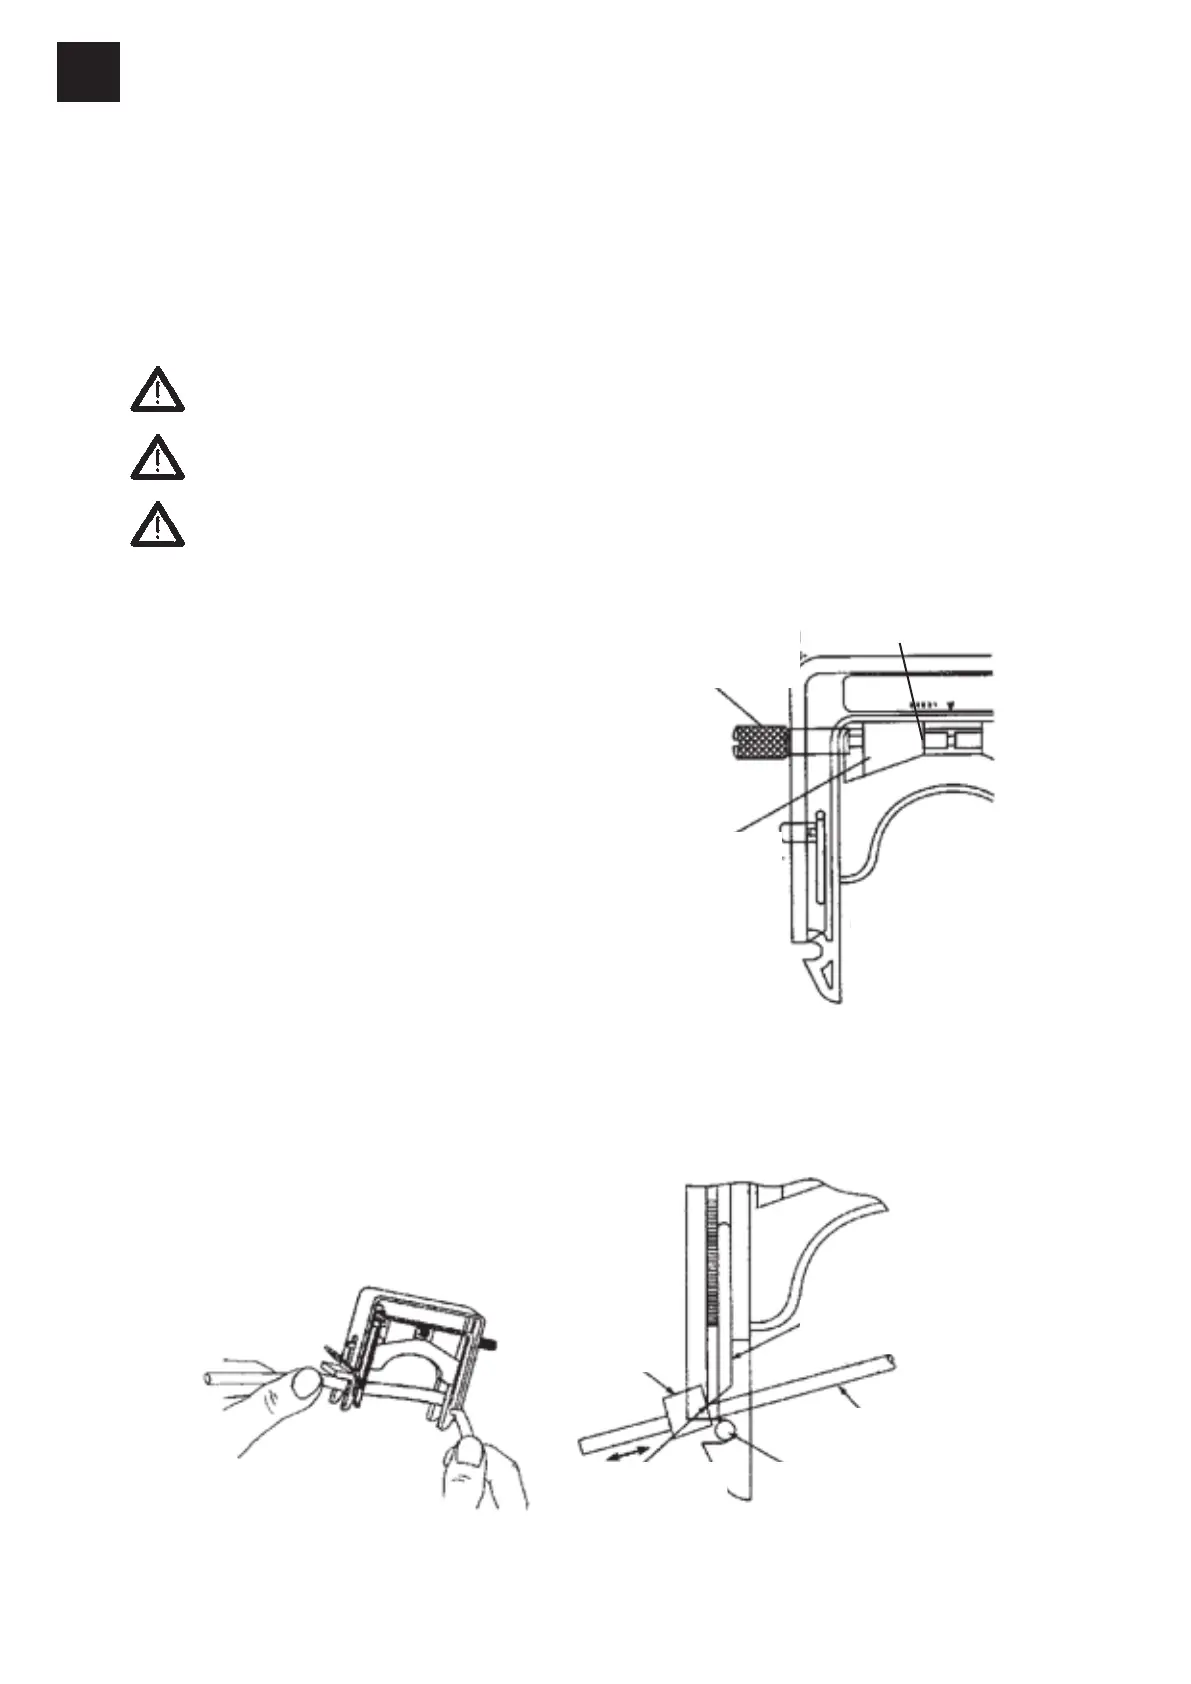
- Load approved 2-stop-tubing in cassette
(refer to fig. 33). Slip stopper on both ends
of the cassette to the tube holder (refer to
fig. 34).
- Hook tube cassette over one of the carrier rods, while holding tube between cassette feet
and pressi
ng its against the tube holder (refer to figs. 34 & 35).
 Loading...