î Tighten the adjusting nuts lightly, and then
tighten the lock nuts by holding the adjusting
nuts with an open end wrench.
1
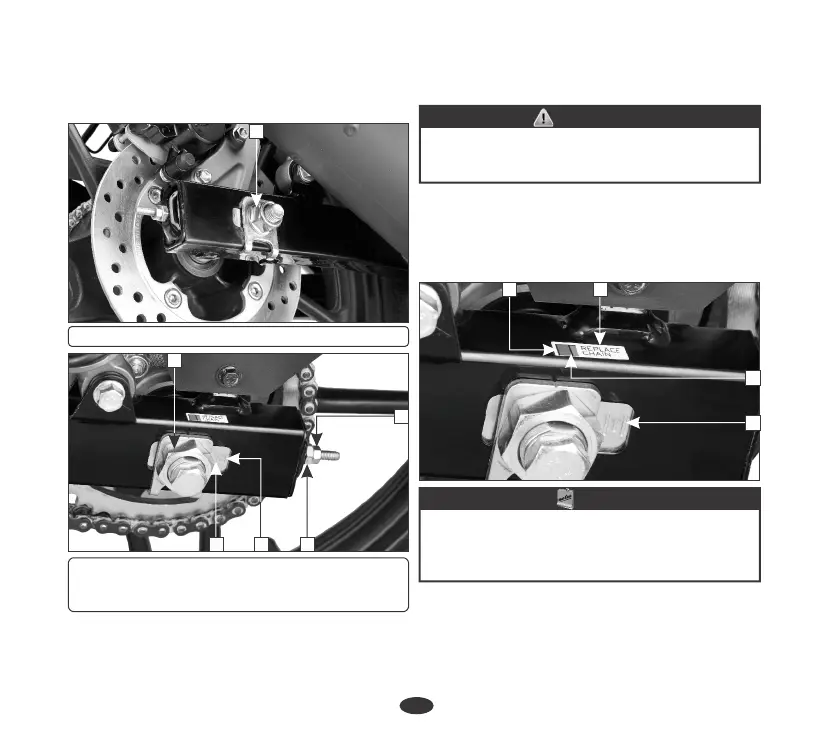
(1) Rear axle nut
3
2
465
(2) Sleeve nut (3) Drive chain lock nut
(4) Drive chain adjusting nut (5) Index mark
(6) Rear edge of adjusting slot
Check the rear brake pedal free play and
adjust as necessary (page 43).
î Recheck the drive chain slack. Rear brake
pedal free play is affected when repositioning
the rear wheel to adjust drive chain slack.
If a torque wrench is not used for installation, see
your authorized Hero MotoCorp workshop as
soon as possible to check for proper assembly.
WARNING
Drive Chain Wear Indicator
If after adjustment of drive chain slack the
double headed arrow (1) reaches the red line
(2) on the wear indicator label (3), the drive
chain kit has to be replaced.
3
1
2
4
When a new drive chain kit is installed adjust the
drive chain slack and then attach a new wear
indicator label while aligning the double headed
arrow with the black line (4) on the label.
NOTE
Cleaning and Lubrication
Lubricate every 1000 km or sooner if the
chain appears dry.
î Turn the engine off, raise the rear wheel off
the ground by placing a support block under
40