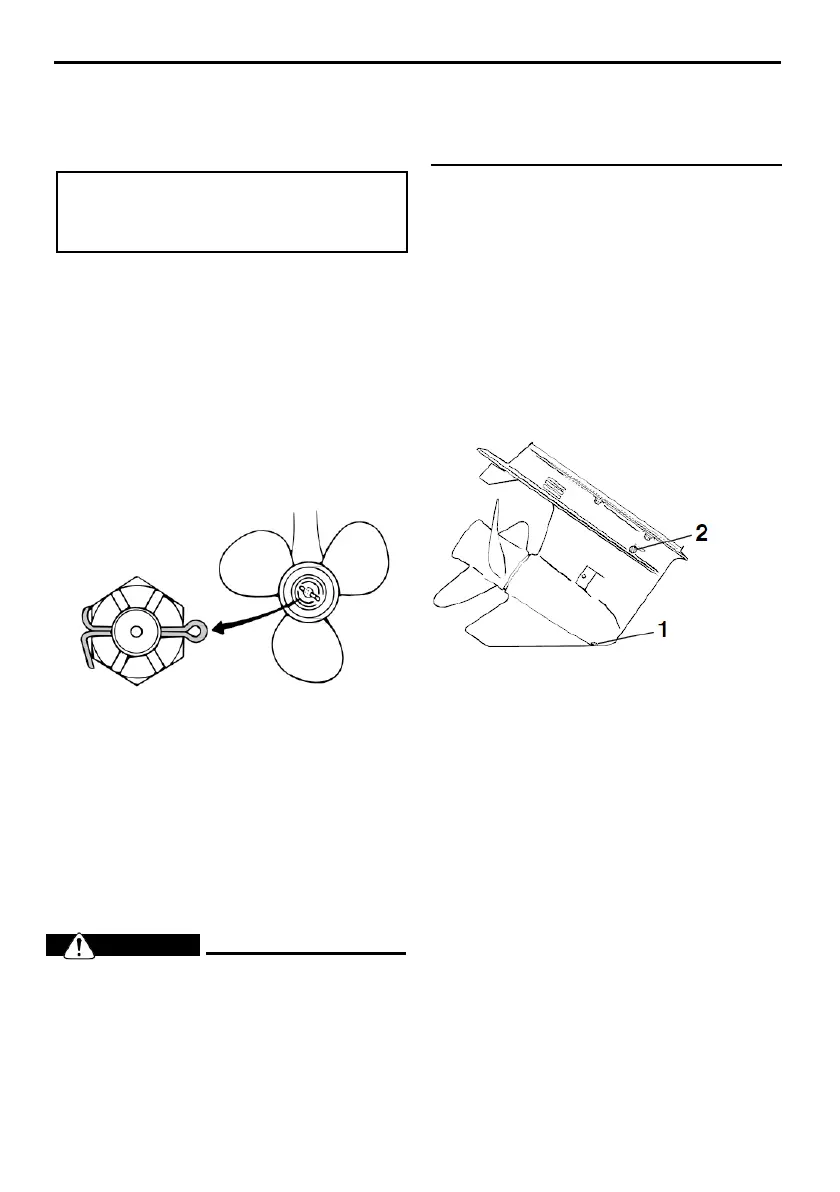
3. Install the spacer (if equipped) and the
washer. Tighten the propeller nut to the
specified torque.
Propeller nut tightening torque:
F40 35.0 Nm (3.57 kgf-m, 25.8 ft-lb)
F60 35.0 Nm (3.57 kgf-m, 25.8 ft-lb)
4. Align the propeller nut with the propeller
shaft hole. Insert a new cotter pin in the hole
and bend the cotter pin ends. NOTICE: Do
not reuse the cotter pin. Otherwise, the
propeller can come off during operation.
or knob is locked. Severe injury could
occur if the outboard motor accidental- ly
falls.
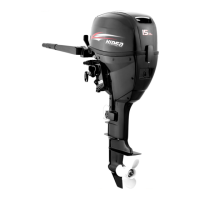
1. Tilt the outboard motor so that the gear
oil drain screw is at the lowest point pos-
sible.
2. Place a suitable container under the
gear case.
3. Remove the gear oil drain screw and
gasket. NOTICE: If there is an excessive
quantity of metal particles on the
magnetic gear oil drain screw, this can
indicate lower unit problem. Con- sult
your Hidea dealer.
TIP:
1. Gear oil drain screw
2. Oil level plug
If the propeller nut does not align with the
propeller shaft hole after tightening to the
specified torque, tighten the nut further to
align it with the hole.
Changing gear oil
WA RNING
●
Be sure the outboard motor is securely
fastened to the transom or a stable stand.
You could be severely injured if the
outboard motor falls on you.
●
Never get under the lower unit while it
is tilted, even when the tilt support lever
TIP:
●
If a magnetic gear oil drain screw is
equipped, remove all metal particles from
the screw before installing it.
●
Always use new gaskets. Do not reuse the
removed gaskets.
4. Remove the oil level plug and gasket to
allow the oil to drain completely. NOTICE:
Check the used gear oil after it has been
drained. If the gear oil is milky or
contains water or a large amount of metal
particles, the gear case may be damaged.
Have a Hidea dealer check and repair
the