2-6
Installing Remote Enable/Disable
Trackspot User Manual
Address Switches
The address switch settings determine either the fixture’s numerical
order in a link or its starting channel. The control mode you chose
determines how you set the address switches. See Table 2-4 for
address switch settings.
Installing Remote Enable/Disable
If your Trackspot fixtures are operating in stand alone mode, you can
remotely enable/disable the fixtures by installing either a remote SPST
switch or an external voltage source.
Warning: Unplug the fixture before installing remote
enable/disable.
You will need:
• either a SPST (single-pole, single-throw) switch or a 10 volt source
(such as a battery, a 0-10 volt analog control source, etc.)
• suitable length of 18-24 gauge two-conductor wire (The gauge of
conductor you need will depend on the distance from your remote
switch or external voltage source to the master fixture.)
• one male 8-pin DIN connector
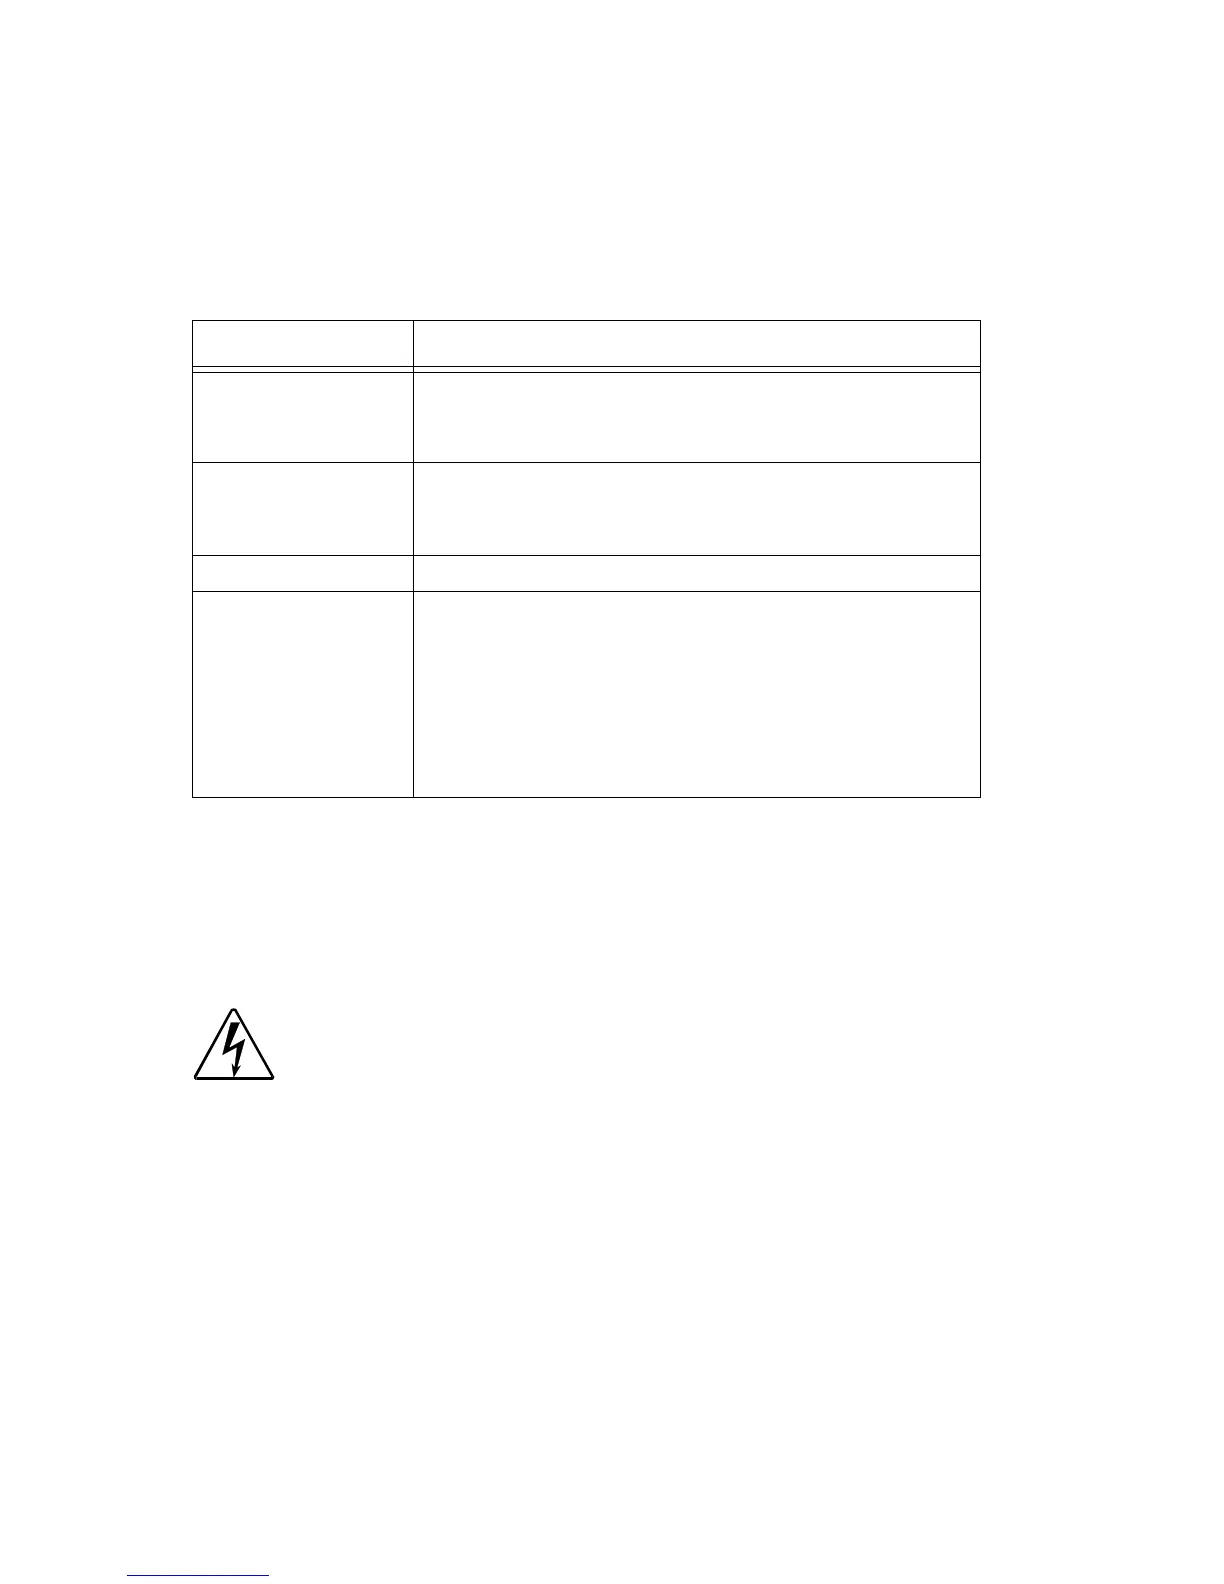
Table 2-4. Address switch settings
Control Mode Address Switch Settings
DMX 512
Set each fixture’s address switches to its starting
channel using either high or low resolution mode
(see Table A-1 on page A-2).
LWR Protocol
Set each fixture’s address switches to represent the
fixture’s sequential numerical order in the link (see
Table C-2 on page C-2).
Standard Analog Set all address switches OFF.
Stand Alone
(Master/Slave)
On the master Trackspot fixture, set the address
switches to represent the
total
number of Trackspot
fixtures in the link (including the master).
On each slave fixture, set the address switches to
represent the fixture’s numerical order in the link.
See Table C-2 on page C-2 for address switch
settings.