3-8
Replacing Parts
Trackspot User Manual
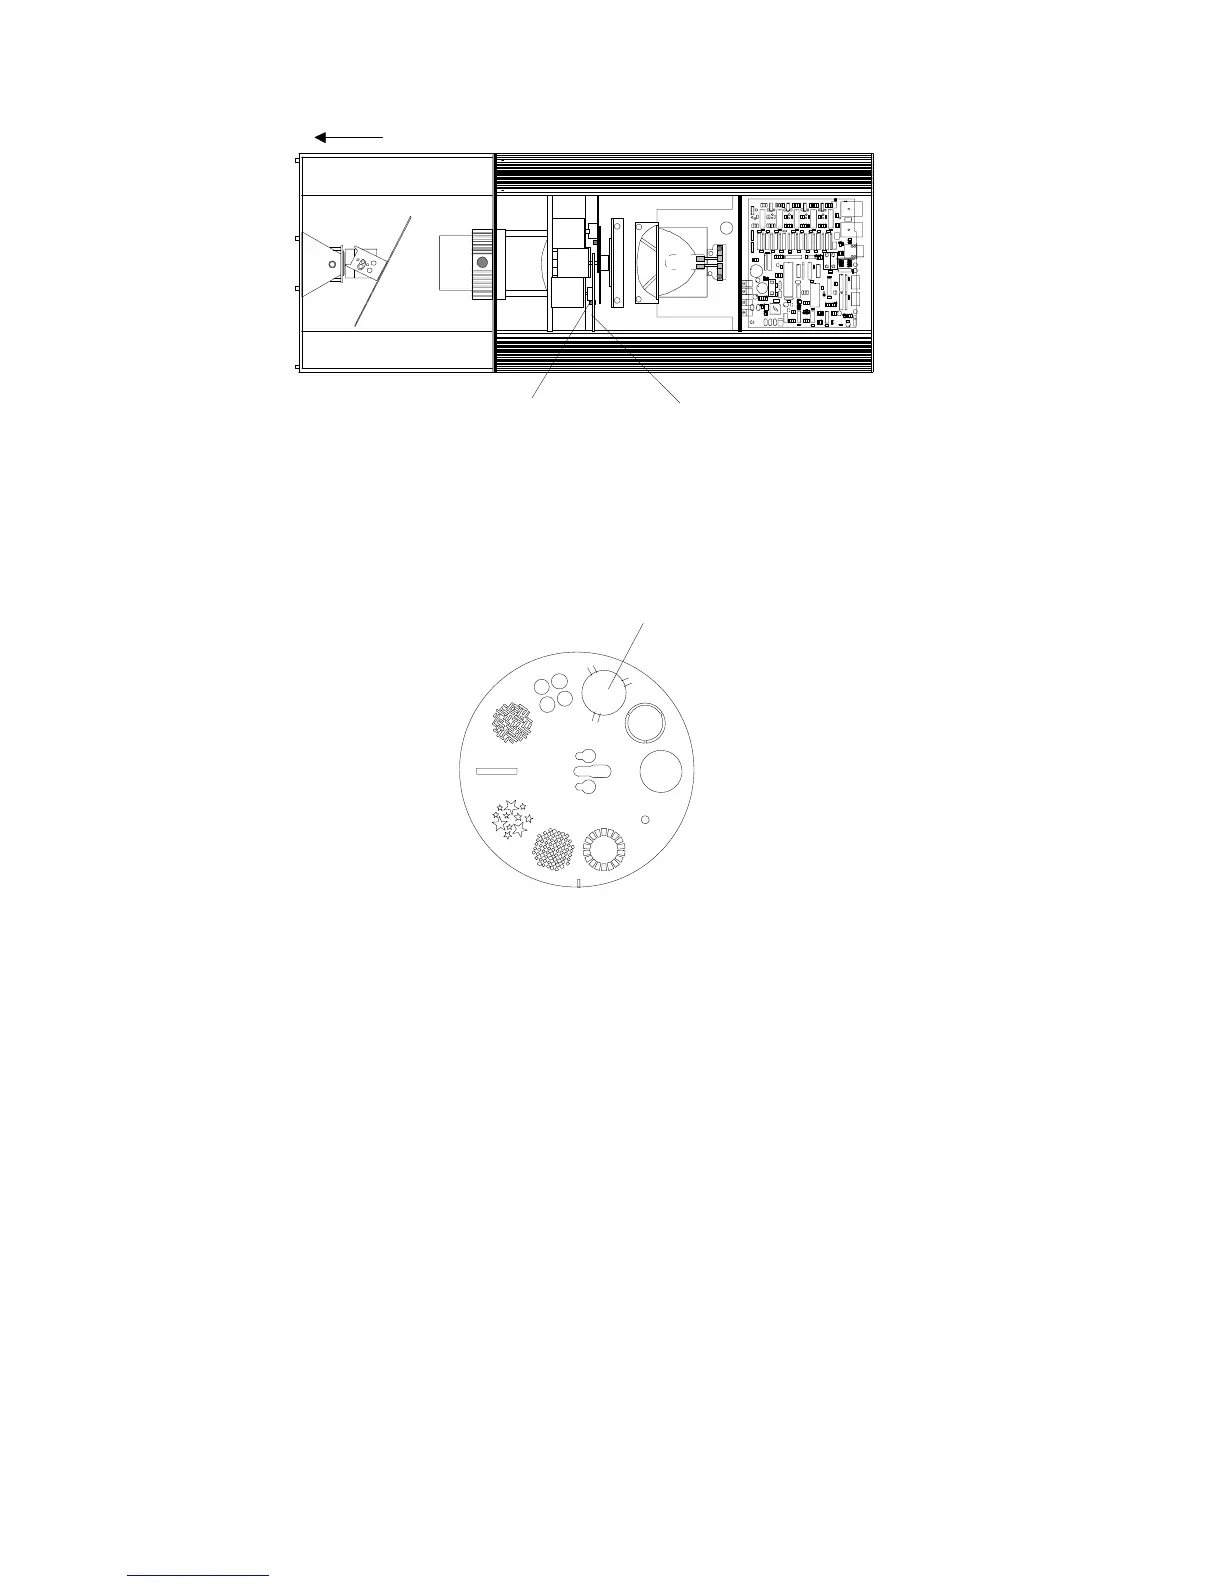
5. Manually rotate the gobo wheel until the custom gobo position is at
the top of the wheel. The custom gobo position is identified by the
three tabs on the outer edge of the aperture (see Figure 3-11).
6. Carefully slide the custom gobo under two of the three tabs. If the
gobo has a notch, align the notch with the last tab, press the gobo
in place, and turn the gobo until the notch and the tab are no
longer aligned. If the gobo does not have a notch as
recommended, you must carefully apply pressure to the free side
of the custom gobo until it bows enough to slide under the third
tab.
Note: If the custom gobo has letters or numbers, install the gobo
so that the information is legible when looking at the gobo
from the front of the fixture (see Figure 3-10).
7. Reconnect the safety cable (if applicable), replace the access door
and secure the thumb latch.
For more information about Trackspot custom gobos, contact either
your High End Systems dealer/distributor, High End System Sales, or
visit the High End Systems Web site. For contact information, see the
section titled “International Sales” on page ii.
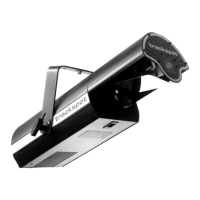
Figure 3-10. Gobo wheel and gobo wheel sensor location
gobo wheel
gobo wheel sensor
front of fixture
Figure 3-11. Custom gobo aperture in gobo wheel
custom gobo position