3-4
Replacing Parts
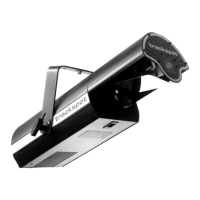
Trackspot User Manual
Replacing Power Supply Fuses
This section explains how to replace the fuses located on the Trackspot
circuit board and rear panel.
You will need:
• flat head screwdriver (to replace the rear panel fuse only)
• replacement fuse (see Table 3-1 for type and sizes)
Caution: When operating, equipment surfaces may
reach temperatures up to 67° C (153° F).
Allow 5 minutes for the fixture to cool before
handling.
Warning: Replace fuses
only
with the specified type
and rating.
To replace the fuse:
1. Unplug the fixture. If the fixture has been operating, allow the
fixture to cool as described above.
2. Determine which fuse(s) to replace by referring to Table 3-1 below.
3. Replace the fuse(s) with a fuse of the same type and rating.
To access the fuses on the circuit board, remove the fixture’s
access door and locate the fuse to be replaced (see Figure 3-5).
After replacing the appropriate fuse(s), replace the fixture’s access
door and secure the thumb latch.
Table 3-1. Description and function of Trackspot fuses
Fuse Location
Type and
Rating
Size Protects Symptom
F1
circuit
board
5.0 A, 250V,
Fast Blow
Only
5mm x
20 mm
All Motors
No motors work.
Yellow Enable
LED does not
light.
F2
circuit
board
.125 A,
250V, Fast
Blow Only
5mm x
20 mm
Data Link
No response to
data link.
F3
circuit
board
.125 A,
250V, Fast
Blow Only
5mm x
20 mm
Data Link
No response to
data link.
F4 rear panel
4.0 A, 250V,
Slow Blow
Only
5mm x
20 mm
Main
Power
Input
No power. Unit
appears dead.