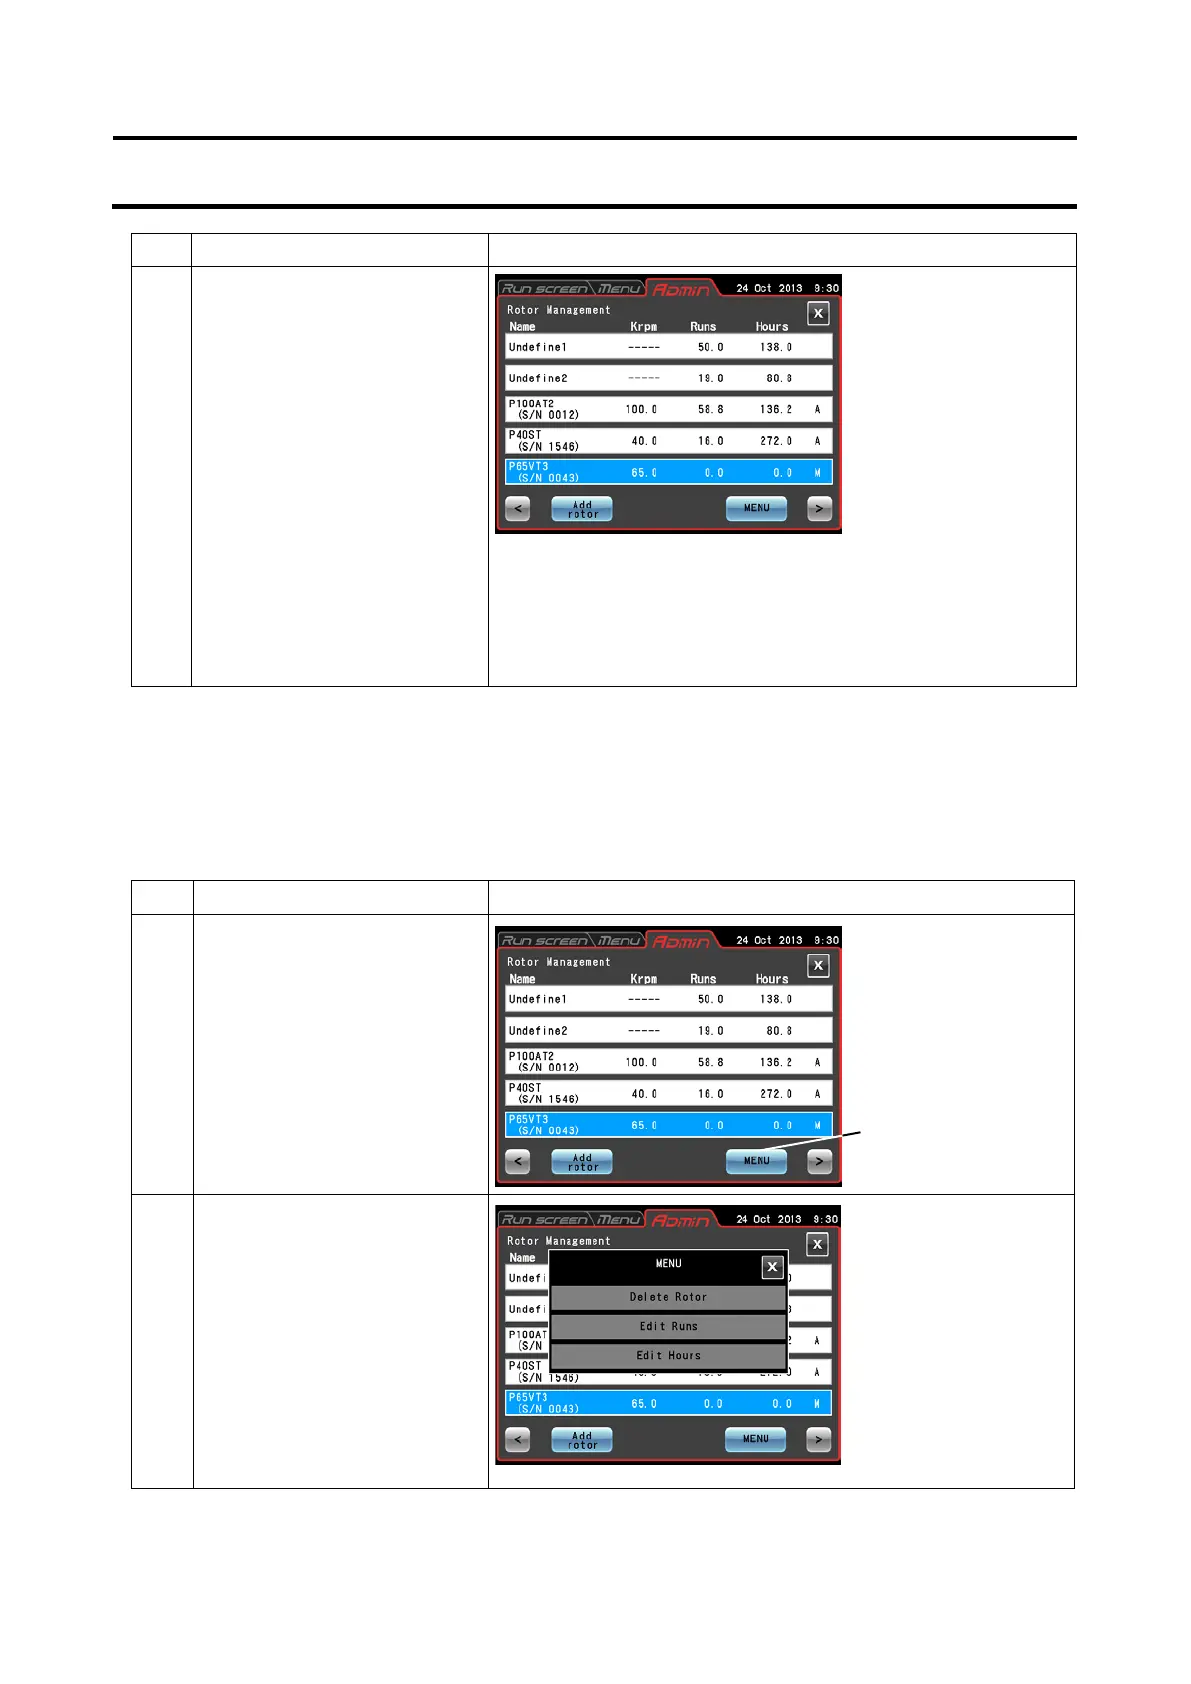
Step Touchscreen operation Screen displays and notes
5
Enter the serial number (S/N)
and press the [Enter] button.
Enter a four digit serial
number, if the serial number
is "43," prefix it with 0 and
enter "0043."
The added rotor and its serial number are displayed.
An "M" (for manual) appears at the right end of the field for
the added rotor indicating that it is a rotor with an optical disk.
A rotor with an RLM adapter is automatically registered and
an "A" (for Auto) appears at the right end of the field.
(2) Procedures for registering a rotor with an optical disk that has been used
The following example describes how to register a rotor with an optical disk that has been used
in another centrifuge.
In the registration, the Run history so far (total run time and number of runs) must be registered.
After registration and use in this centrifuge, the rotor is used in another centrifuge. Before the
rotor can be used in this centrifuge again, the performance results from the other centrifuge must
be added to enable correct management of run time and number of runs.
Step Touchscreen operation Screen displays and notes
1
Press the [Rotor
Management] button, select
a rotor to register and enter
the serial number.
2
Check that the field of the
rotor registered in step 1 is
blue and then press the
[MENU] button. If the field of
the rotor registered in step 1
is not blue, press the field of
the rotor registered in step 1.
Check that the field of the
rotor registered in step 1 is
blue and then press the
●
Management screen
appears.
●
displayed in the Rotor
management screen.
●
appears in the Rotor
management screen.
3-95
 Loading...