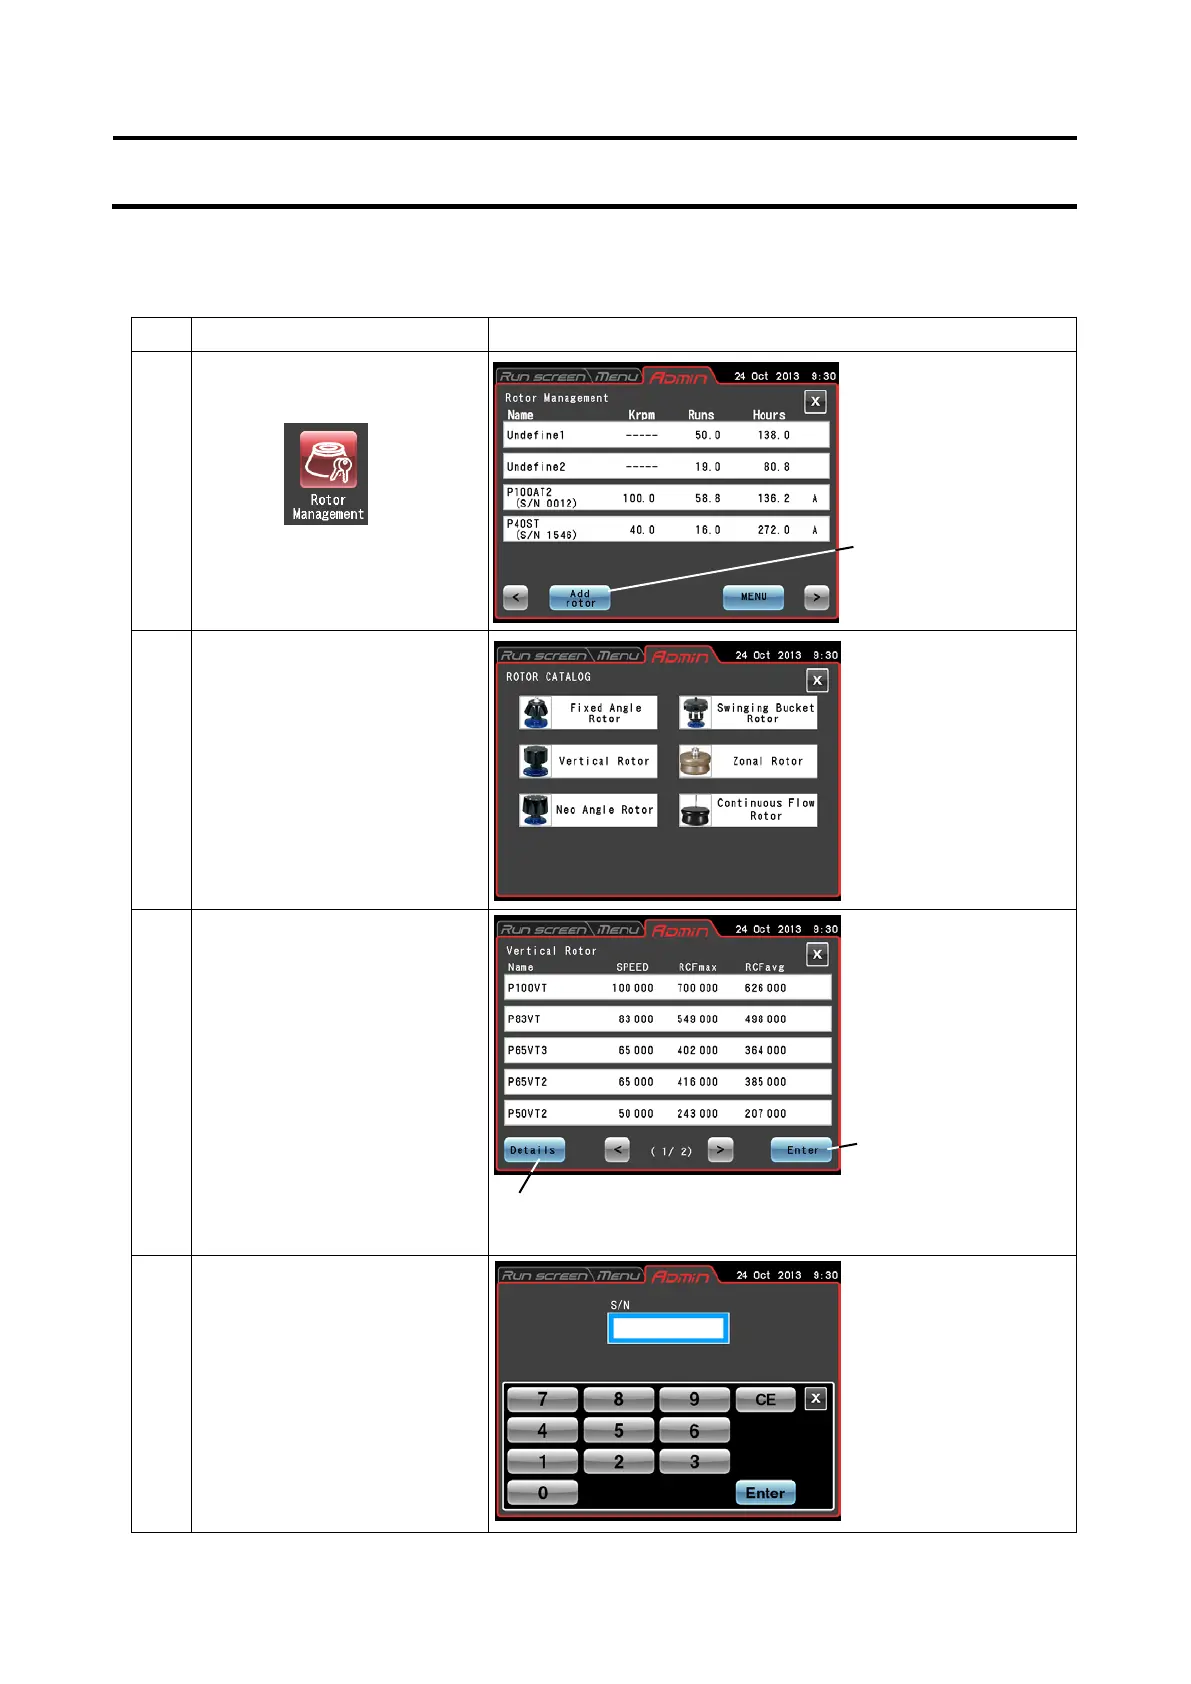
4) Procedures for registering a rotor with an optical disk
(1) Procedure for registering a new rotor with an optical disk (This procedure is not required with
rotors with an RLM adapter.)
Step Touchscreen operation Screen displays and notes
1 Press the [Rotor
Management] button.
2 Press the [Add rotor] button.
3 In the ROTOR CATALOG
screen, select the desired
rotor type.
4 Select a rotor to register.
Check that the field turns blue
and press the [Enter] button.
Select a rotor, press the
[Details] button to open the
Rotor details screen to check
rotor specifications.
●
Management screen
appears.
●
CATALOG screen
appears.
●
appears.
●
(S/N) field appears.
3-94
 Loading...