2 Unit installation
RPK - FSN(H)3M Wall mounted
SMGB0099 rev.0 - 12/2016
59
2
Installation
! CAUTION
• Where the mounting bracket must be installed on a wooden or concrete wall, make sure it is resistant enough to withstand a weight
of 200 kg.
• Do not t the mounting bracket to a pillar.
• The place where the indoor unit is to be installed must be a at surface with enough space to fully house the unit. The weight of the
unit must be evenly distributed over the surface.
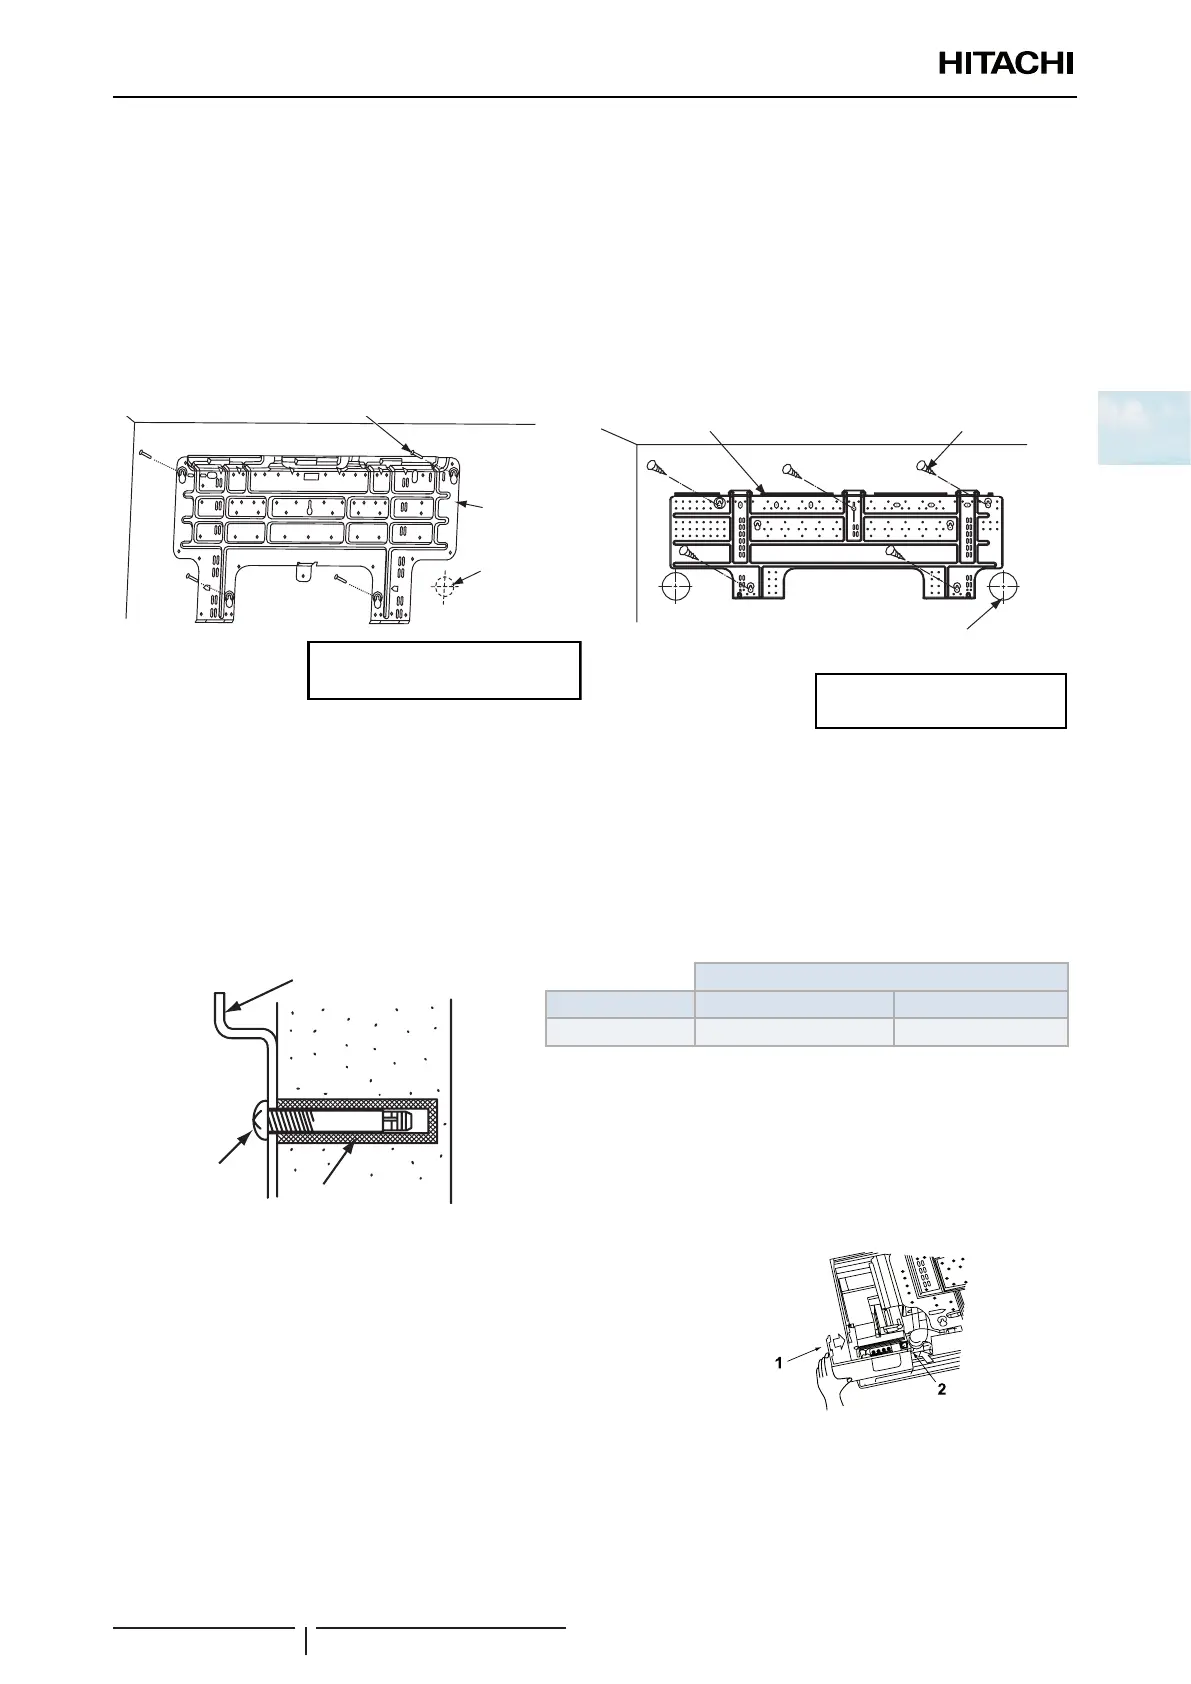
RPK-(0.6-1.5)FSN(H)3M RPK-(2.0-4.0)FSN3M
Fixing screw for suspension bracket
Suspension
bracket
Fix the suspension bracket with more
than 4 xing screws.
Hole for pipings
and wirings
Suspension bracket
Fixing screw for
suspension bracket
Hole for pipings and wirings
Fix the suspension bracket with
more than 5 xing screws.
Check that the mounting bracket is installed so that the drain pipe side is slightly lower (around 3 mm) than the other side
for easier condensate discharge.
? NOTE
The drain hose connection can be made on the right or the left of the unit.
Installation on a concrete wall or a concrete block: t the mounting bracket to the wall using anchor bolts, as shown in the
gure.
Plug
Screw
Suspension bracket
Q’ty
Plug size RPK-(0.6-1.5)FSN(H)3M RPK-(2.0-4.0)FSN3M
M4-M5 4 5
Remove the bottom cover by pressing -1- and -2-.
! CAUTION
• Before lifting the unit, prepare any necessary means (ladders, scaffolding,
elevator platform, etc.) and check that the current safety regulations in the
place where the installation is taking place are met.
• Check that the lifting work can be carried out without the risk of injuries to you
or others in the surrounding area.
• Request the assistance of another person to lift the unit.
 Loading...

