1 N·m (0.1 kgf·m, 0.74 lbf·ft)
44 N·m (4.5 kgf·m, 33 lbf·ft)
When replacing, remove the
emergency stop switch clip
to prevent an accidental
startup of the engine.
The propeller is thin and
sharp. To protect your hands,
wear the heavy gloves during
replacement.
138
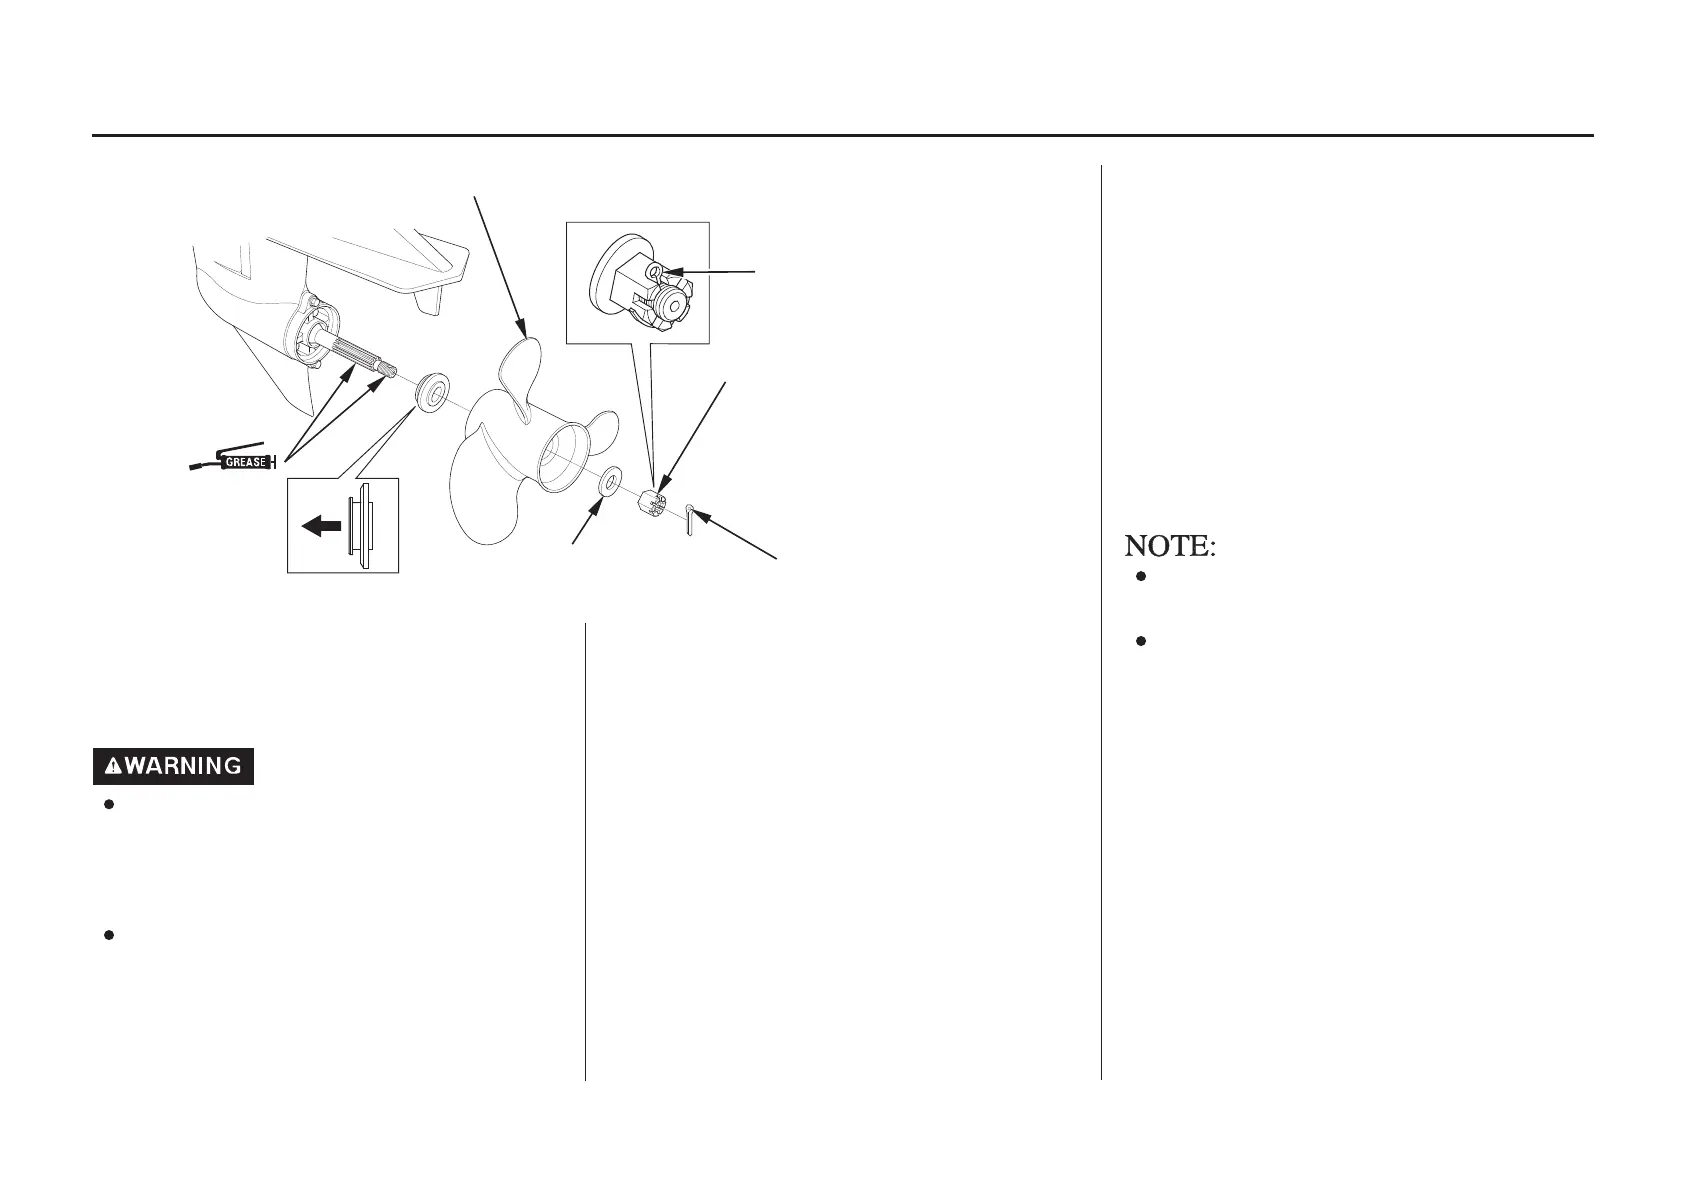
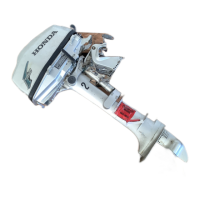
Propeller
Replacement
MAINTENANCE
CASTLE NUT
COTTER PIN
PROPELLER (optional equipment)
COTTER PIN18.5 mm
WASHER
THRUST WASHER
If the propeller is damaged by
striking a rock, or other obstacle,
replace the propeller as follows.
Remove the cotter pin then remove
the 18 mm castle nut, washer,
propeller and thrust washer.
Install the new propeller in the
reverse sequence to removal.
Tighten the castle nut with your
hand first until the propeller has no
play. Then, tighten the castle nut
again with a tool until the groove
in the castle nut aligns with the
cotter pin hole. (Note that this tool
is not included in the tools that
come together with the outboard
motor.)
Use a genuine Honda cotter pin
and bend the pin ends as shown.
Install the thrust washer with the
grooved side toward the gear case.
Be sure to replace the cotter pin
with a new one.
2.
1.
3.
4.
CASTLE NUT
TIGHTENING TORQUE:
UPPER LIMIT OF TORQUE: