Checking the configuration
11
8.4. Time program for cooling function
If the cooling function was activated (see "Cooling function",
Page 9), a separate time program for heating and cooling
can be assigned for each zone (e.g. "Heat living", "Cool
living").
The time programs and setpoint values are activated by the
heating or cooling switchover contact.
The time program for heating is active when the connection
at terminal 3 and 4 is open at connector 9 (see fold-out
page, Fig. 4 (9)).
If terminals 3 and 4 are connected, time cooling time pro-
gram becomes active.
If no time program for cooling is assigned to a
zone, the standard room setpoint temperature is
26°C.
8.5. Allocating relay modules for con-
trolling the heat generator
Depending on the heat requirement of the installed rooms
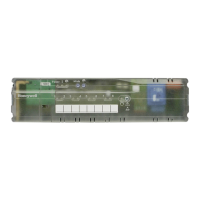
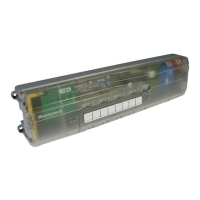
the relay module HC60NG/R6660D controls the heat gen-
erator as a function of the valve setting.
8.5.1. Teach-in for boiler feedback
HC60NG/R6660D
► Press the button at the relay module HC60NG/R6660D for
5 seconds in order to activate the mode.
The red LED at the relay module flashes in the rhythm
0.5 sec on, 0.5 sec off.
► Press the installation button
at the underfloor heating
controller briefly.
After successful allocation the red LED of the relay mod-
ule extinguishes.
► Press the installation button
at the underfloor heating
controller again when leaving the device display.
8.6. Cancelling the assignment
8.6.1. Cancelling the assignment of the
setpoint adjuster to a temperature
zone
► Keep the installation mode pressed for at least 2 sec-
onds in order to access the installation mode.
The
LED lights up. The LED of Zone 1 flashes red.
► Press the installation button
repeatedly until the LED of
the zone to be removed flashes red.
► Press the Mode button for at least 4 seconds.
The LED of the selected zone extinguishes.
The assignment of the setpoint adjuster to the tempera-
ture zone has been cancelled.
8.6.2. Cancelling assignment of the room
name or time program to the tem-
perature zone
► Keep the installation mode pressed for at least 2 sec-
onds in order to access the installation mode.
The LED
lights up. The LED of Zone 1 flashes red.
► Press the installation button
repeatedly until the LED of
the zone to be removed flashes green.
► Press the Mode button for at least 4 seconds!
The LED of the selected zone extinguishes.
The assignment of the room name or the time program to
the temperature zone is cancelled.
8.7. Saving the settings on the Homet-
ronic Manager
The settings at the Hometronic Manager have to be saved
before commissioning is completed.
See: Operating instructions of the Hometronic Manager,
"Adaptation" chapter.
9. Checking the configuration
► Press the installation button .
The LED flashes yellow.
The underfloor heating controller shows up in the device
display.
The colours of LEDs 1...8 always indicate the configuration
of the temperature zones.
Off No device installed
Red
Room temperature sensor/setpoint adjuster is
installed
Yellow
Time program, setpoint adjuster and room tem-
perature sensor are installed
Green
Hometronic Manager or radio setpoint adjuster
CM67z is installed
If the heating/cooling is enabled, information
about the current status can be called up.
► Press the installation button briefly again.
The colours of LEDs 1...8 indicate the assignment of the time
programs to the temperature zones.
Green Time program for cooling assigned
Red Time program for heating assigned
Yellow Time program for heating/cooling assigned
9.1. Checking radio transmission
9.1.1. Sending test signals
The underfloor heating controller can send a test signal to
all the allocated radio receivers in order to test the signal
strength.
► Keep the
Mode
and buttons pressed simultaneously
for at least 4 seconds.
The
LED flashes green.
The underfloor heating controller sends a test signal
every 5 seconds to the allocated radio receivers. The
zone LEDs light up briefly during sending.
You can exit the test mode by pressing any button. After 4
minutes the device changes automatically to normal mode.
9.1.2. Receiving test signals
For information on sending a test signal to the
underfloor heating controller read the instructions
of the corresponding radio transmitter.
► Send a test signal to the underfloor heating controller.
When a test signal is received, the LED flashes green.
The zone LED of the corresponding zone indicates the
strength of the received signal by flashing
(1=sufficient…5=strong).
 Loading...
