Assigning zones and allocating room names (teach-in)
10
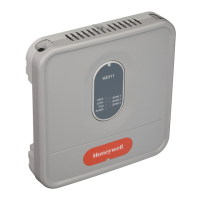
The underfloor heating controller is in installation mode
and waits for the signal from the setpoint adjuster.
In order to assign the setpoint adjuster to a dif-
ferent zone, press the installation button until
the LED of the desired zone flashes red.
► Press the Send button of the setpoint adjuster.
The setpoint adjuster is assigned to Zone 1.
The LED of the selected zone lights continuously red.
If no time program is active, the underfloor heat-
ing controller operates with a basic value of 20°C
(heating mode) or 26°C (cooling mode). Please
refer to Page 11 for information about checking
the configuration.
8.2. Allocating Hometronic Manager
HCM 200D
For information on installing the device please
read the HCM 200D operating instructions.
► Press the installation button at the underfloor heating
controller again.
The LED of the selected zone flashes green. The under-
floor heating controller waits for a signal from the
Hometronic Manager.
► Select the desired room name, e.g. LIVING, in the Settings
> Installation > Heating/Cooling menu
► Press the Input button.
A * appears after "LIVING".
LIVING *
DINING
KITCHEN
BEDROOM
The LED on the underfloor heating controller in Zone 1
lights up green. The name "LIVING" has been assigned
to temperature zone 1.
► Enter the room name in the zoning plan.
► Repeat the steps until a room name is assigned to all the
temperature zones.
► Press the installation button
until the LED extin-
guishes.
The underfloor heating controller is back in normal mode.
If the installation button is not pressed for 4 min-
utes, the underfloor heating controller reverts to
normal mode.
The assigned temperature zones remain stored
in the underfloor heating controller, even after a
power failure.
8.3. Assigning the room control system
CM67z
8.3.1. Teach-in room temperature sensor
For information on installing the device please
read the CM67z operating instructions.
The CM67z operating unit has an integrated temperature
sensor for Zone 1. The function of the sensor is specified by
parameter 7:tS in the installation mode:
► Set parameter 7:tS to the setting "2".
► Set parameter 17:SU to the setting 0 (only HR 80) or 2
(HR 80 and R6660D).
The integrated sensor is now used to measure and con-
trol the room temperature in Zone 1.
Information about the parameter settings of the
CM67z can be found in the corresponding oper-
ating instructions.
► Move the slide switch at the operating unit CM67z to the
position OFF. Move the buttons TEMP
, TEMP and
PROG 1 together in order to activate the teach-in mode
for Zone 1.
The following is displayed at the
CM67z:
► Keep the installation button at the underfloor heating
controller pressed for 2 seconds.
The
LED lights up. The LED of Zone 1 flashes red.
The underfloor heating controller is in installation mode
and waits for the signal from the CM67z.
In order to assign the CM67z to a different zone,
press the installation button until the LED of
the desired zone flashes red.
► Send the teach-in signal by pressing the button .
8.3.2. Teach-in time program CM67z
(Zone 1)
► Press the installation button at the underfloor heating
controller again.
The LED of zone 1 flashes green.
► Send the teach-in-signal by pressing the button .
The LED of the selected zone lights continuously green.
8.3.3. Teach-in time program CM67z
(Zone 2)
No internal sensor is available at CM67z for Zone
2. You have to assign an external sensor
(HCF 82) to the zone (see Allocating the setpoint
adjuster HCW 82, room temperature sensor
HCF 82, chapter 8.1).
► Move the slide switch at the operating unit CM67z to the
position OFF. Move the buttons TEMP
, TEMP and
PROG 1 together in order to activate the teach-in mode
for Zone 1.
► Press the button MAN
in order to switch the operating
unit CM67z to the teach-in mode for Zone 2.
The following is displayed at the
CM67z:
► Press the installation button at the underfloor heating
controller again briefly.
The
LED lights up. The LED of the selected zone
flashes green.
The underfloor heating controller is in installation mode
and waits for the signal from the CM67z.
In order to assign the CM67z to a different zone,
press the installation button until the LED of
the desired zone flashes green.
► Send the teach-in-signal by pressing the button .
The LED of the selected zone lights continuously green.
 Loading...
