1/99 SMV 3000 Transmitter User’s Manual 97
8.3 Changing Default Failsafe Direction, Continued
Procedure, continued
Table 26 Cutting Failsafe Jumper, Continued
Step Action
10
Turn ON transmitter power.
11
Perform Upload of the SMV database to the SCT.
12
Open the Status Tab Card. Read the gross and detailed status
messages of the transmitter. Verify that the status messages are the
same as recorded in Step 3.
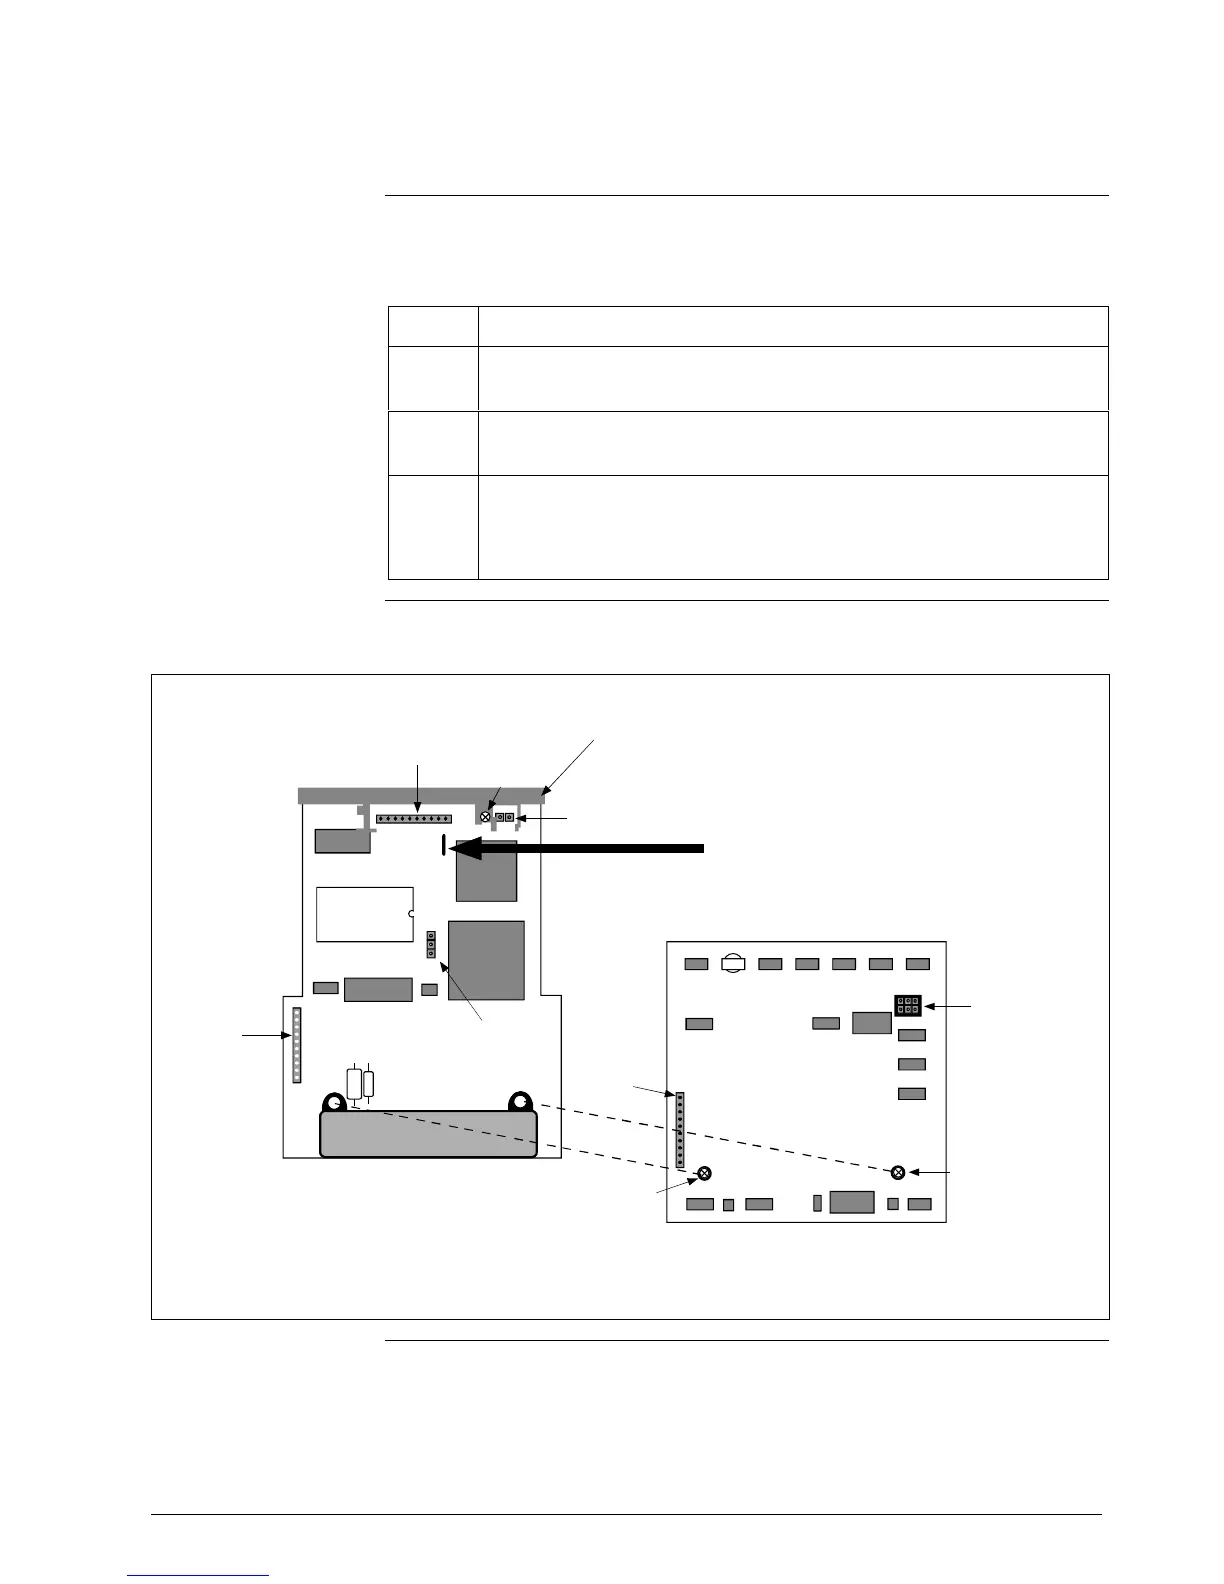
Figure 27 Location of Failsafe Jumper on main PWA of Electronics Module.
Screw
Temperature
Input
Connector
Daughter PWA
Screw
PWA
Connector
PROM
Location
Flex Tape
Connector
Power
Connector
Write
Protect
Jumper
Screw
PWA
Connector
Main PWA
Plastic
Bracket
Failsafe
Jumper
 Loading...


