102 SMV 3000 Transmitter User’s Manual 1/99
9.3 Inspecting and Cleaning Barrier Diaphragms, Continued
Procedure, continued
Table 27 Inspecting and Cleaning Barrier Diaphragms, Continued
Step Action
3
Remove O-ring and clean interior of process head using soft bristle
brush and suitable solvent.
4
Inspect barrier diaphragm for any signs of deterioration or corrosion.
Look for possible residue and clean if necessary.
NOTE: If diaphragm is dented, has distorted convolutions or radial
wrinkles, performance may be affected. Contact the
Solutions Support Center for assistance.
5
Replace O-ring or teflon gasket ring.
6
Coat threads on process head bolts with anti-seize compound such
as “Neverseize” or equivalent.
7
Replace process heads and bolts. Finger tighten nuts.
8
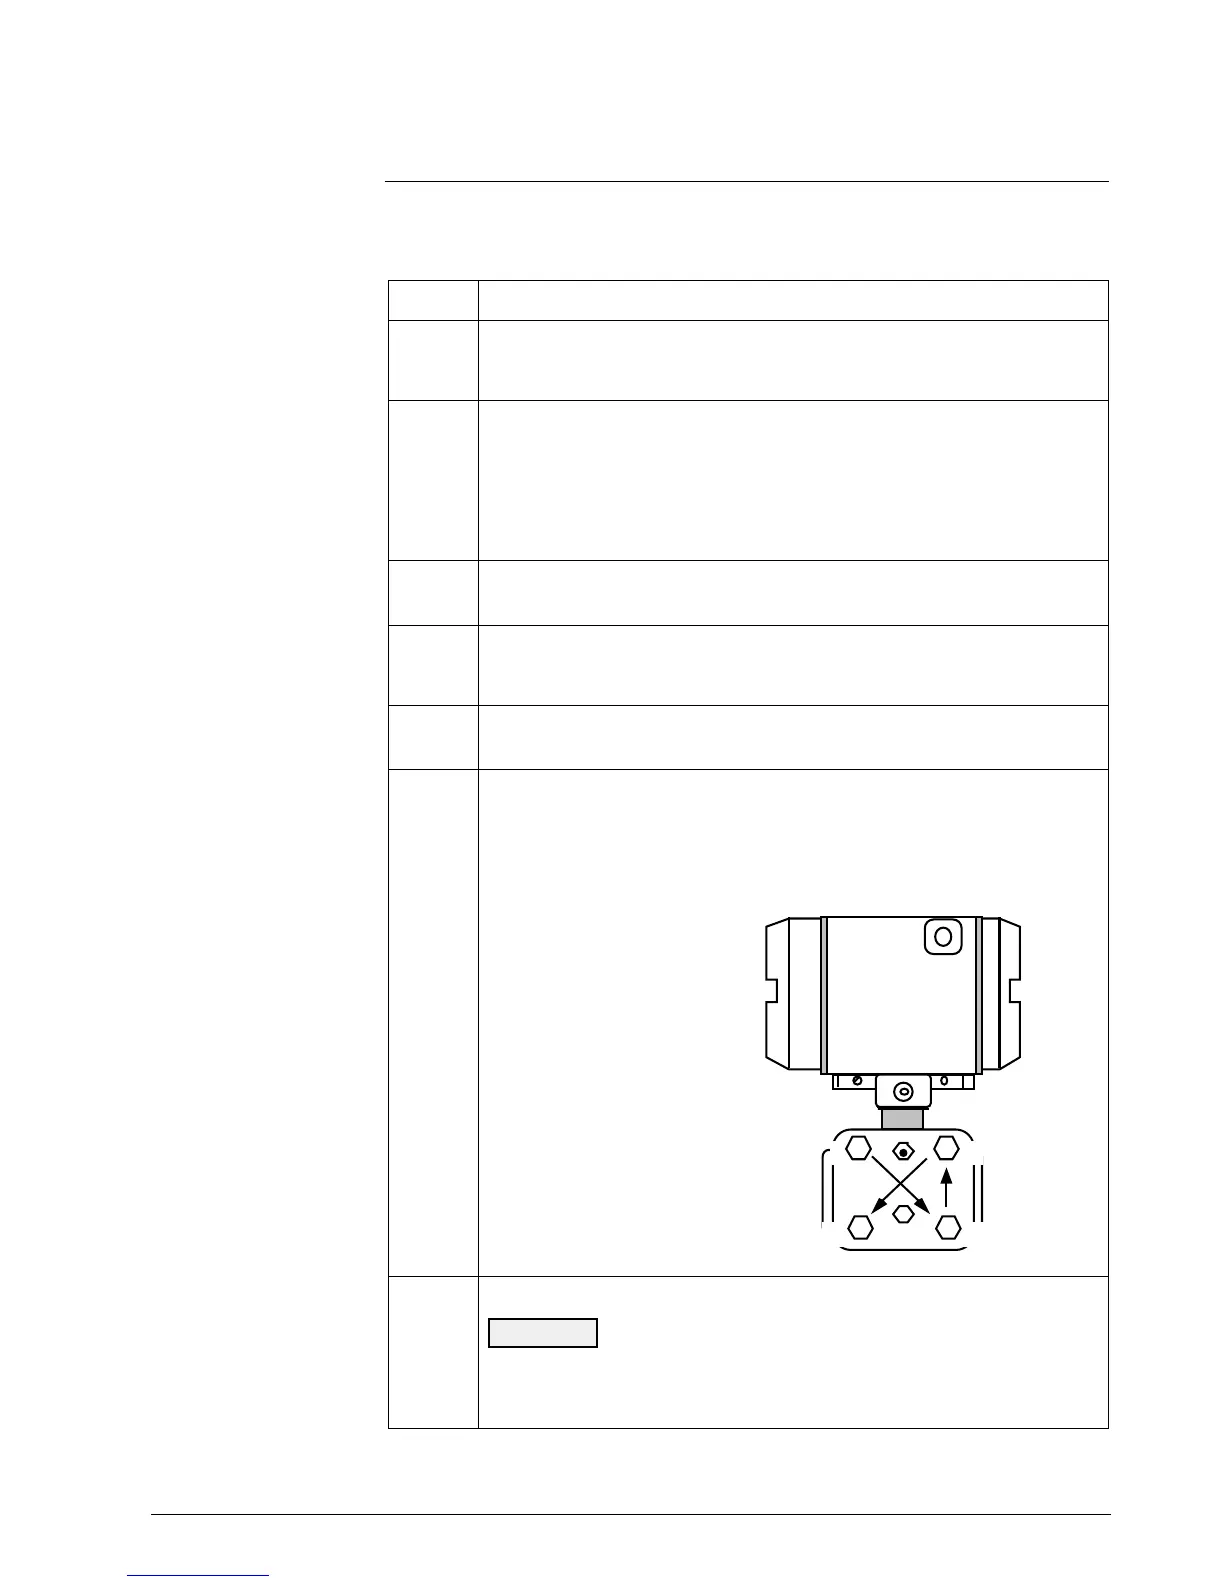
Use a torque wrench to gradually tighten nuts to torque of 40 ft-lb (54
N•m) for carbon steel process heads bolts or 35 ft-lb (47.5 N•m) for
stainless steel process head bolts in sequence shown in following
illustration. Tighten head bolts in stages of 1/3 full torque, 2/3 full
torque, and then full torque.
22519
1
2
3
4
Always tighten head bolts in
sequence shown and in these
stages:
1. 1/3 full torque
2. 2/3 full torque
3. Full torque
9
Return transmitter to service.
CAUTION
Do not exceed the overload rating when placing the
transmitter back into service or during cleaning operations. See
Overpressure ratings in Section 3 of this manual.
 Loading...


