6 - 9
Step 6. Remove the full capacity weight from the scale platter. The green LED blinks 5 times. Wait at least 3 seconds for
scale stability, then press the Sound button once. There is a short delay followed by 5 short beeps that indicates
that the return zero load value has been stored.
Step 7. The calibration process is complete. The scanner automatically restarts, then beeps once after 12 seconds.
Step 8. Verify the calibration was successful with the calibrated weights. If the scale display does not show the calibrated
load weight correctly, repeat this procedure.
If you have any issues with the calibration, check that the unit has been properly installed and verify that there is no rocking
motion when pressing on opposite corners of the scale. If you feel any movement, correct by adjusting the leveling screws
that support the scale on the check-stand. When they are correct, lock these down snugly.
Once you have completed the scale calibration, the scale must be verified by the appropriate country or state Weights and
Measures inspector. For details, contact your local government’s Weights and Measures department.
Scale Calibration with Push Buttons
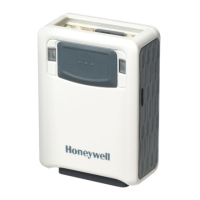
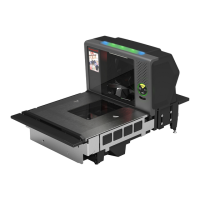
This method of calibration uses the push buttons on the scanner and the LCD display located in the horizontal window of
the scanner scale, visible through the platter.
Step 1. Press and hold the Image Capture and F1 buttons simultaneously for 5 seconds,
then release them together.
You will see [MENU] appear for a second or two on the LCD display, then SOFT-
WARE UPDATE. (Do not hold the buttons too long, or you might get a button stuck
error.)
Step 2. With SOFTWARE UPDATE showing on the LCD display, press the Sound button
repeatedly until you see CALIBRATE SCALE on the LCD display.
Step 3. Press the F1 button. The LCD display shows CALIBRATE SCALE – SINGLE RANGE
KGS.
Step 4. Press the Sound button repeatedly until the LCD display reads CALIBRATE SCALE
– SINGLE RANGLE LBS.
Step 5.
STOP at this point. Raise the platter and remove the 7mm hex nut and scale service
plate to expose the scale service switch pinhole. Use a thin rod or straightened paper
clip to push down through the exposed pinhole and depress the calibration switch until
a scale beep sounds. The scale is now in service mode. Replace the platter before
continuing.
Scale Zero
F1
Sound
Image Capture
 Loading...