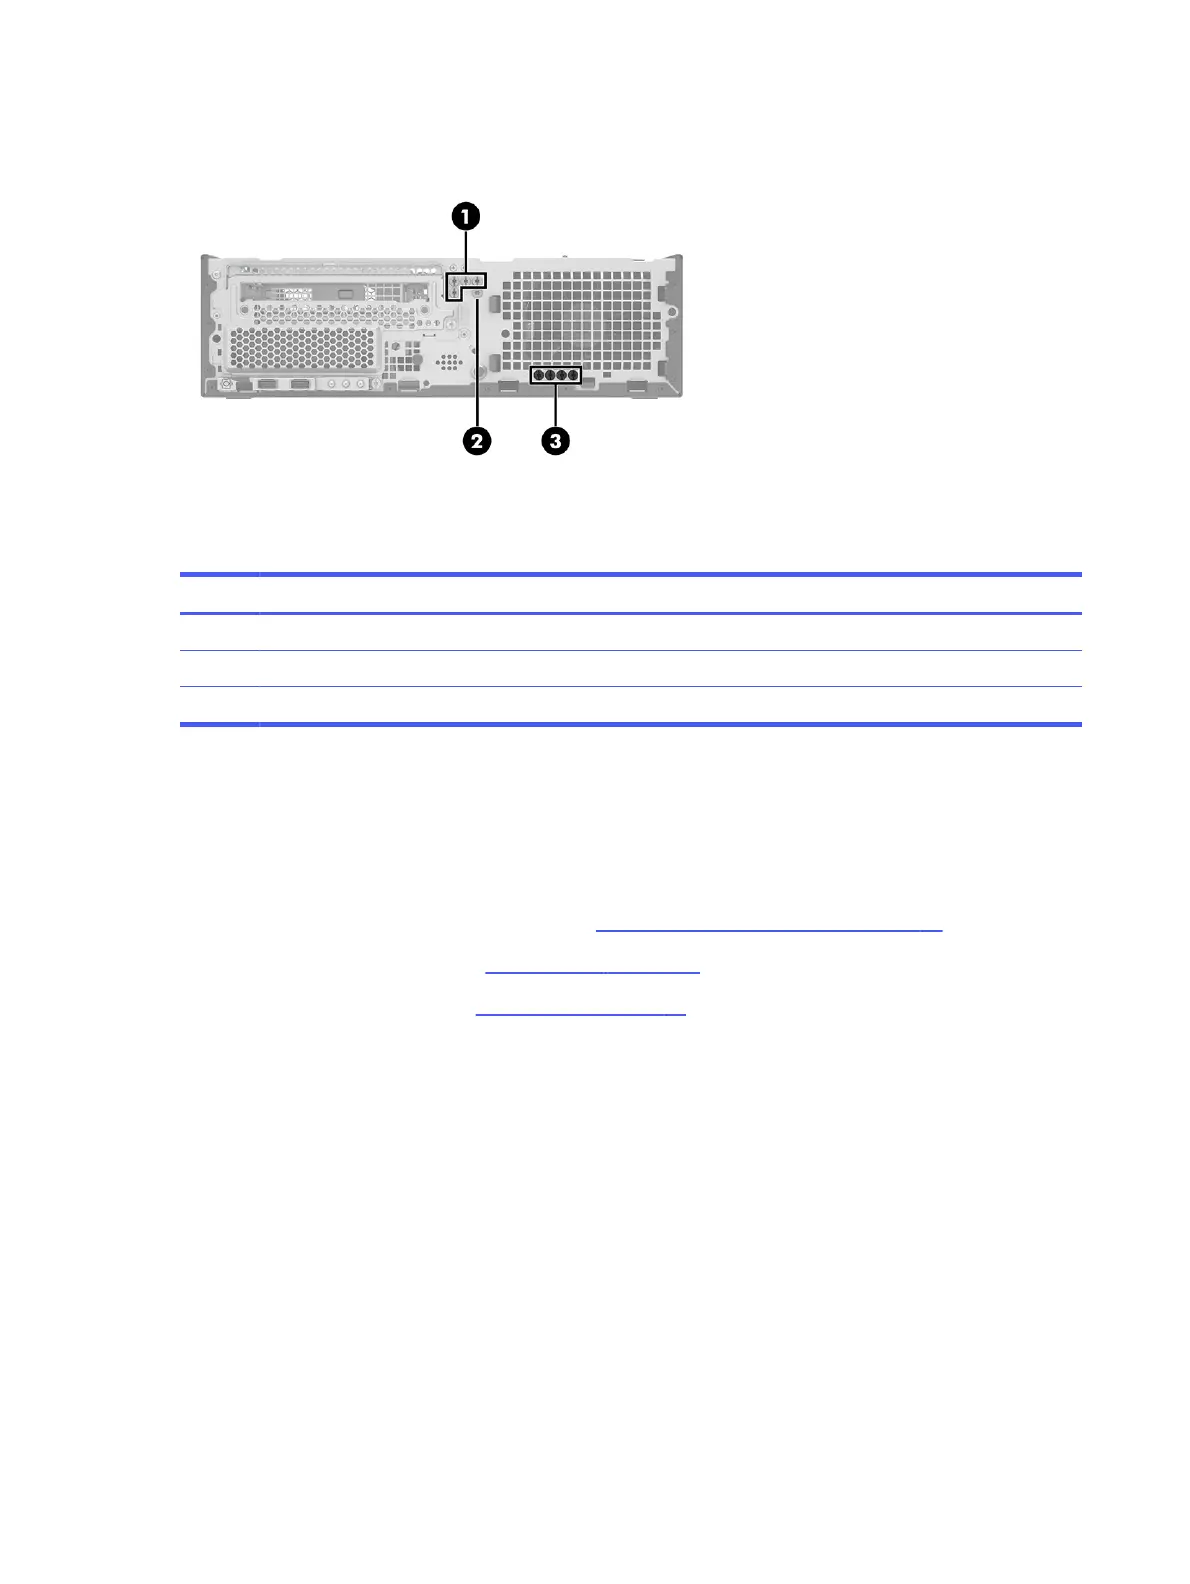
Table 4-1 Extra screw locations
Item Expansion slot
(1) Four silver 6/32 inch component screws
(2) One silver security screw
(3) Four black M3 drive screws
Rotating the drive cage
To rotate the drive cage upright, use this procedure and illustration.
Before rotating the drive cage, follow these steps:
1. Prepare the computer for disassembly (see Preparation for disassembly on page 20).
2. Remove the access panel (see Access panel on page 21).
3. Remove the optical drive (see Optical drive on page 23).
Rotate the drive cage:
26
Chapter 4 Removal and replacement procedures