Installing Additional Components
This section describes how to install components into the server that are not factory integrated.
Most servers are pre-configured with all components installed prior to shipping from the HP factory.
If you do not have additional components to install, go on to “Installing the Server into a Rack or
Pedestal Mount” (page 32).
Removing and Replacing the Top Cover
This section describes how to remove and replace the server top cover.
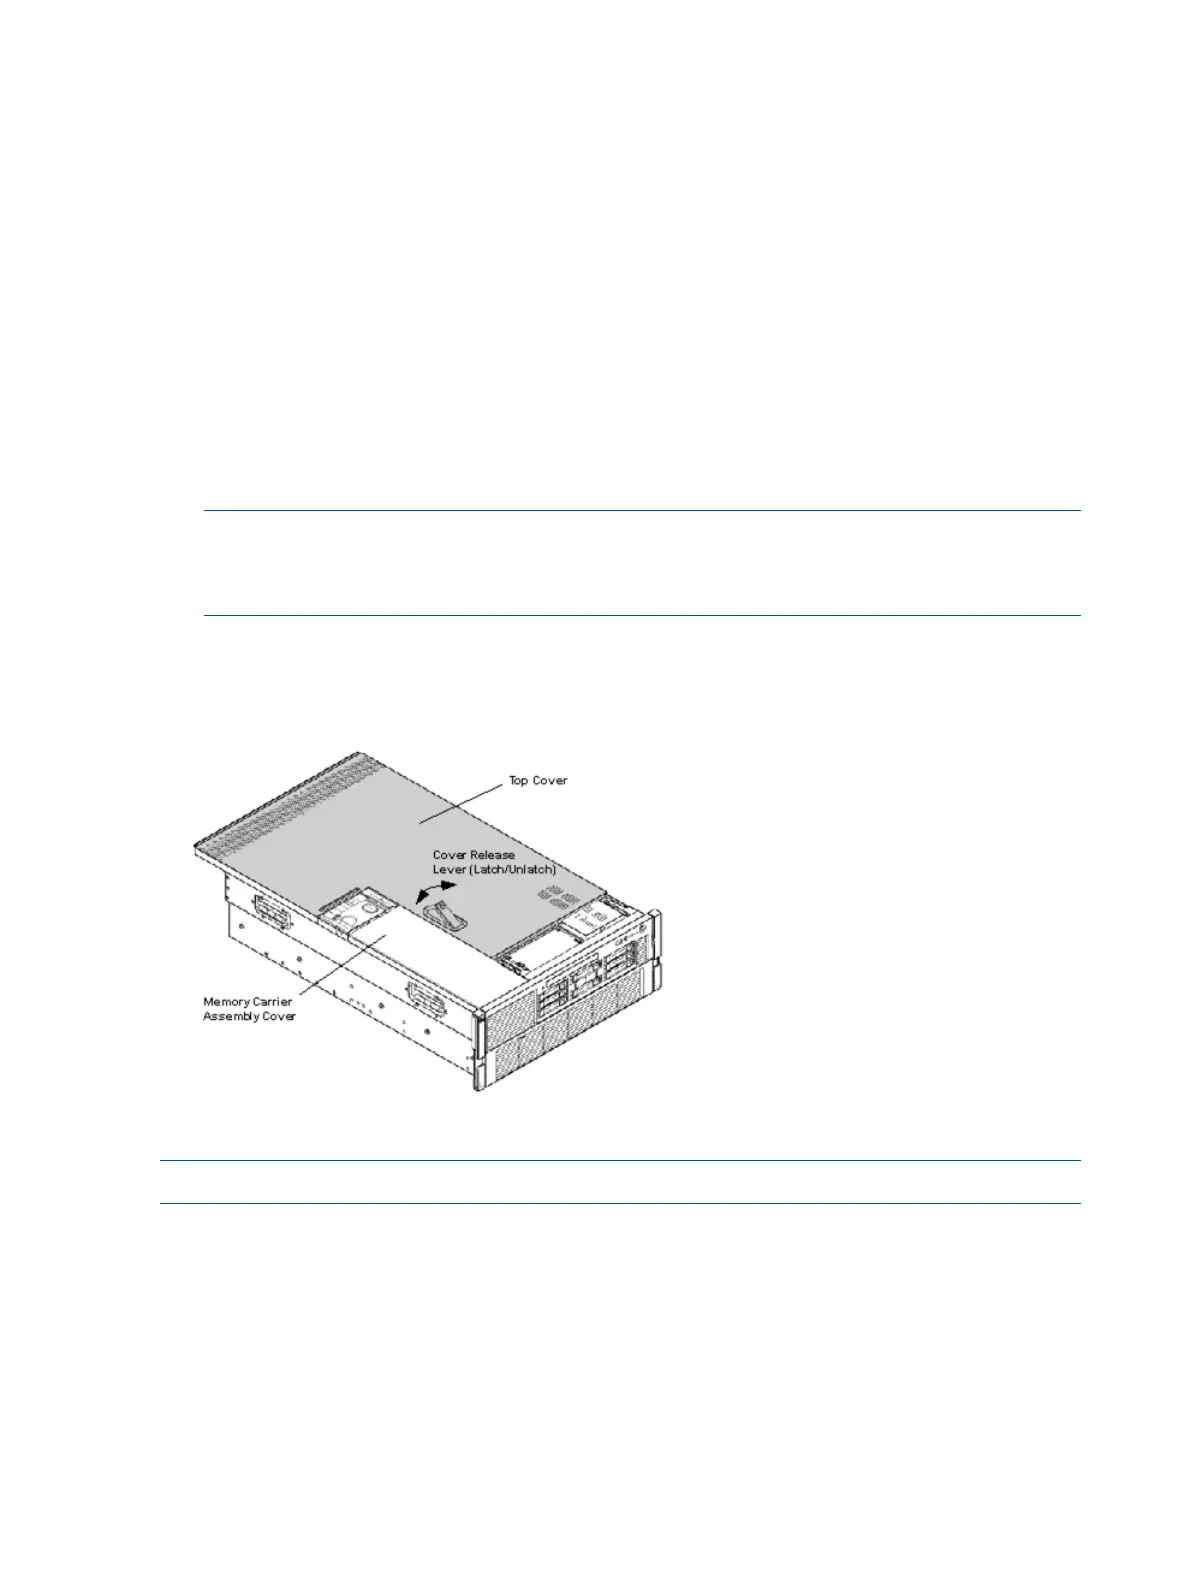
Removing the Top Cover
To remove the top cover, follow these steps:
1. Unlock the cover release lever (Figure 1) by turning the cam approximately 90 degrees
counterclockwise.
2. Pull up on the cover release lever to disengage the top cover from the chassis (Figure 1
(page 12)).
NOTE: The cover release lever also disengages the memory carrier assembly cover.
The memory carrier assembly cover can remain in place while servicing any components
except for the memory carrier assembly and the processor board assembly.
3. Slide the cover toward the rear of the server until the tabs release from the slots in the chassis.
4. Lift the cover off the chassis.
Figure 1 Removing and Replacing the Top Cover
Replacing the Top Cover
NOTE: Always replace the memory carrier assembly cover before replacing the top cover.
To replace the top cover, follow these steps:
1. Ensure the memory carrier assembly cover is in place.
2. Ensure the cover release lever is in the open position and that the memory cover is firmly
seated or the top cover cannot be installed (Figure 1).
3. Align the tabs of the top cover with the corresponding slots in the chassis. Insert the tabs into
the slots.
4. Slide the cover forward until it is flush with the front of the chassis.
5. Push the cover release lever down into the latched position (Figure 1).
6. Lock the cover release lever. Turning the cam 90 degrees clockwise.
12 Installing the System
 Loading...


