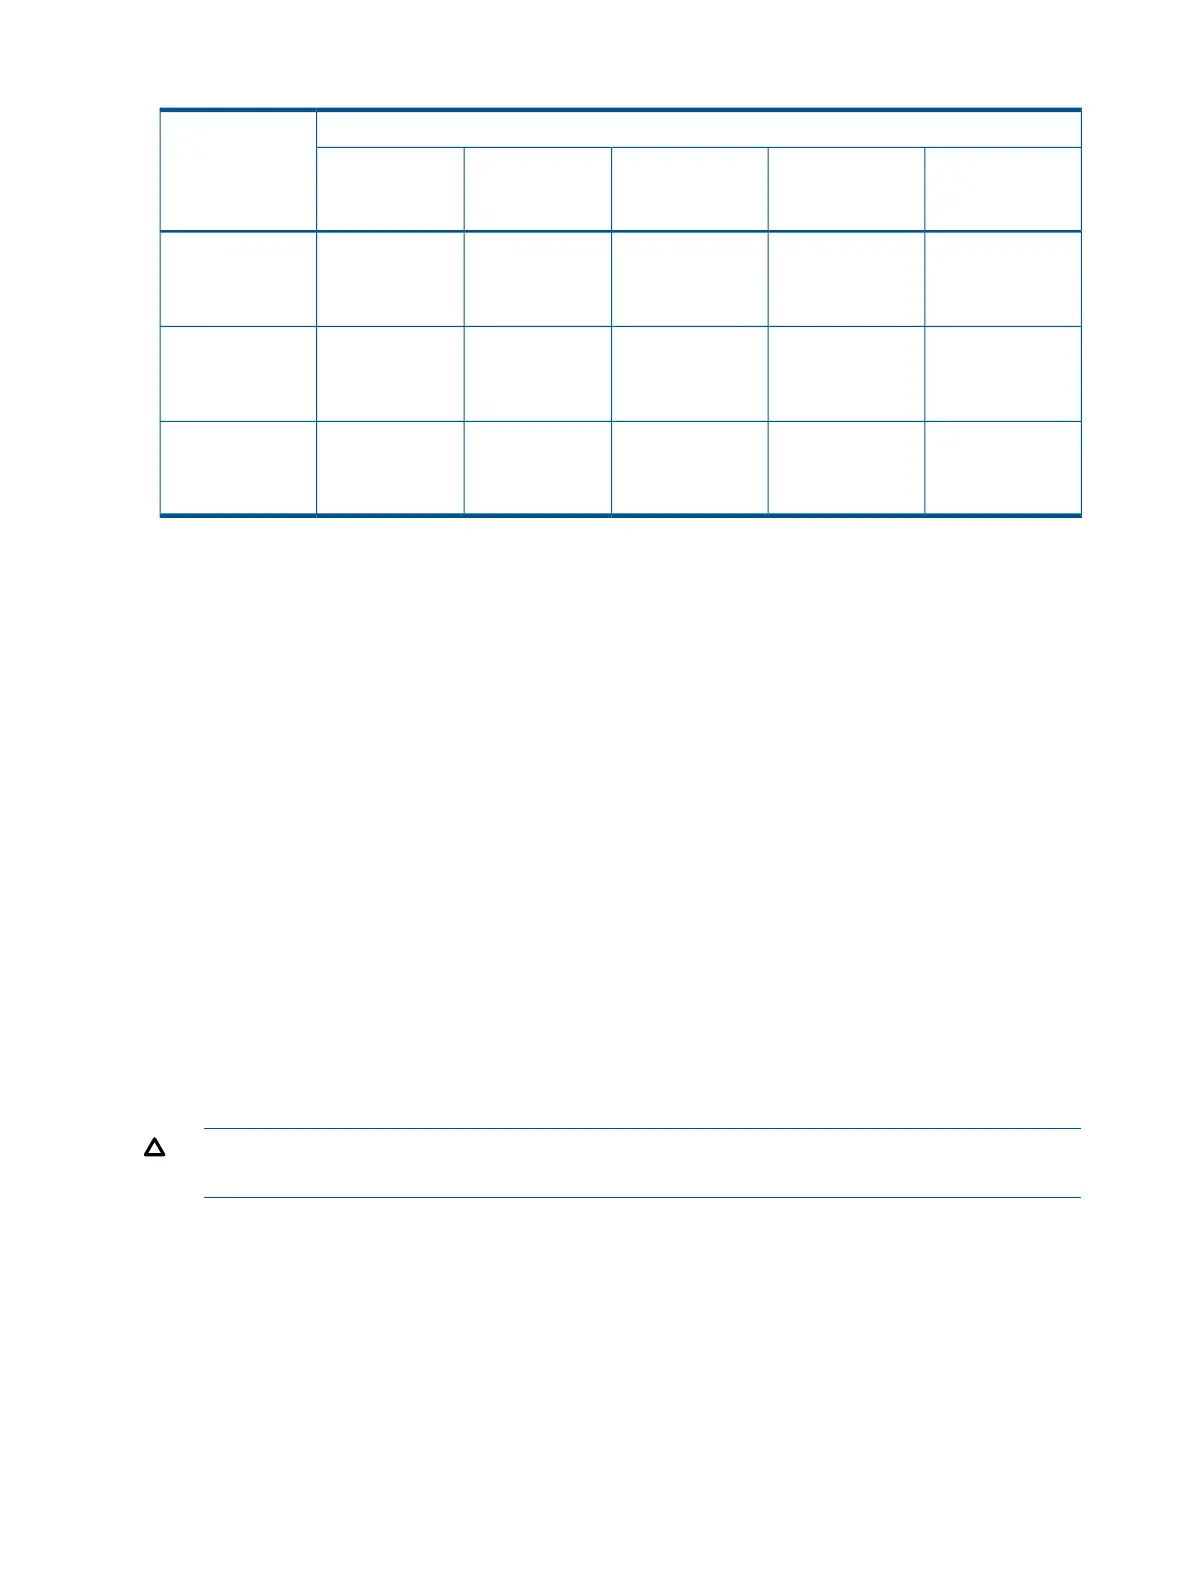
Table 3 PCI/PCI-X Card Slot Frequency and Bus Mode Compatibility for Shared Slots
1
Cards to be InstalledCurrent PCI Bus
Mode and
Frequency for the
Card in a Shared
Slot
PCI-X 266PCI-X 133PCI-X 66PCI 66PCI 33
Compatible
2
New card running
at PCI 33
Compatible
2
New card running
at PCI 33
Compatible
2
New card running
at PCI 33
Compatible
2
New card
running at PCI 33
Compatible
2
PCI 33 MHz
Compatible
2
New card running
at PCI 66
Compatible
2
New card running
at PCI 66
Compatible
2
New card running
at PCI 66
Compatible
2
New card
running at PCI 66
Incompatible
frequency
3
PCI 66 MHz
Compatible
2
New card running
at PCI-X 66
Compatible
2
New card running
at PCI-X 66
Compatible
2
New card running
at PCI-X 66
Incompatible
bus
4
Incompatible
frequency
3
PCI-X 66 MHz
1
The conditions described in this table apply only to shared slots 7, 8, 9, and 10. Slots 1, 2, 3, 4, 5, and 6 are not
shared slots.
2
Compatible: card is accepted and runs at the frequency shown.
3
Incompatible-frequency: card does not work. The new card does not initialize and powers down due to frequency
mismatch.
4
Incompatible bus: Card does not work. The new card does not initialize and powers down due to bus mode mismatch.
Offline Installation of a PCI Card
Ensure that you install the proper drivers for PCI/PCI-X/PCIe cards after you complete the server
installation and power on the server.
To install a PCI/PCI-X/PCIe card with the power off, follow these steps:
1. Remove the top cover from the chassis. See “Removing the Top Cover” (page 12).
2. Select an empty slot that is appropriate for the card you are installing. To locate an appropriate
slot, see “PCI/PCI-X/PCIe Configurations” (page 18) and Figure 6 for more information.
3. Open the MRL.
a. Press the indentation on the MRL to release it from the chassis wall.
b. Lift the edge of the MRL and rotate it upward 90 degrees until it rests against the chassis
wall and the PCI/PCI-X/PCIe card bulkhead filler is fully exposed.
4. Remove the PCI/PCI-X/PCIe bulkhead filler.
5. Insert the PCI/PCI-X/PCIe card into the empty slot and exert firm, even pressure to seat the
card in the slot.
CAUTION: Ensure that you fully seat the card into the slot or the card can fail after power
is reapplied to the slot.
6. Connect all internal and external cables to the PCI/PCI-X card.
7. Close the MRL.
a. Rotate the MRL downward 90 degrees.
b. Push the edge of the MRL down until it clicks into place on the PCI/PCI-X/PCIe card
bulkhead.
8. Close the gate latch to secure the end of the card if it is full length.
9. Replace the top cover. See “Replacing the Top Cover” (page 12).
20 Installing the System
 Loading...


