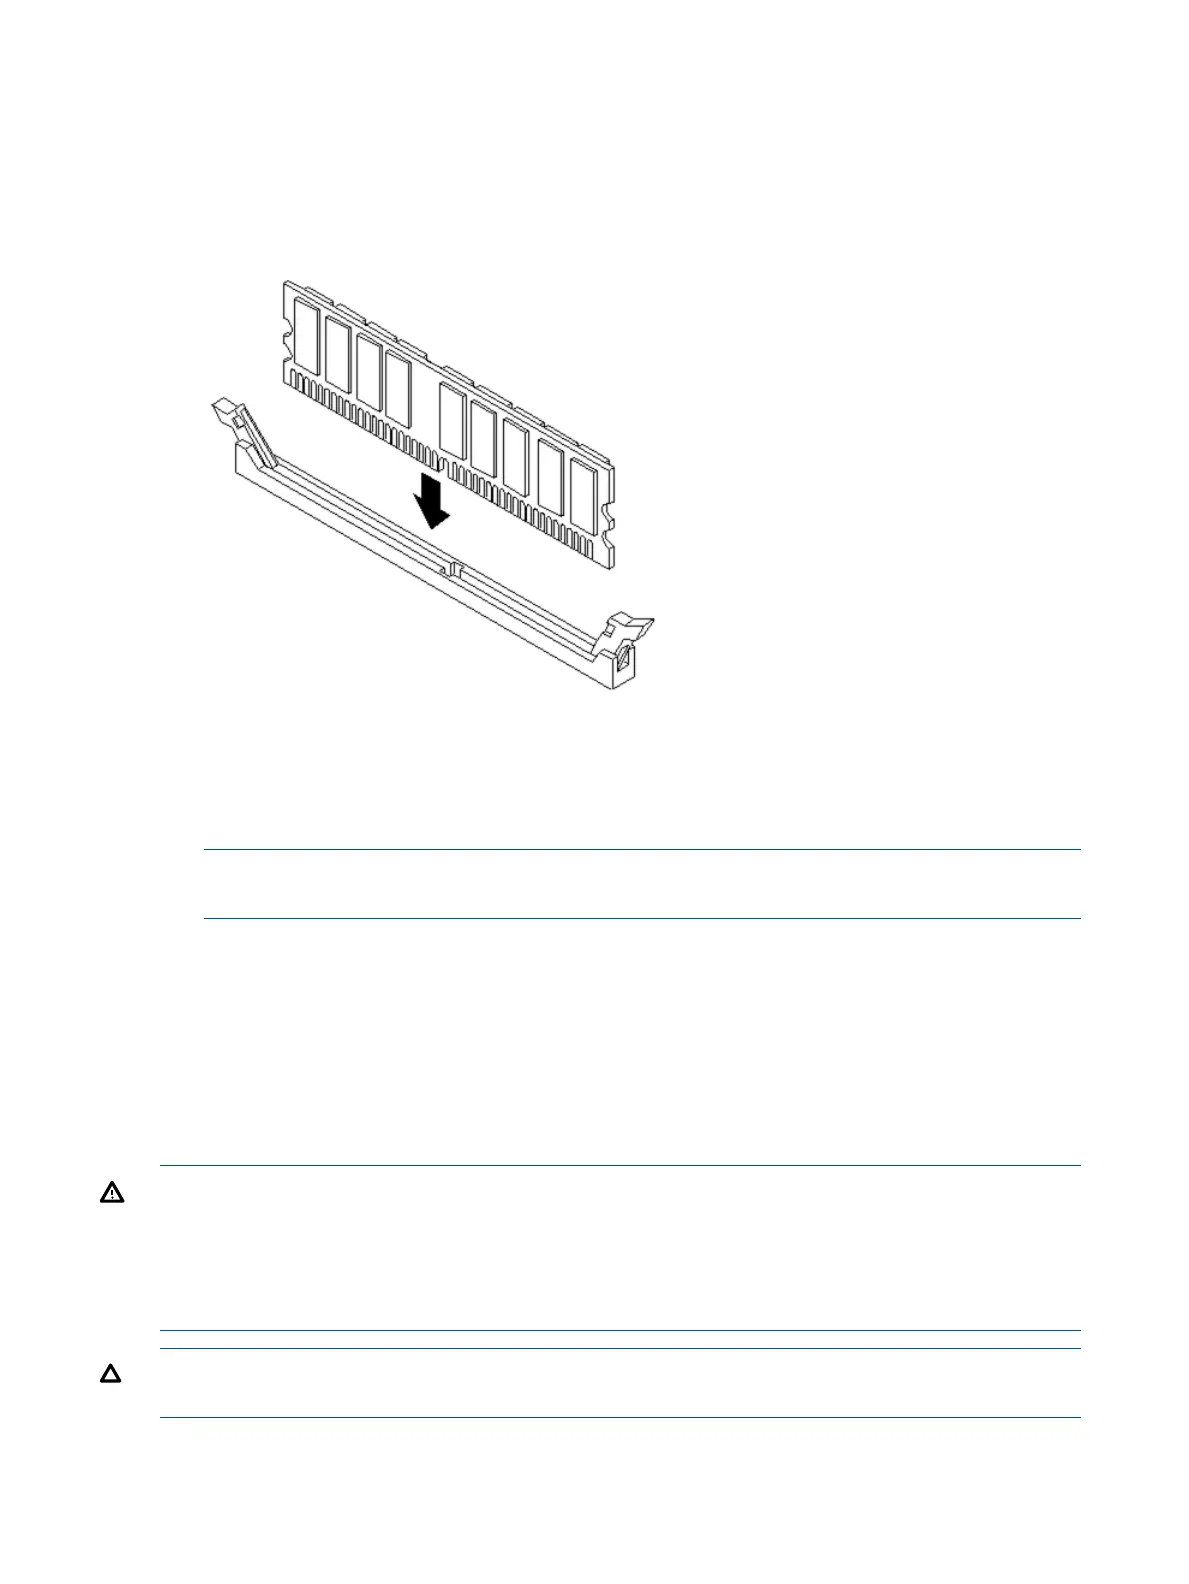
6. Install the DIMMs (Figure 11).
a. Align the DIMM with the slot located on the memory board, and align the key in the
connector with the notch in the DIMM.
b. Push on each end of the DIMM firmly and evenly until it seats into the slot.
c. Ensure that the extraction levers are in the fully closed position.
Figure 11 Inserting a DIMM into the Memory Board Connector
7. Replace the memory carrier assembly side cover.
a. Insert the side cover tabs into the retaining slots at the base of the assembly (Figure 8).
b. Insert the tabs into the slots on both sides of the extraction handle release button until the
side cover snaps into place.
NOTE: To install DIMMs into slots on the other side of the memory carrier, turn the carrier
over to the opposite side (side 0 or side 1) and repeat the installation procedure.
8. Replace the memory carrier assembly and latch the top cover release lever. See “Replacing
the Memory Carrier Assembly” (page 22).
Removing and Replacing the Processor Board Assembly
The processor board assembly holds one or two dual-core Itanium processors and is located beneath
the disk drives and memory carrier assembly in the bottom service bay. The processor board is
mounted onto a removable carrier tray which is retained in the service bay by a hinged access
door.
WARNING! Ensure that the system is powered off and all power sources have been disconnected
from the server prior to performing this procedure.
Voltages are present at various locations within the server whenever an AC power source is
connected. This voltage is present even when the main power switch is in the off position.
Failure to observe this warning can result in personal injury or damage to equipment.
CAUTION: Observe all ESD safety precautions before attempting this procedure. Failure to follow
ESD safety precautions can result in damage to the server.
Removing the Processor Board Assembly
To remove the processor board assembly, follow these steps:
28 Installing the System
 Loading...


