A Statement of Volatility
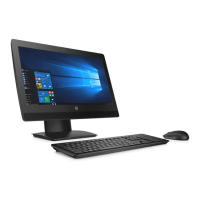
HP confirms that Intel-based HP ProOne 400 G1 23-inch Non-Touch All-in-One Business PC systems
contain DDR3 volatile memory (memory amount depends on the customer configuration). In addition,
the motherboard in the condition originally shipped without subsequent modification or the addition or
installation of any applications, features, or functionality, contain the following nonvolatile memory:
Real Time Clock battery backed-up configuration memory (256 Bytes), DIMM Serial Presence Detect
(SPD) configuration data (256 Bytes per module, 128 Bytes programmable), Serial Peripheral Interface
(SPI) ROM for System BIOS (8M Bytes) and Super I/O’s: masked keyboard ROM (overall 2K Bytes)..
The volatile memory will not hold any user data once power has been removed for 30 seconds or
longer.
Please find below a list of steps that should be taken to restore the Non Volatile memory found in the
Intel-based HP ProOne 400 G1 23-inch Non-Touch All-in-One Business PC systems.
1. Download the latest BIOS for this system and operating system off of the HP website.
2. Follow the instructions on the website to flash the BIOS.
3. Shut down Windows, and then turn on the computer and enter the Computer Setup Utility by
pressing the esc key when the “Press the ESC key for Startup Menu” prompt appears near the
bottom of the screen (before the operating system loads). Choose Computer Setup (F10) from
the list of options.
4. If the Ownership Tag or Asset Tag is set, manually clear it under Security > System IDs.
5. Select File > Save Changes and Exit.
6. To clear the Setup or Power-On passwords and any other settings, power down the computer and
remove the access panel.
7. On the system board, locate the black, two-pin password jumper on header E49 (labeled PSWD)
and remove it.
8. Disconnect the power cord, and then wait 10 seconds to let AC power drain out of the computer.
9. Remove the CMOS battery, and then press the clear CMOS button (typically a yellow push button
(labeled CMOS) on the system board).
10. Replace the CMOS battery, power cord, and access panel. The passwords are now cleared and
all other user-configurable, non-volatile memory settings are reset to their factory default values.
11. Turn on the computer and enter the Computer Setup Utility.
166 Appendix A Statement of Volatility
 Loading...


