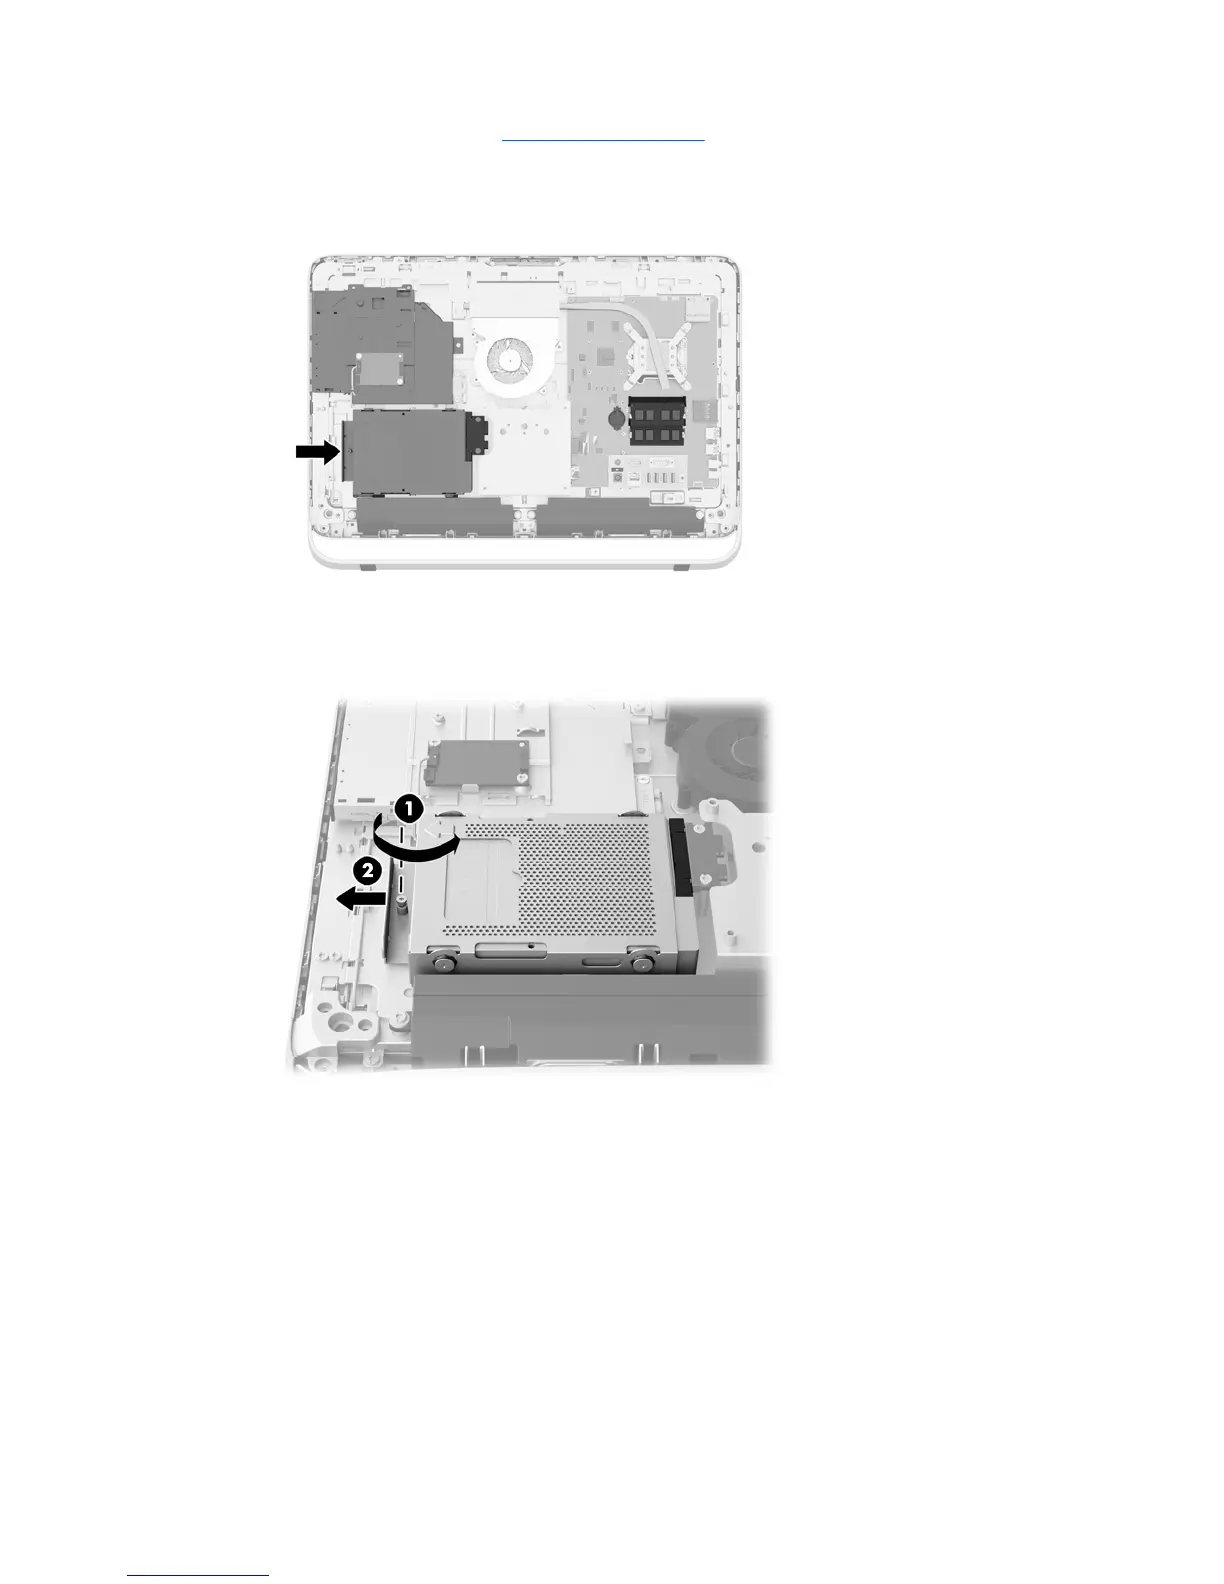
2. Remove the rear cover (see Rear cover on page 30).
The hard drive cage can now be seen in the lower left side of the chassis.
3. Loosen the captive screw securing the hard drive cage in the chassis (1).
4. Slide the hard drive cage left, and then lift it out of the chassis (2).
5. Remove the four mounting screws (1) securing the 3.5-inch hard drive in the hard drive cage. Be
sure to keep the screws together with the blue rubber grommets to use to install a replacement
drive.
Replacing drives
35

 Loading...