Chapter 4 109
Field Replaceable Units
FRU Removal and Replacement
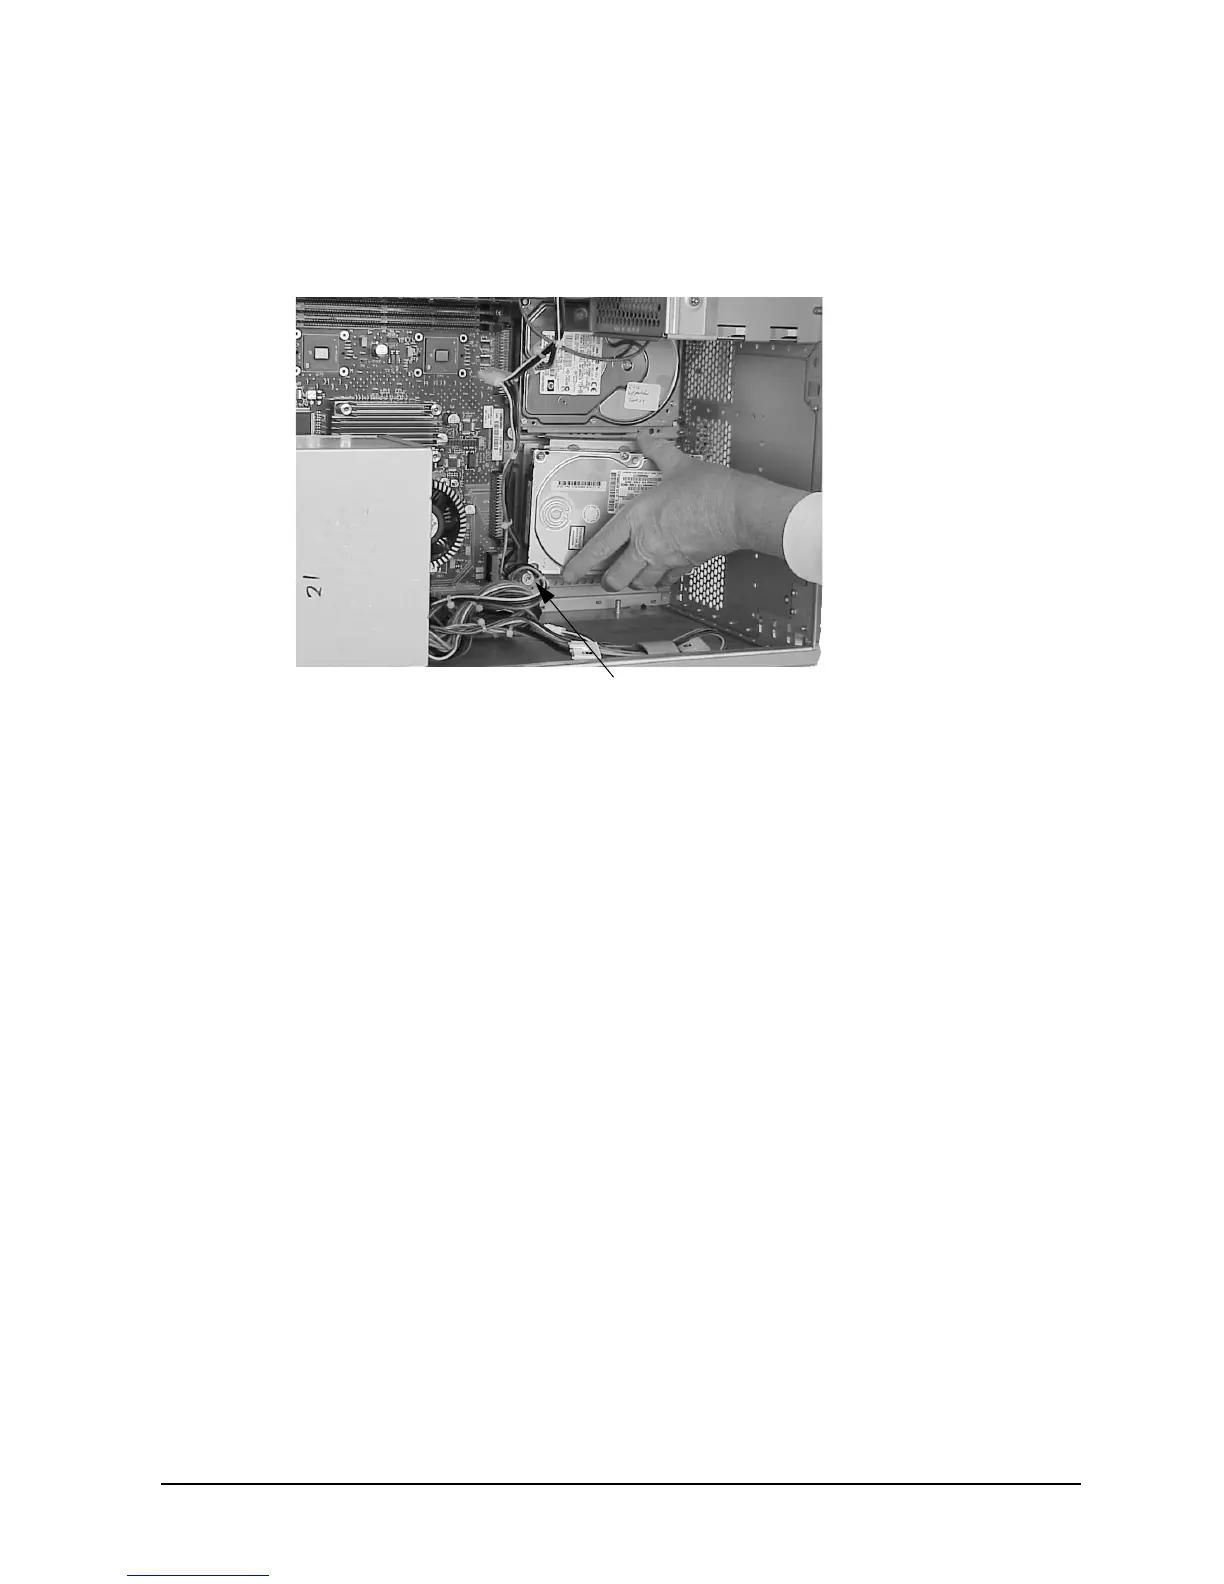
5. Slide the hard disk drive assembly into its slot, and push inward firmly until the front
of the hard disk drive bracket is flush with the hard disk drive connector on the system
board. See Figure 4-33. The bracket hooks will lock into the chassis rail.
Figure 4-33. Positioning the Hard Disk Drive Assembly
6. Tighten the T-15 Torx thumbscrew to secure the hard disk drive assembly to the system
board.
7. Close the left side panel of the workstation as shown in the section “Closing the Left
Side Panel.”
T-15 Torx Thumbscrew